Layouts
The bread and butter of any theme. Below you’ll find the layouts included with Minimal Mistakes, what they look like and the type of content they’ve been built for.
Default layout
The base layout all other layouts inherit from. There’s not much to this layout apart from pulling in several _includes:
<head>elements- masthead navigation links
{{ content }}- page footer
- scripts
Note: You won’t ever assign this layout directly to a post or page. Instead all other layouts will build off of it by setting layout: default in their YAML Front Matter.
Layout based and user-defined classes
Class names corresponding to each layout are automatically added to the <body> element eg. <body class="layout--single">.
| layout | class name |
|---|---|
| archive | .layout--archive |
| archive-taxonomy | .layout--archive-taxonomy |
| search | .layout--search |
| single | .layout--single |
| splash | .layout--splash |
| home | .layout--home |
| posts | .layout--posts |
| categories | .layout--categories |
| category | .layout--category |
| tags | .layout--tags |
| tag | .layout--tag |
Using YAML Front Matter you can also assign custom classes to target with CSS or JavaScript. Perfect for “art directed” posts or adding custom styles to specific pages.
Example:
---
layout: splash
classes:
  - landing
  - dark-theme
---
Outputs:
<body class="layout--splash landing dark-theme">
Canonical URL
You can set custom Canonical URL for a page by specifying canonical_url option in pages YAML Front Matter. For example, if you have the following:
layout: single
title: Title of Your Post
canonical_url: "https://yoursite.com/custom-canonical-url"
This will generate the following in the <head> of your page:
<link rel="canonical" href="https://yoursite.com/custom-canonical-url" />
Compress layout
A Jekyll layout that compresses HTML in pure Liquid. To enable add layout: compress to _layouts/default.html.
Note: Has been known to mangle markup and break JavaScript… especially if inline // comments are present. For this reason it has been disabled by default.
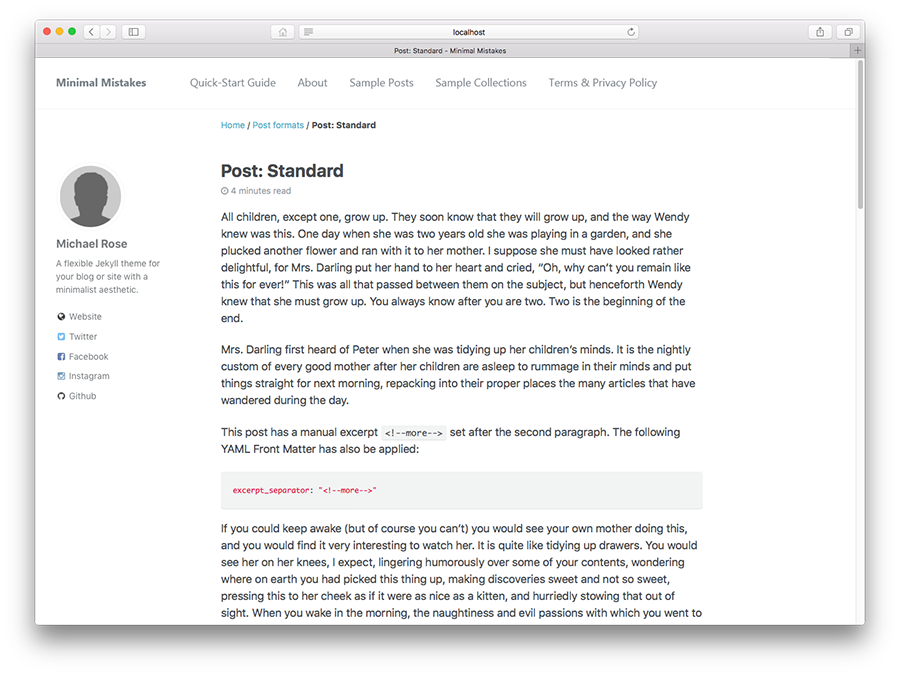
Single layout
The layout you’ll likely use the most — sidebar and main content combo.
Includes:
- Optional header image with caption
- Optional header overlay (solid color/image) + text and optional “call to action” button
- Optional social sharing links module
- Optional comments module
- Optional related posts module
- Wide page variant
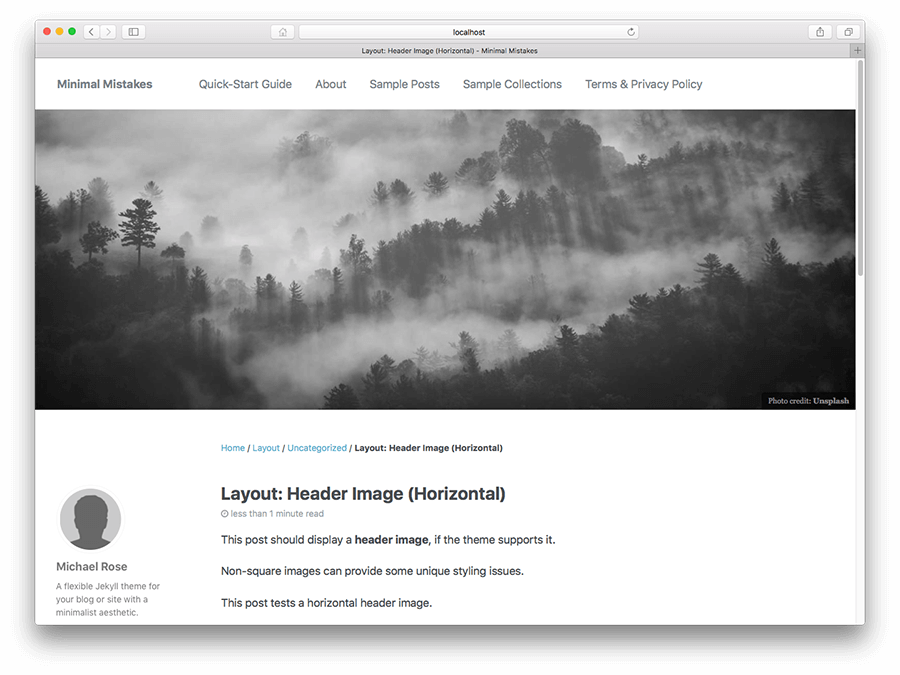
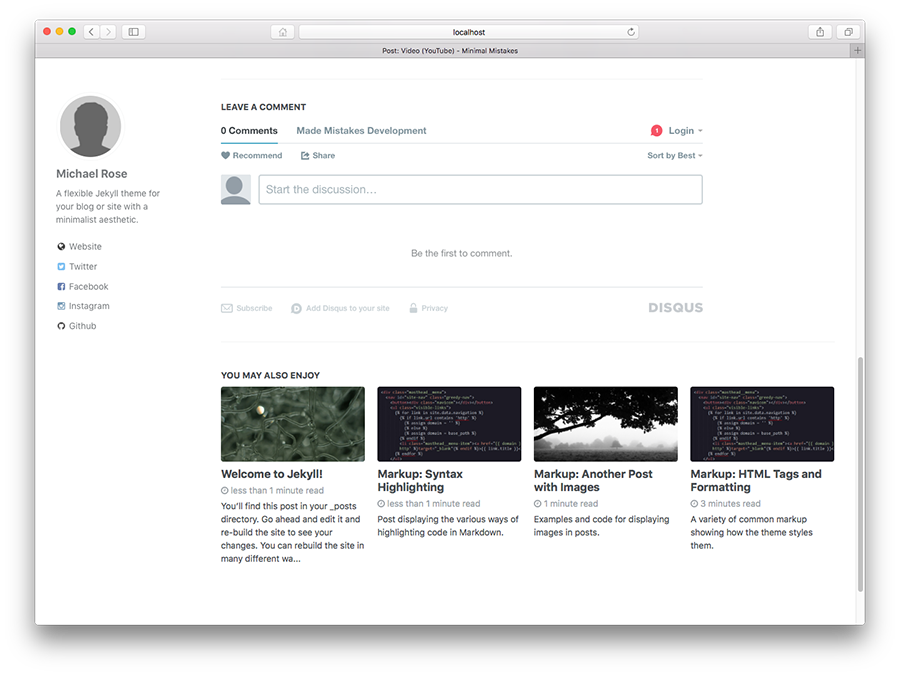
single layout
Assign with layout: single , or better yet apply as a Front Matter default in _config.yml.
Wide page
To expand the main content to the right, filling the space of what is normally occupied by the table of contents. Add the following to a post or page’s YAML Front Matter:
classes: wide
Note: If the page contains a table of contents, it will no longer appear to the right. Instead it will be forced into the main content container directly following the page’s title.
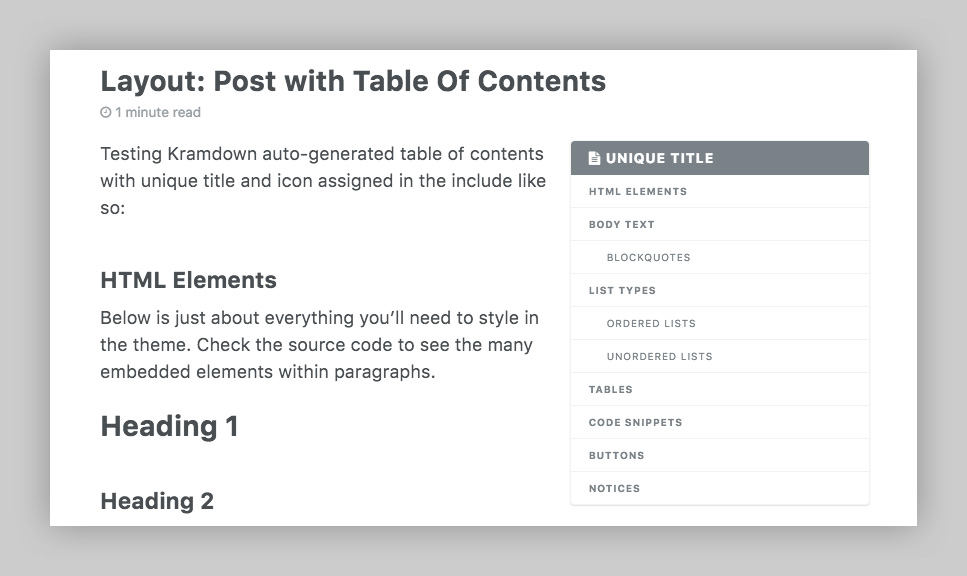
Table of contents
Auto-generated table of contents list for your posts and pages can be enabled by adding toc: true to the YAML Front Matter.
| Parameter | Required | Description | Default |
|---|---|---|---|
| toc | Optional | Show table of contents. (boolean) | false |
| toc_label | Optional | Table of contents title. (string) | toc_label in UI Text data file. |
| toc_icon | Optional | Table of contents icon, displays before the title. (string) | Font Awesome file-alt icon. Other FA icons can be used instead. |
TOC example with custom title and icon
---
toc: true
toc_label: "My Table of Contents"
toc_icon: "cog"
---
Archive layout
Essentially the same as single with markup adjustments and some modules removed.
Includes:
- Optional header image with caption
- Optional header overlay (solid color/image) + text and optional “call to action” button
- List and grid views
Below are sample archive pages you can easily drop into your project, taking care to rename permalink, title, or the filename to fit your site. Each is 100% compatible with GitHub Pages.
- All Posts Grouped by Category – List View
- All Posts Grouped by Tag – List View
- All Posts Grouped by Year – List View
- All Posts Grouped by Collection – List View
- Portfolio Collection – Grid View
Post and page excerpts are auto-generated by Jekyll which grabs the first paragraph of text. To override this text with something more specific use the following YAML Front Matter:
excerpt: "A unique line of text to describe this post that will display in an archive listing and meta description with SEO benefits."
Wide page
To expand the main content to the right, filling the space of what is normally occupied by the table of contents. Add the following to a post or page’s YAML Front Matter:
classes: wide
Grid view
Adding type=grid to the archive-single helper will display archive posts in a 4 column grid. For example to create an archive displaying all documents in the portfolio collection:
Create a portfolio archive page (eg. _pages/portfolio-archive.md) with the following YAML Front Matter:
---
title: Portfolio
layout: collection
permalink: /portfolio/
collection: portfolio
entries_layout: grid
---
Teaser images are assigned similar to header images using the following YAML Front Matter:
header:
  teaser: path-to-teaser-image.jpg
Note: More information on using this _include can be found under Helpers.
Taxonomy archives
If you have the luxury of using Jekyll plugins, the creation of category and tag archives is greatly simplified. Simply enable support for the jekyll-archives plugin with a few _config.yml settings as noted in the Configuration section and you’re good to go.
If you’re not using the jekyll-archives plugin then you need to create archive pages yourself. Sample taxonomy archives can be found by grabbing the Markdown sources below and adding to your site.
| Name | Layout | Example |
|---|---|---|
| Posts Archive | layout: posts |
year-archive.md |
| Categories Archive | layout: categories |
category-archive.md |
| Category Archive | layout: category |
edge-case.md |
| Tags Archive | layout: tags |
tag-archive.md |
| Tag Archive | layout: tag |
markup.md |
| Collection Archive | layout: collection |
recipes-archive.md |
Note: By default, documents are shown in a list view. To change to a grid view add entries_layout: grid to the page’s front matter.
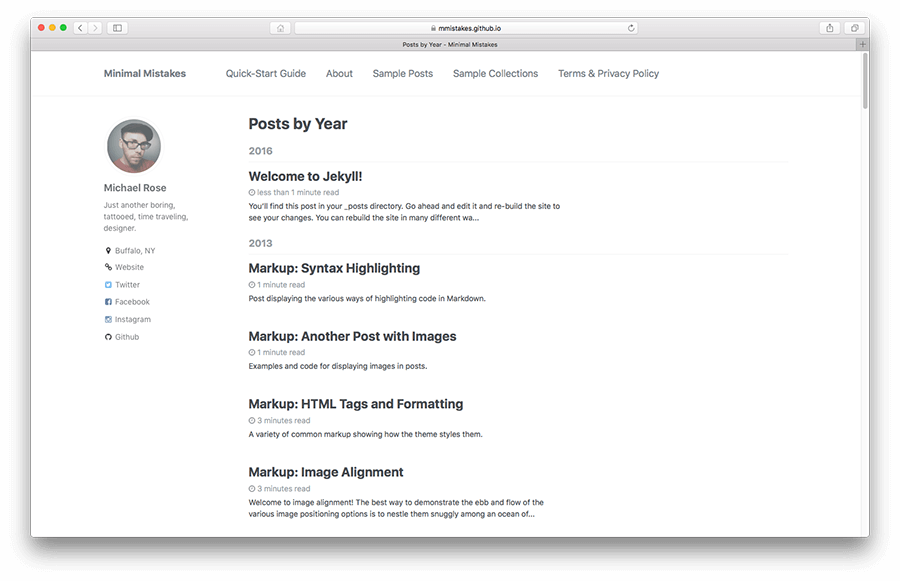
layout: posts
This layout displays all posts grouped by the year they were published. It accommodates the same front matter as layout: archive.
layout: categories
This layout displays all posts grouped category. It accommodates the same front matter as layout: archive.
layout: tags
This layout displays all posts grouped by tag. It accommodates the same front matter as layout: archive.
layout: collection
This layout displays all documents grouped by a specific collection. It accommodates the same front matter as layout: archive with the addition of the following:
collection: # collection name
entries_layout: # list (default), grid
show_excerpts: # true (default), false
sort_by: # date (default) title
sort_order: # forward (default), reverse
To create a page showing all documents in the recipes collection you’d create recipes.md in the root of your project and add this front matter:
title: Recipes
layout: collection
permalink: /recipes/
collection: recipes
If you want to sort the collection by title add sort_by: title. If you want reverse sorting, add sort_order: reverse.
layout: category
This layout displays all posts grouped by a specific category. It accommodates the same front matter as layout: archive with the addition of the following:
taxonomy: # category name
entries_layout: # list (default), grid
To create a page showing all posts assigned to the category foo you’d create foo.md and add this front matter:
title: Foo
layout: category
permalink: /categories/foo/
taxonomy: foo
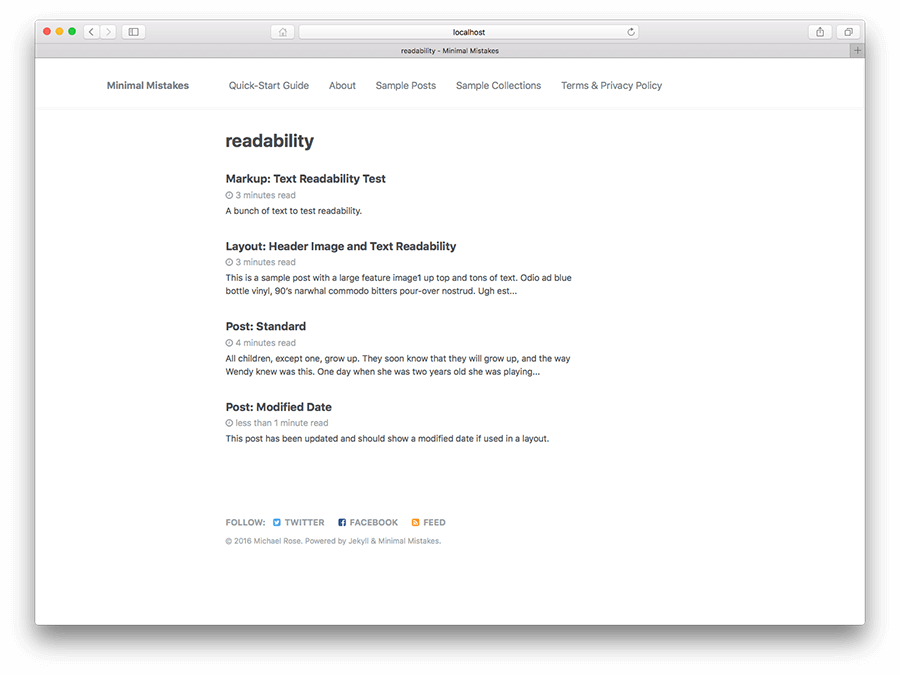
layout: tag
This layout displays all posts grouped by a specific tag. It accommodates the same front matter as layout: archive with the addition of the following:
taxonomy: # tag name
entries_layout: # list (default), grid
To create a page showing all posts assigned to the tag foo bar you’d create foo-bar.md and add this front matter:
title: Foo Bar
layout: tag
permalink: /tags/foo-bar/
taxonomy: foo bar
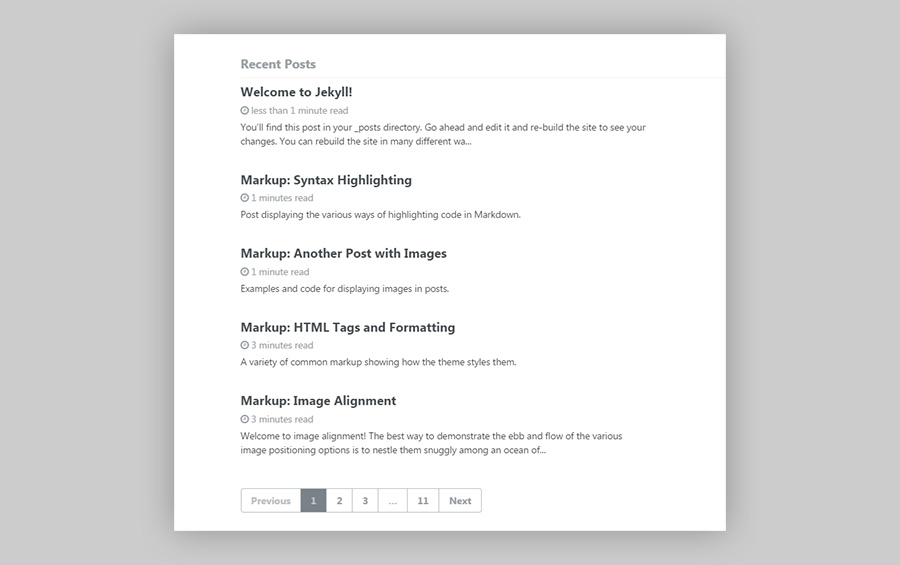
Home page layout
A derivative archive page layout to be used as a simple home page. It is built to show a paginated list of recent posts based off of the pagination settings in _config.yml.
To use create index.html at the root of your project and add the following YAML Front Matter:
---
layout: home
---
Then configure pagination in _config.yml.
paginate: 5 # amount of posts to show
paginate_path: /page:num/
If you’d rather have a paginated page of posts reside in a subfolder instead of acting as your homepage make the following adjustments.
Create index.html in the location you’d like. For example if I wanted it to live at /blog I’d create /blog/index.html with layout: home in its YAML Front Matter.
Then adjust the paginate_path in _config.yml to match.
paginate_path: /blog/page:num
Note: Jekyll can only paginate a single index.html file. If you’d like to paginate more pages (e.g. category indexes) you’ll need the help of a custom plugin. For more pagination related settings check the Configuration section.
Splash page layout
For full-width landing pages that need a little something extra add layout: splash to the YAML Front Matter.
Includes:
- Optional header image with caption
- Optional header overlay (solid color/image) + text and optional “call to action” button
- Feature blocks (
left,center, andrightalignment options)
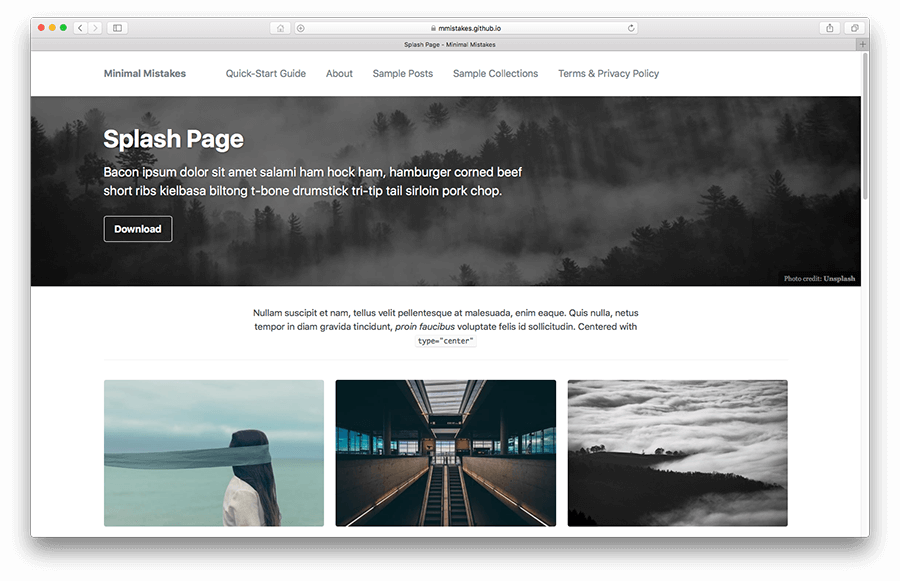
Feature blocks can be assigned and aligned to the left, right, or center with a sprinkling of YAML. For full details on how to use the feature_row helper check the Content section or review a sample splash page.
Search page layout
A page with a search form. Add layout: search to the YAML Front Matter similar to this example on the test site.
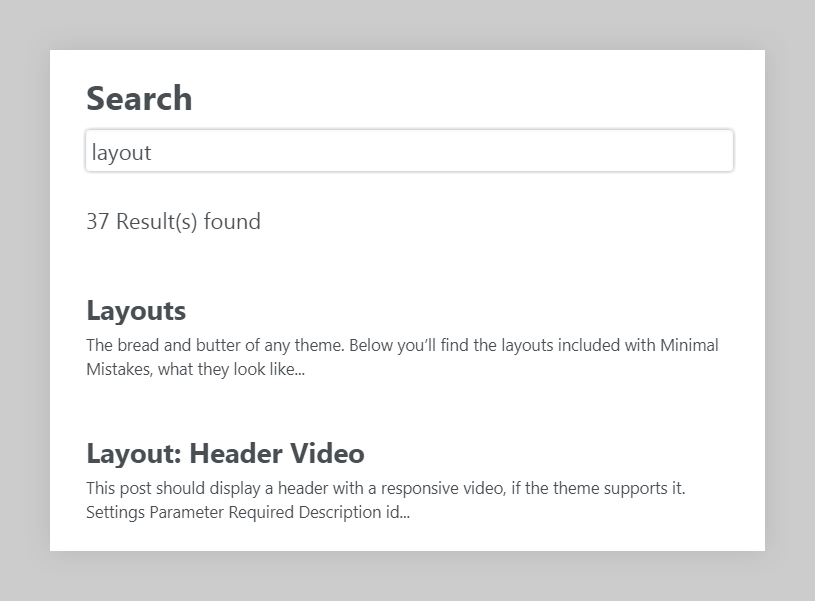
Note: A page using the layout: search isn’t compatible with the new site search feature incorporated in the masthead.
Exclusions
If you would like to exclude specific pages/posts from the search index set the search flag to false in the YAML Front Matter for the page/post.
search: false
ProTip: Add a link to this page in the masthead navigation.
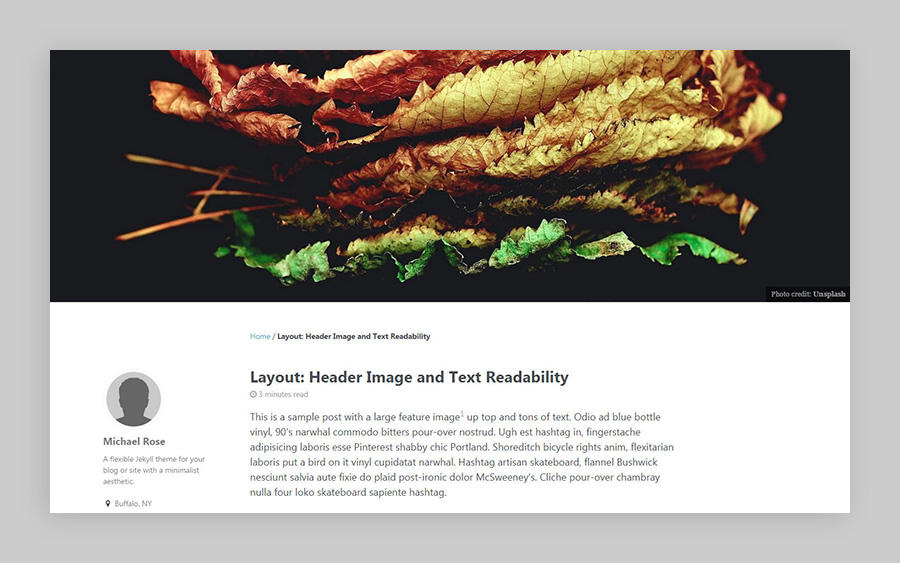
Headers
To add some visual punch to a post or page, a large full-width header image can be included.
Be sure to resize your header images. ~1280px is a good width if you aren’t responsively serving up images. Through the magic of CSS they will scale up or down to fill the container. If you go with something too small it will look like garbage when upscaled, and something too large will hurt performance.
Please Note: Paths for image headers, overlays, teasers, galleries, and feature rows have changed and require a full path. Instead of just image: filename.jpg you’ll need to use the full path eg: image: /assets/images/filename.jpg. The preferred location is now /assets/images/, but can be placed elsewhere or external hosted. This all applies for image references in _config.yml and author.yml as well.
Place your images in the /assets/images/ folder and add the following YAML Front Matter:
header:
  image: /assets/images/image-filename.jpg
For externally hosted images include the full image path instead of just the filename:
header:
  image: http://some-site.com/assets/images/image.jpg
To provide a custom alt tag for screen readers:
header:
  image: /assets/images/unsplash-image-1.jpg
  image_description: "A description of the image"
To include a caption or attribution for the image:
header:
  image: /assets/images/unsplash-image-1.jpg
  caption: "Photo credit: [**Unsplash**](https://unsplash.com)"
ProTip: Captions written in Markdown are supported, so feel free to add links, or style text. Just be sure to wrap it in quotes.
Header overlay
To overlay text on top of a header image you have a few more options:
| Name | Description | Default |
|---|---|---|
| overlay_image | Header image you’d like to overlay. Same rules as header.image from above. |
|
| overlay_filter | Color/opacity to overlay on top of the header image eg: 0.5 or rgba(255, 0, 0, 0.5). |
|
| show_overlay_excerpt | Display excerpt in the overlay text | true |
| excerpt | Auto-generated page excerpt is added to the overlay text or can be overridden. | |
| actions | Call to action button links (actions array: label and url). More than one button link can be assigned. |
|
| cta_label | Deprecated, use actions instead. Call to action button text label. |
more_label in UI Text data file |
| cta_url | Deprecated, use actions instead. Call to action button URL. |
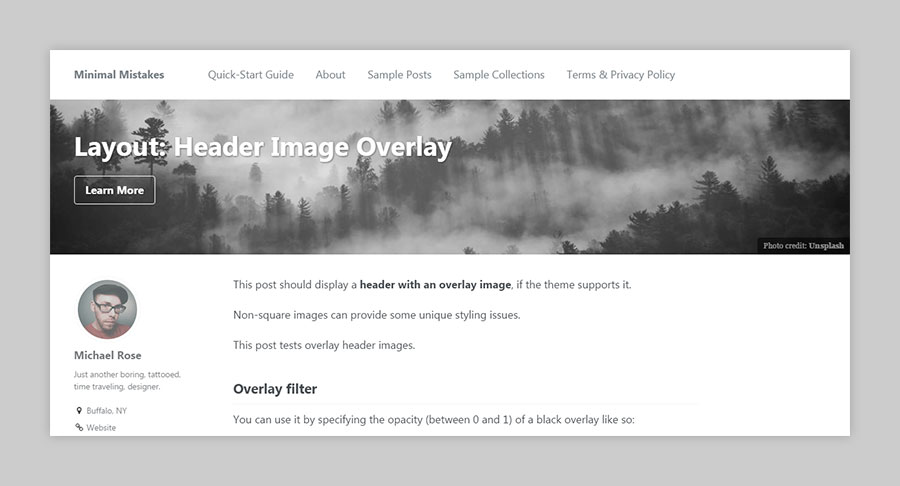
With this YAML Front Matter:
excerpt: "This post should display a **header with an overlay image**, if the theme supports it."
header:
  overlay_image: /assets/images/unsplash-image-1.jpg
  caption: "Photo credit: [**Unsplash**](https://unsplash.com)"
  actions:
    - label: "More Info"
      url: "https://unsplash.com"
You’d get a header image overlaid with text and a call to action button like this:
You also have the option of specifying a solid background-color to use instead of an image.
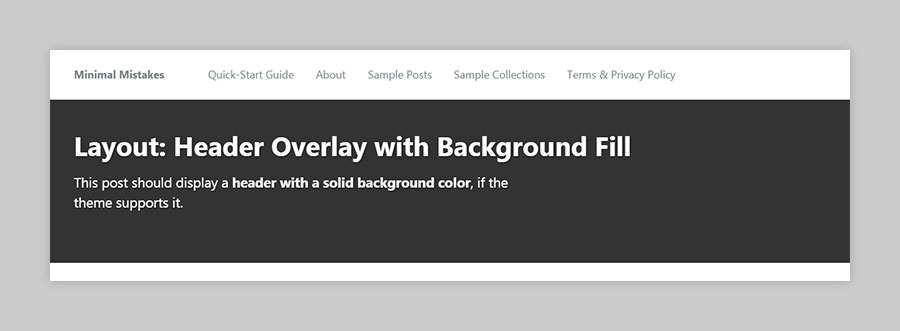
excerpt: "This post should display a **header with a solid background color**, if the theme supports it."
header:
  overlay_color: "#333"
You can also specifying the opacity (between 0 and 1) of a black overlay like so:
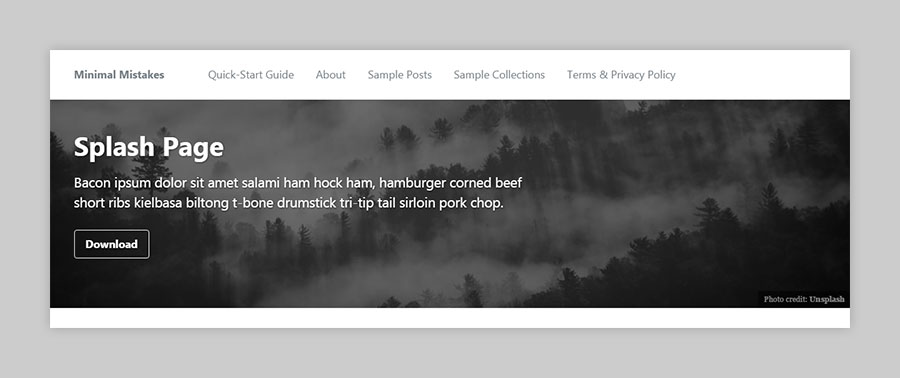
excerpt: "This post should [...]"
header:
  overlay_image: /assets/images/unsplash-image-1.jpg
  overlay_filter: 0.5 # same as adding an opacity of 0.5 to a black background
  caption: "Photo credit: [**Unsplash**](https://unsplash.com)"
  actions:
    - label: "Download"
      url: "https://github.com"
Or if you want to do more fancy things, go full rgba:
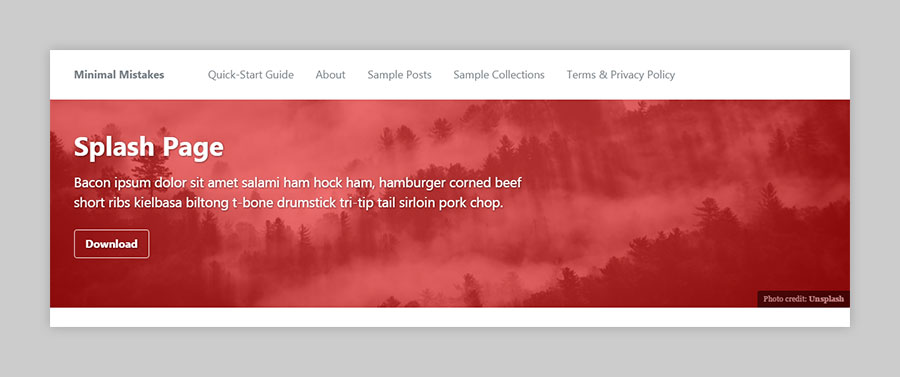
excerpt: "This post should [...]"
header:
  overlay_image: /assets/images/unsplash-image-1.jpg
  overlay_filter: rgba(255, 0, 0, 0.5)
  caption: "Photo credit: [**Unsplash**](https://unsplash.com)"
  actions:
    - label: "Download"
      url: "https://github.com"
Multiple call to action button links can be assigned like this:
excerpt: "This post should display a **header with an overlay image**, if the theme supports it."
header:
  overlay_image: /assets/images/unsplash-image-1.jpg
  caption: "Photo credit: [**Unsplash**](https://unsplash.com)"
  actions:
    - label: "Foo Button"
      url: "#foo"
    - label: "Bar Button"
      url: "#bar"
Open Graph & Twitter Card images
By default the large page header or overlay images are used for sharing previews. If you’d like to set this image to something else use page.header.og_image like:
header:
  image: /assets/images/your-page-image.jpg
  og_image: /assets/images/your-og-image.jpg
ProTip: og_image is useful for setting OpenGraph images on pages that don’t have a header or overlay image.
Sidebars
The space to the left of a page’s main content is blank by default, but has the ability to show an author profile (name, short biography, social media links), custom content, or both.
Author profile
Add author_profile: true to a post or page’s YAML Front Matter.
Better yet, enable it with Front Matter Defaults set in _config.yml.
defaults:
  # _posts
  - scope:
      path: ""
      type: posts
    values:
      author_profile: true
Note: To disable the author sidebar profile for a specific post or page, add author_profile: false to the YAML Front Matter instead.
To assign more author links, add to the author.links array in _config.yml link so. Any of Font Awesome’s icons are available for use.
author:
  name: "Your Name"
  avatar: "/assets/images/bio-photo.jpg"
  bio: "I am an **amazing** person." # Note: Markdown is allowed
  location: "Somewhere"
  links:
    - label: "Made Mistakes"
      icon: "fas fa-fw fa-link"
      url: "https://mademistakes.com"
    - label: "Twitter"
      icon: "fab fa-fw fa-twitter-square"
      url: "https://twitter.com/mmistakes"
    - label: "GitHub"
      icon: "fab fa-fw fa-github"
      url: "https://github.com/mmistakes"
    - label: "Instagram"
      icon: "fab fa-fw fa-instagram"
      url: "https://instagram.com/mmistakes"
Note: Depending on the icon and theme skin used, colors may not be used. Popular social networks like Twitter, Facebook, Instagram, etc. have the appropriate brand color set in CSS. To change or add missing colors edit _utilities.scss in <site root>/_sass/minimal-mistakes/.
For example, to color a Reddit icon, simply add a color declaration and the corresponding hex code like so:
.social-icons {
  .fa-reddit {
    color: #ff4500;
  }
}

Custom sidebar content
Blocks of content can be added by using the following under sidebar:
| Name | Description |
|---|---|
| title | Title or heading. |
| image | Image path placed in /images/ folder or an external URL. |
| image_alt | Alternate description for image. |
| text | Text. Markdown is allowed. |
Multiple blocks can also be added by following the example below:
sidebar:
  - title: "Title"
    image: http://placehold.it/350x250
    image_alt: "image"
    text: "Some text here."
  - title: "Another Title"
    text: "More text here."

Note: Custom sidebar content added to a post or page’s YAML Front Matter will appear below the author profile if enabled with author_profile: true.
Custom sidebar navigation menu
To create a sidebar menu1 similar to the one found in the theme’s documentation pages you’ll need to modify a _data file and some YAML Front Matter.
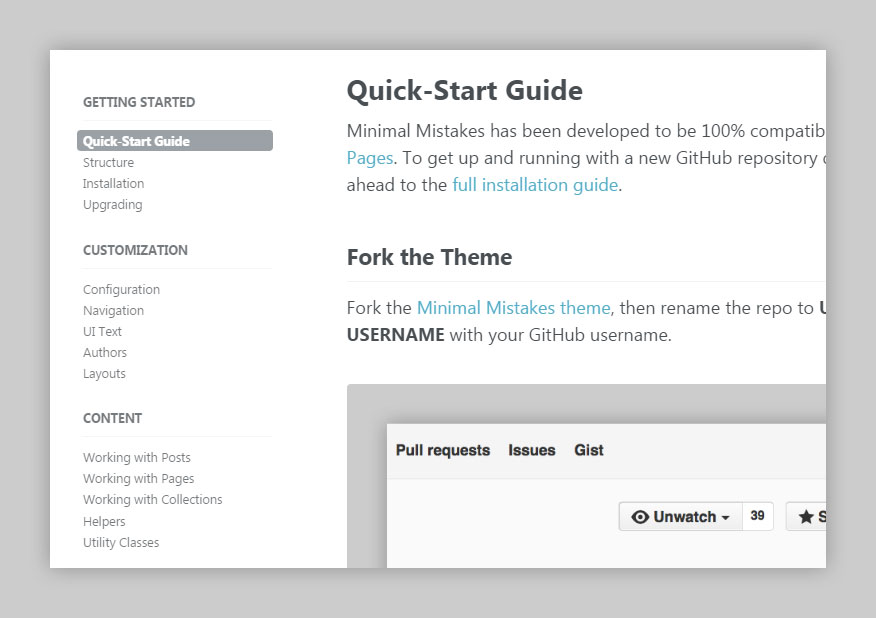
To start, add a new key to _data/navigation.yml. This will be referenced later in via YAML Front Matter so keep it short and memorable. In the case of the theme’s documentation menu I used docs.
Sample sidebar menu links:
docs:
  - title: Getting Started
    children:
      - title: "Quick-Start Guide"
        url: /docs/quick-start-guide/
      - title: "Structure"
        url: /docs/structure/
      - title: "Installation"
        url: /docs/installation/
      - title: "Upgrading"
        url: /docs/upgrading/

  - title: Customization
    children:
      - title: "Configuration"
        url: /docs/configuration/
      - title: "Navigation"
        url: /docs/navigation/
      - title: "UI Text"
        url: /docs/ui-text/
      - title: "Authors"
        url: /docs/authors/
      - title: "Layouts"
        url: /docs/layouts/

  - title: Content
    children:
      - title: "Working with Posts"
        url: /docs/posts/
      - title: "Working with Pages"
        url: /docs/pages/
      - title: "Working with Collections"
        url: /docs/collections/
      - title: "Helpers"
        url: /docs/helpers/
      - title: "Utility Classes"
        url: /docs/utility-classes/

  - title: Extras
    children:
      - title: "Stylesheets"
        url: /docs/stylesheets/
      - title: "JavaScript"
        url: /docs/javascript/
Now you can pull these links into any page by adding the following YAML Front Matter.
sidebar:
  nav: "docs"
Note: nav: "docs" references the docs key in _data/navigation.yml so make sure they match.
If you’re adding a sidebar navigation menu to several pages the use of Front Matter Defaults is a better option. You can define them in _config.yml to avoid adding it to every page or post.
Sample sidebar nav default:
defaults:
  # _docs
  - scope:
      path: ""
      type: docs
    values:
      sidebar:
        nav: "docs"
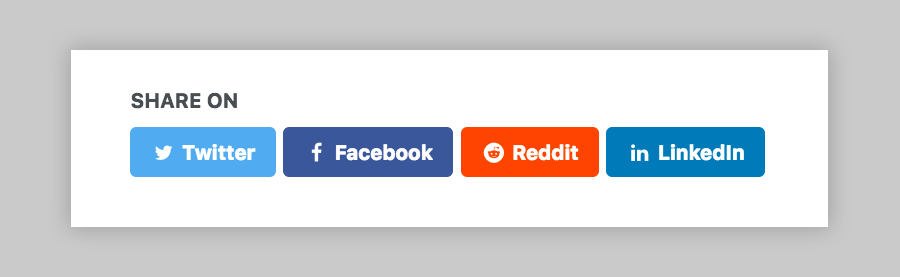
Social sharing links
The single layout has an option to enable social links at the bottom of posts for sharing on Twitter, Facebook, and LinkedIn. Similar to the links found in the author sidebar, the theme ships with defaults for the most common social networks.
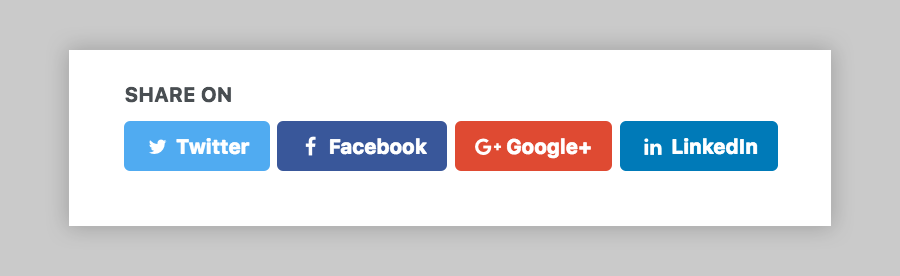
To enable these links add share: true to a post or page’s YAML Front Matter or use a default in your _config.yml to apply more globally.
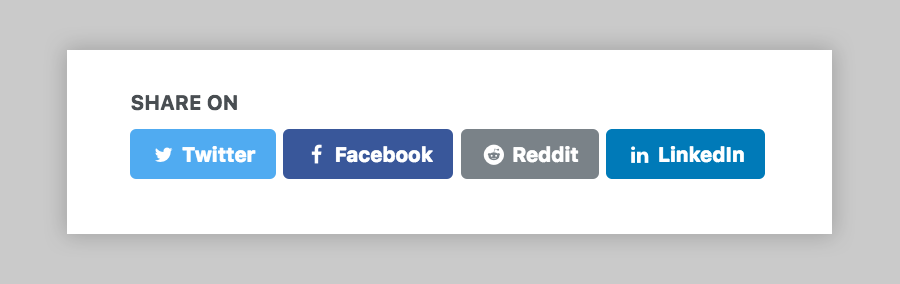
If you’d like to add, remove, or change the order of these default links you can do so by editing _includes/social-share.html.
Let’s say you wanted to replace the LinkedIn button with a Reddit one. Simply replace the HTML with the following:
<a href="https://www.reddit.com/submit?url={{ page.url | absolute_url | url_encode }}&title={{ page.title }}" class="btn" title="{{ site.data.ui-text[site.locale].share_on_label }} Reddit"><i class="fab fa-fw fa-reddit" aria-hidden="true"></i><span> Reddit</span></a>
The important parts to change are:
- Share point URL *eg.
https://www.reddit.com/submit?url= - Link
title - Font Awesome icon (
fa-class) - Link label
To change the color of the button use one of the built in utility classes. Or you can create a new button class to match whatever color you want.
Under the $social color map in assets/_scss/_buttons.scss simply add a name (this will be appened to btn--) that matches the new button class. In our case reddit ~> .btn--reddit.
$social:
(facebook, $facebook-color),
(twitter, $twitter-color),
(linkedin, $linkedin-color);
(reddit, #ff4500;)
ProTip: For bonus points you can add it as a Sass $variable that you set in _variables.scss like the other “brand” colors.
Add the new .btn--reddit class to the <a> element from earlier, compile main.css and away you go.
<a href="https://www.reddit.com/submit?url={{ page.url | relative_url }}&title={{ page.title }}" class="btn btn--reddit" title="{{ site.data.ui-text[site.locale].share_on_label }} Reddit"><i class="fab fa-fw fa-reddit" aria-hidden="true"></i><span> Reddit</span></a>