 Sharp X1 Keyboard Interface
Overview
A major issue with later vintage Sharp computers is keyboards. For whatever reason, either lost, in storage or bought by collectors, a large majority of X1/X68000 machines are now sold without keyboard. Apart from the X68000 where you can still 'kind of' use it with a joystick, the machine is just a paper weight without one. Sellers know this and those that come up for sale can be GBP100-200 or more.
Some resourceful Japanese guys (classicpc.org, or Sato Kyouchi or Martin at 8bity.cz) have developed interfaces to convert common
PS/2 or USB PC keyboards so that they work with these keyboardless Sharp machines. On the whole, for the X1 and X68000 these interfaces work perfectly and are wrapped up in a professional small form factor case.
I initially bought a classicpc.org X1 interface but it didnt work on first try and wasnt sure if it was the X1 Turbo or the interface. I started researching and at the same time came across Sato Kyouchi’s excellent
development, so minimalist and simple. The fault I was experiencing with the classicpc.org interface turned out to be the maximum 50mA current supplied by the X1 through the series 100R resistor. The PS/2 keyboard and the interface were taking above this limit. A simple change
of the resistor value, on both keyboard ports solved the issue.
I started to renovate a second X1 Turbo II and decided to investigate Sato Kyouchi’s design. It was minimalist and the firmware written in C. The R8C processor was a pleasure to learn and I ended up
converting a PS/2 keyboard, internally, to use Sato’s design. The PS/2 keyboard was now an X1 keyboard as it plugged directly into the Turbo II.
Lesson to diary, keep away from auctions! I bought a third X1 Turbo, this time the original model and decided that it would be easier to have an external adapter for the keyboard, just like the one for the X68000 made by Martin at 8bity.cz. It was at the
same time I was working on the MZ-2500 keyboard interface and it just made sense. I converted Sato’s C source so that it had English comments (for my own understanding, Sato’s code is very well structured and commented in Japanese) and tweaked the design to allow bi-directional communications with the keyboard, designed a PCB,
made up a case and cable and now ready for updating the firmware and testing.
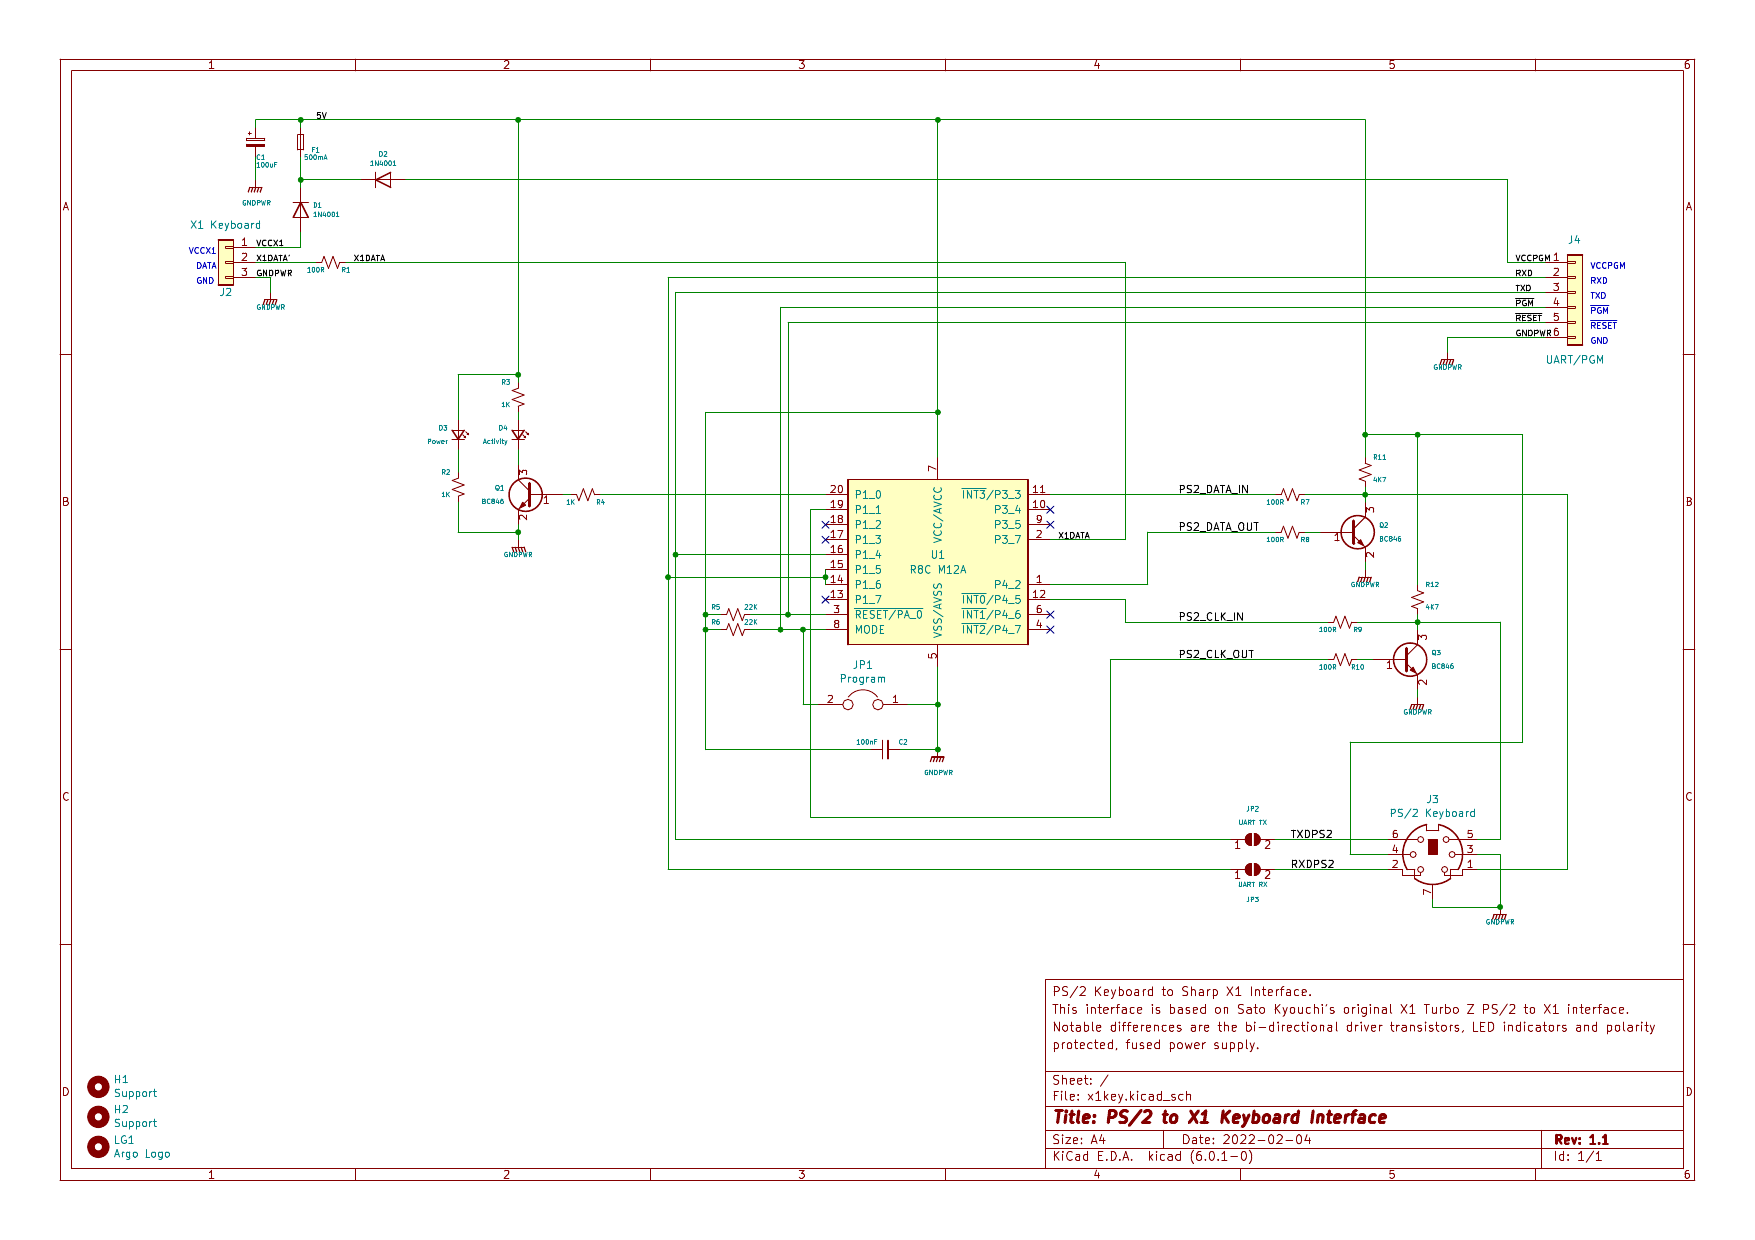
Schematic
The following schematic was based on the original, updating it to be bi-directional (in truth, the R8C GPIO’s could be switched but less flexible to keep switching the mode of operation) and adding LED’s to show activity. Current limit resistors were added to protect the processor and limit line reflection and fused reverse polarity protection was added for safety.
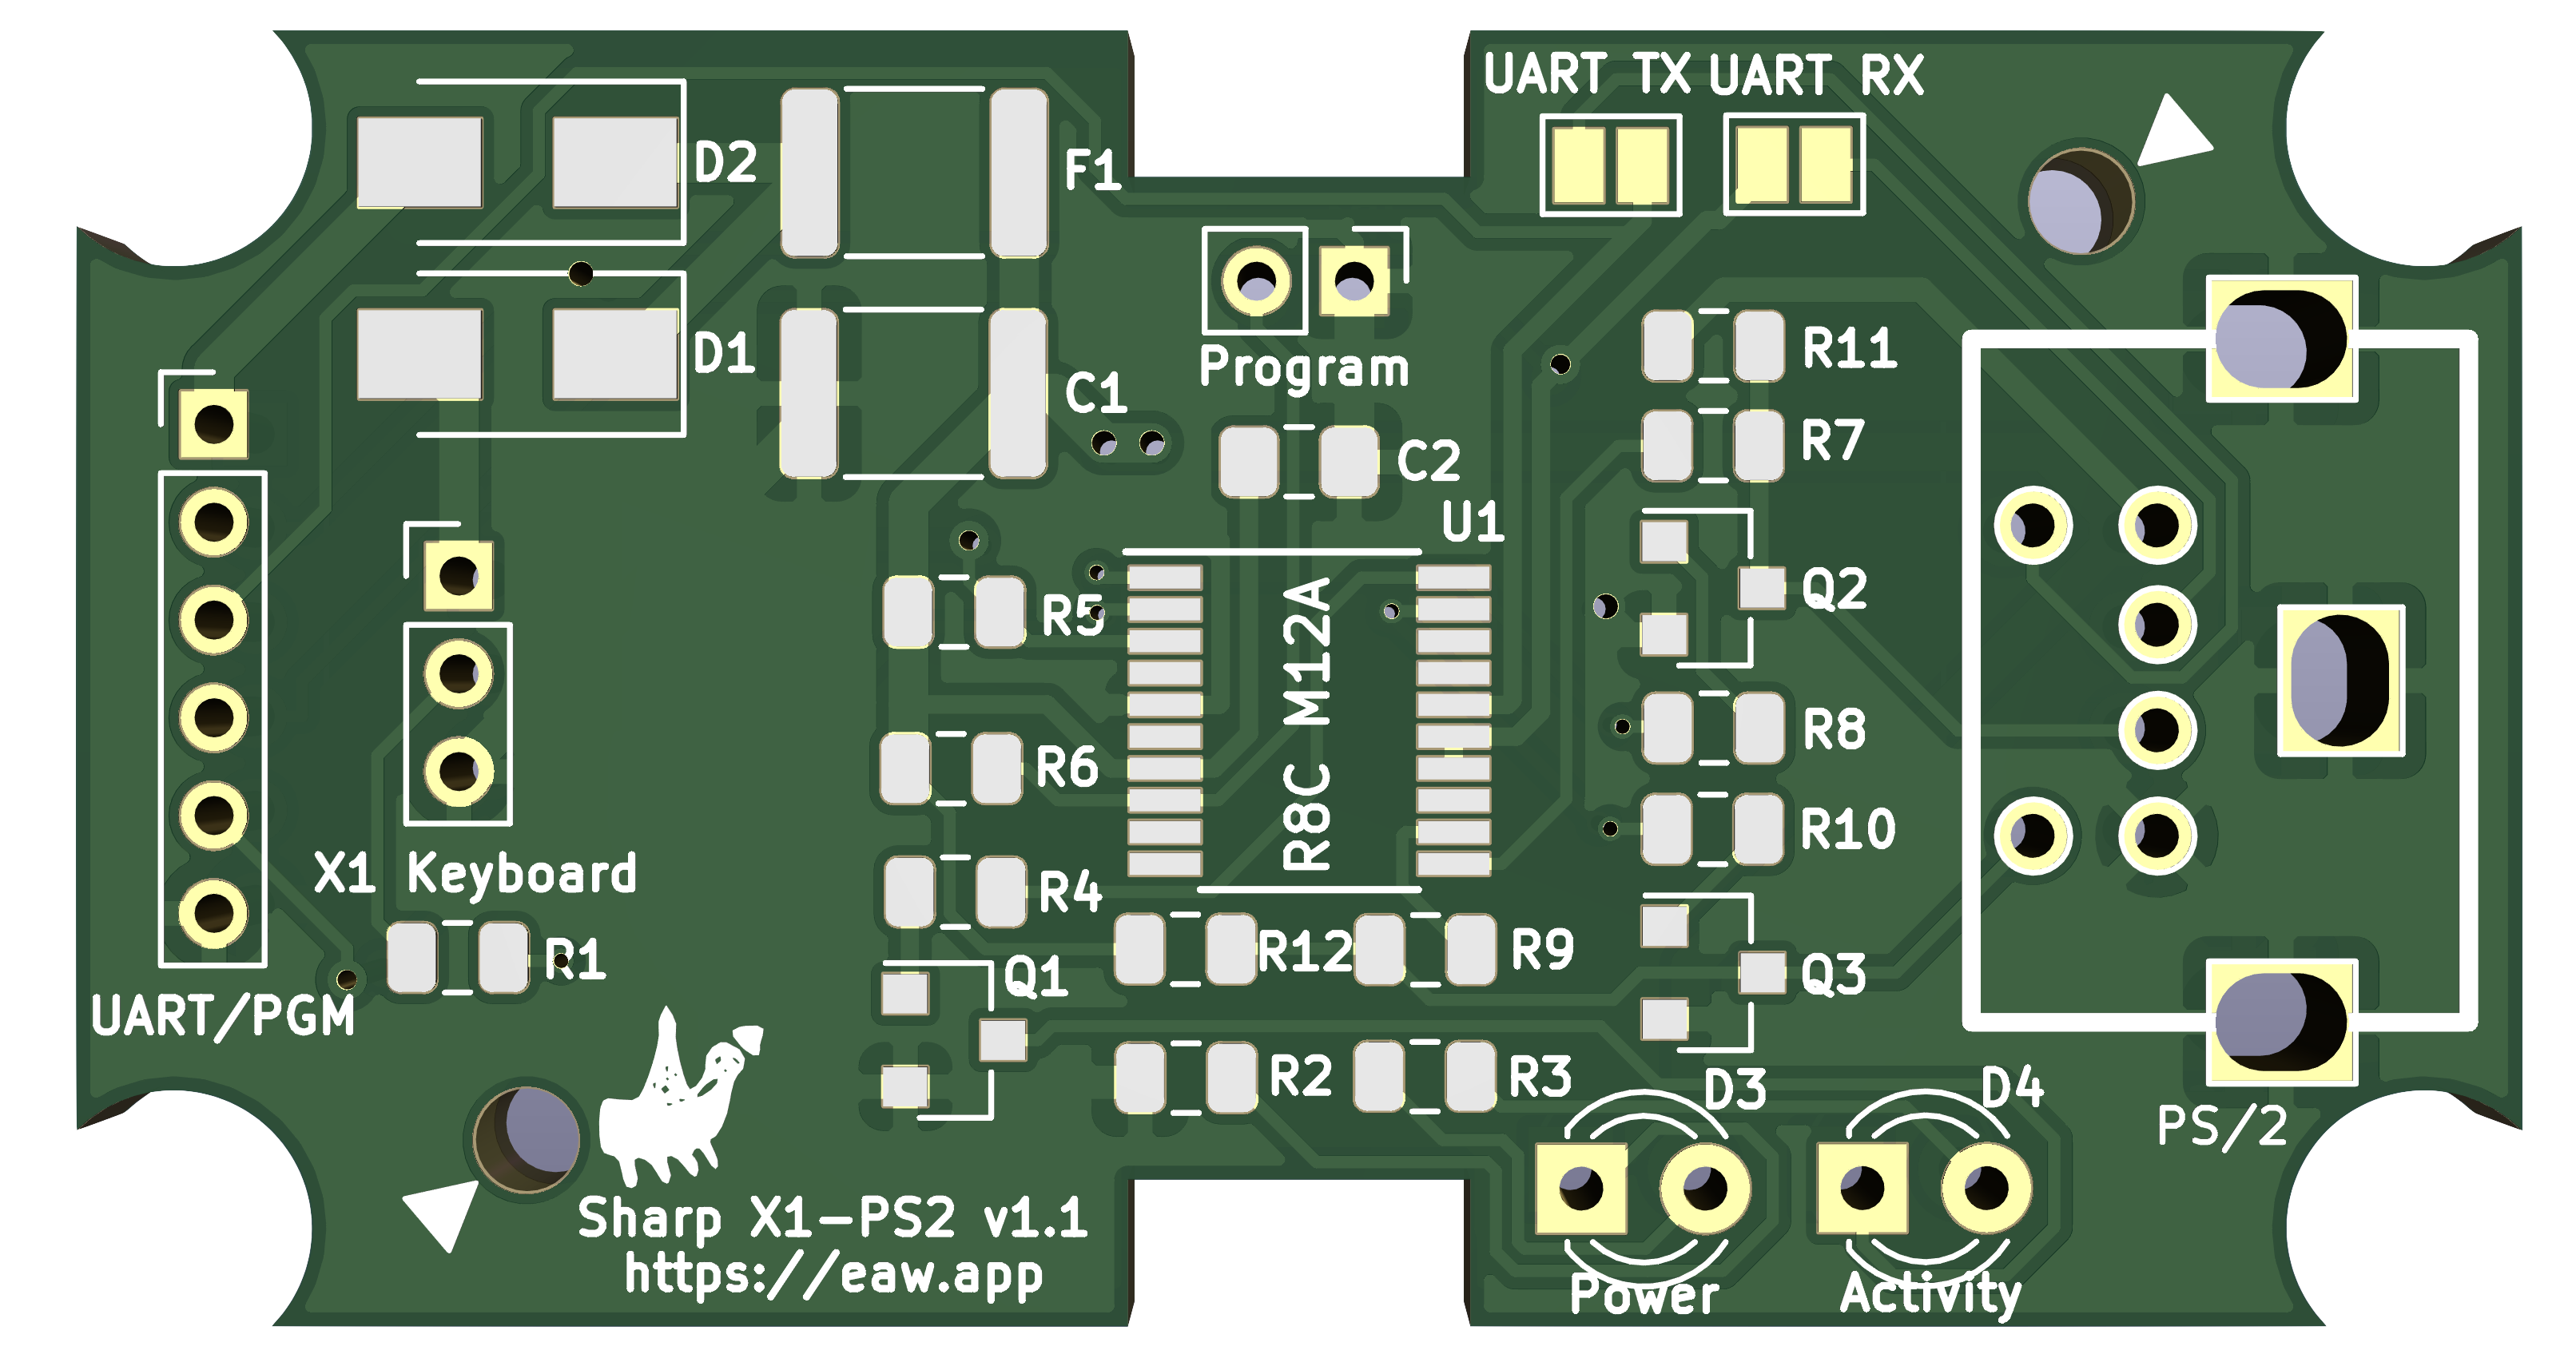
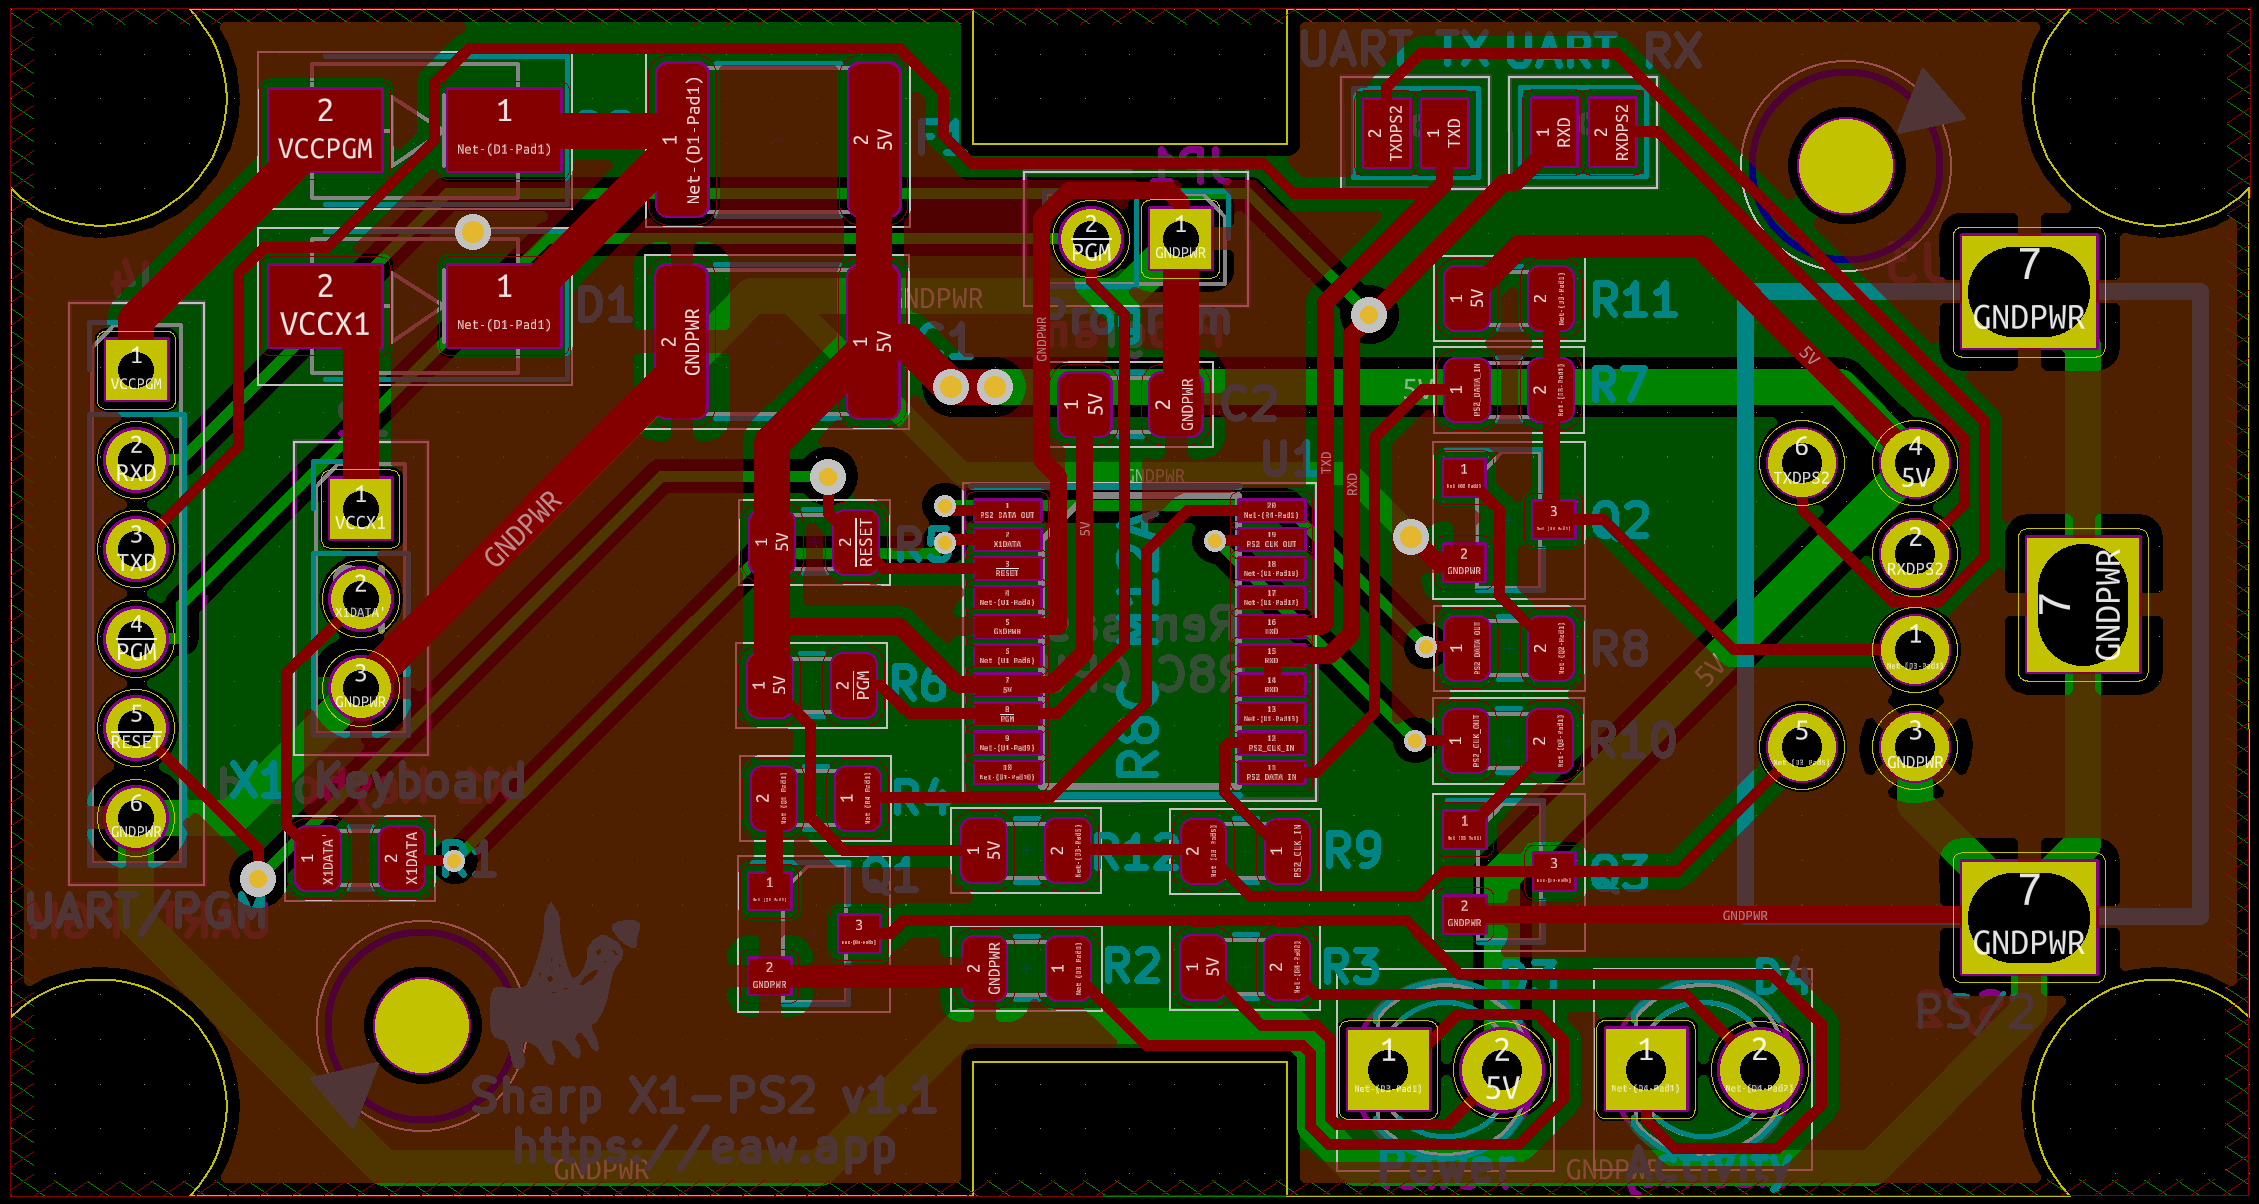
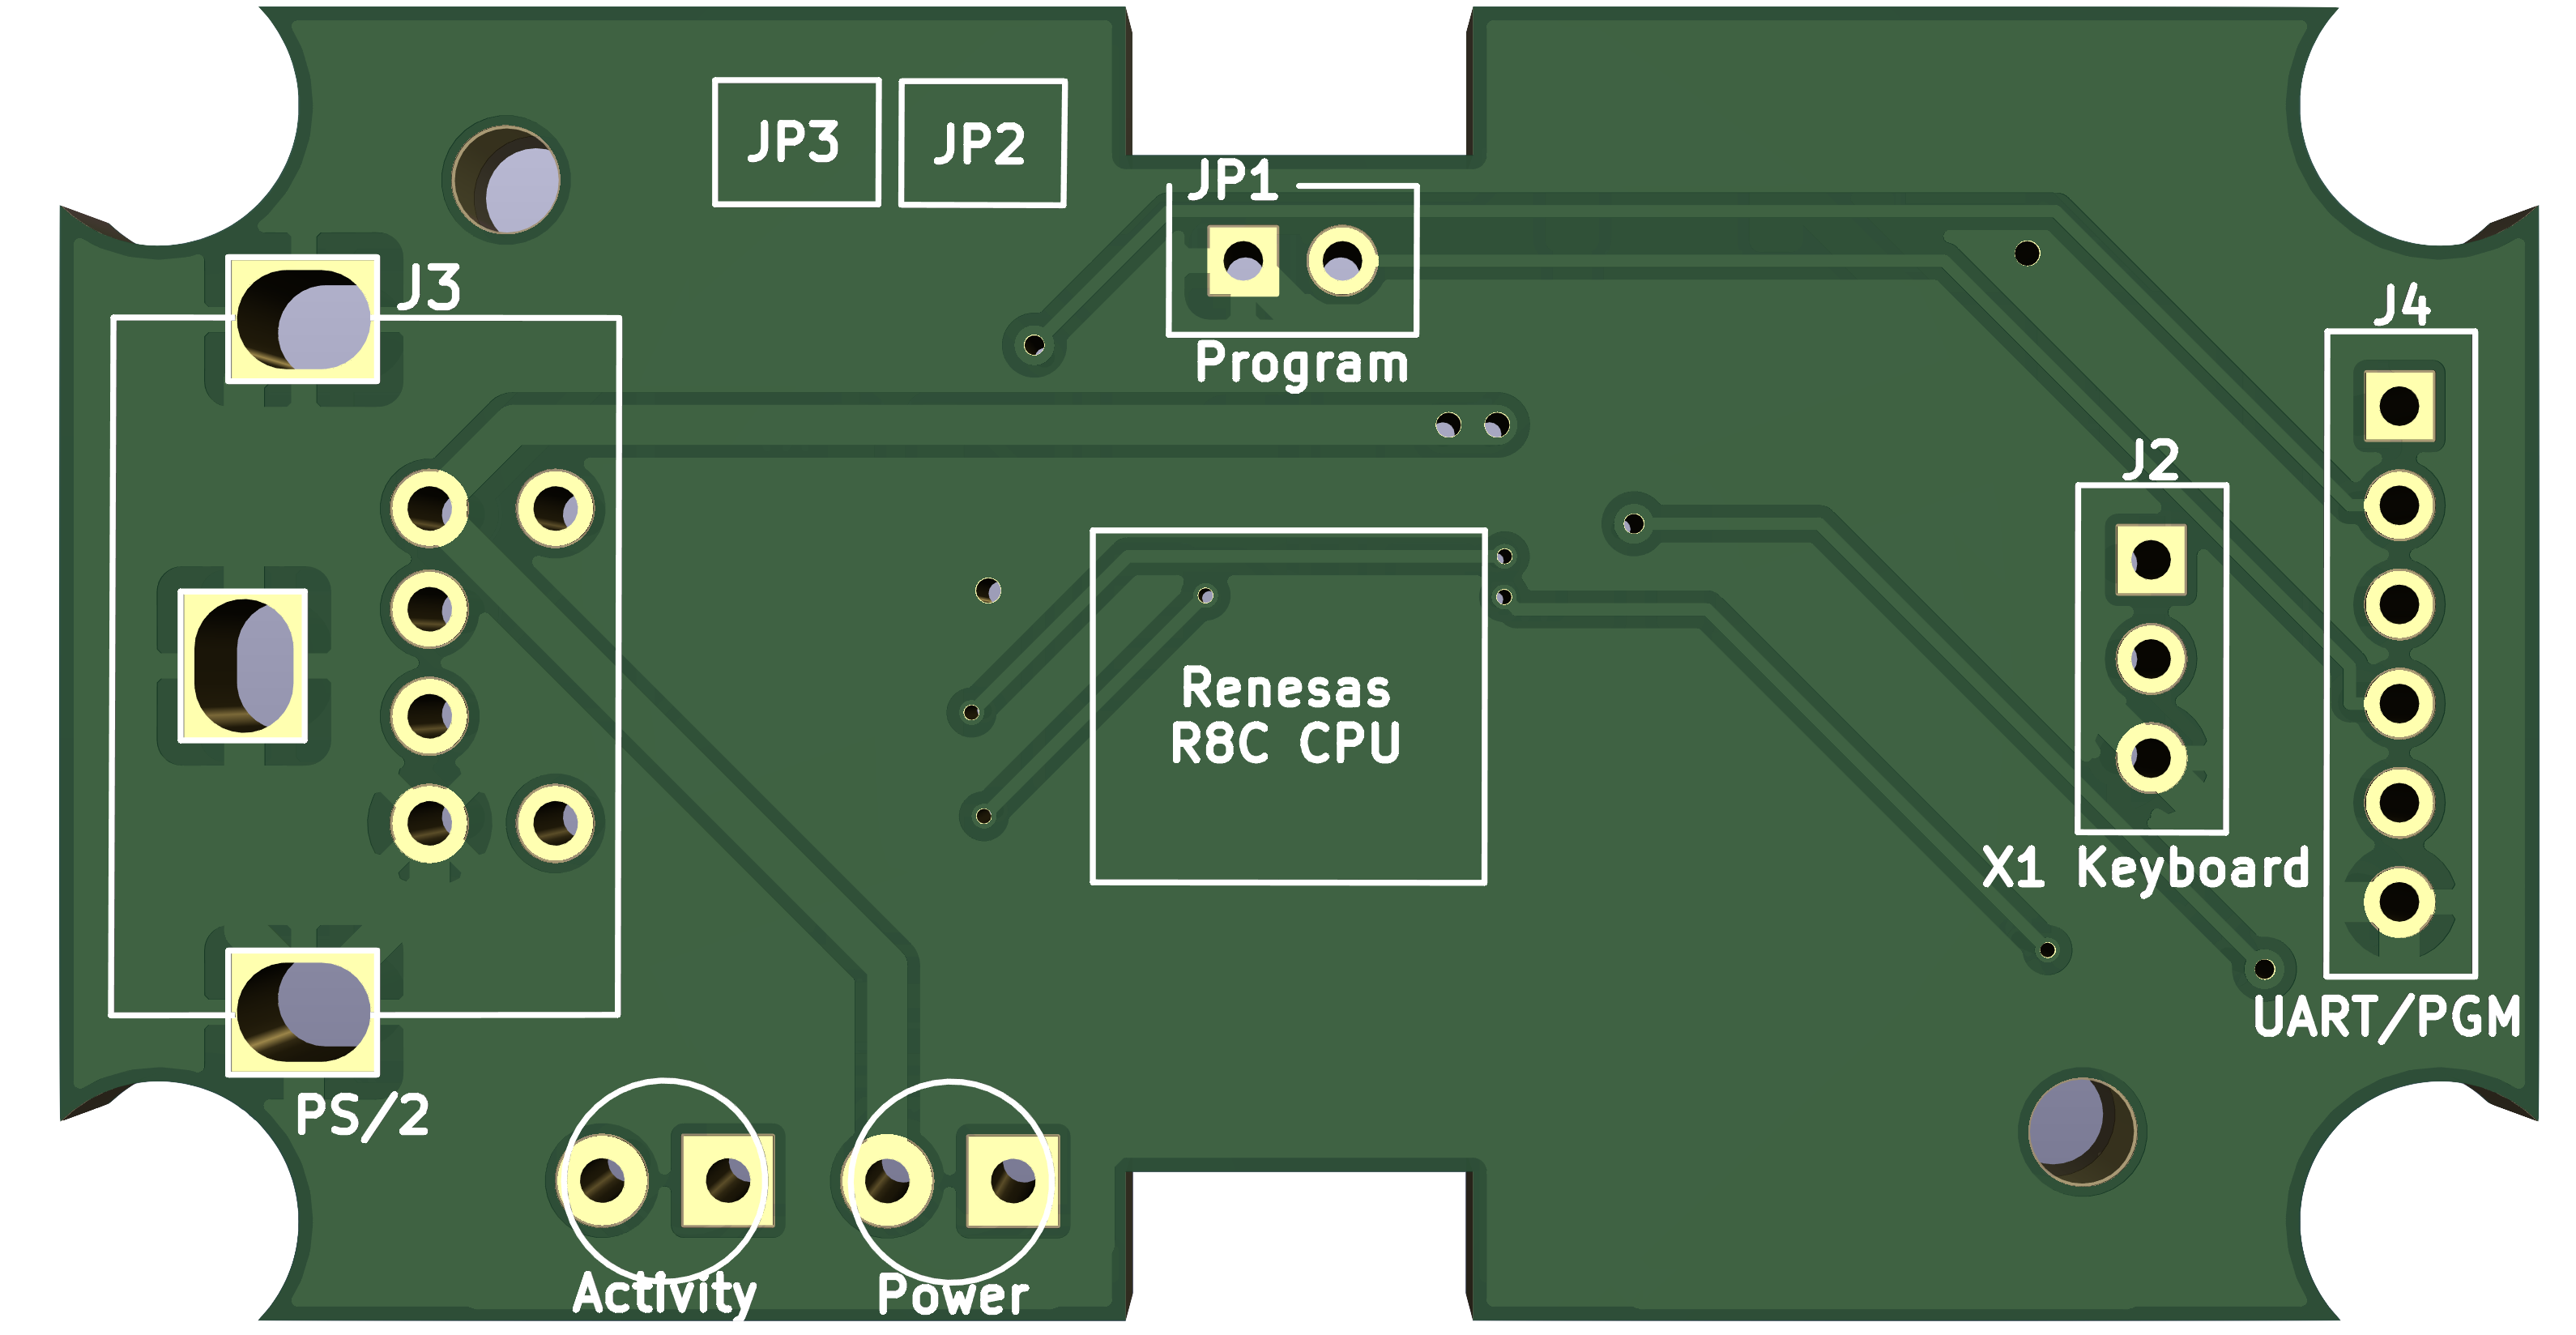
PCB
Having prototyped the designed circuit and tested the control software, I set about designing the PCB. It had to be small to fit inside a KM24 case but with so few components it was straight forward and all parts fitted on the top layer.
The finished circuit board which went into fabrication.
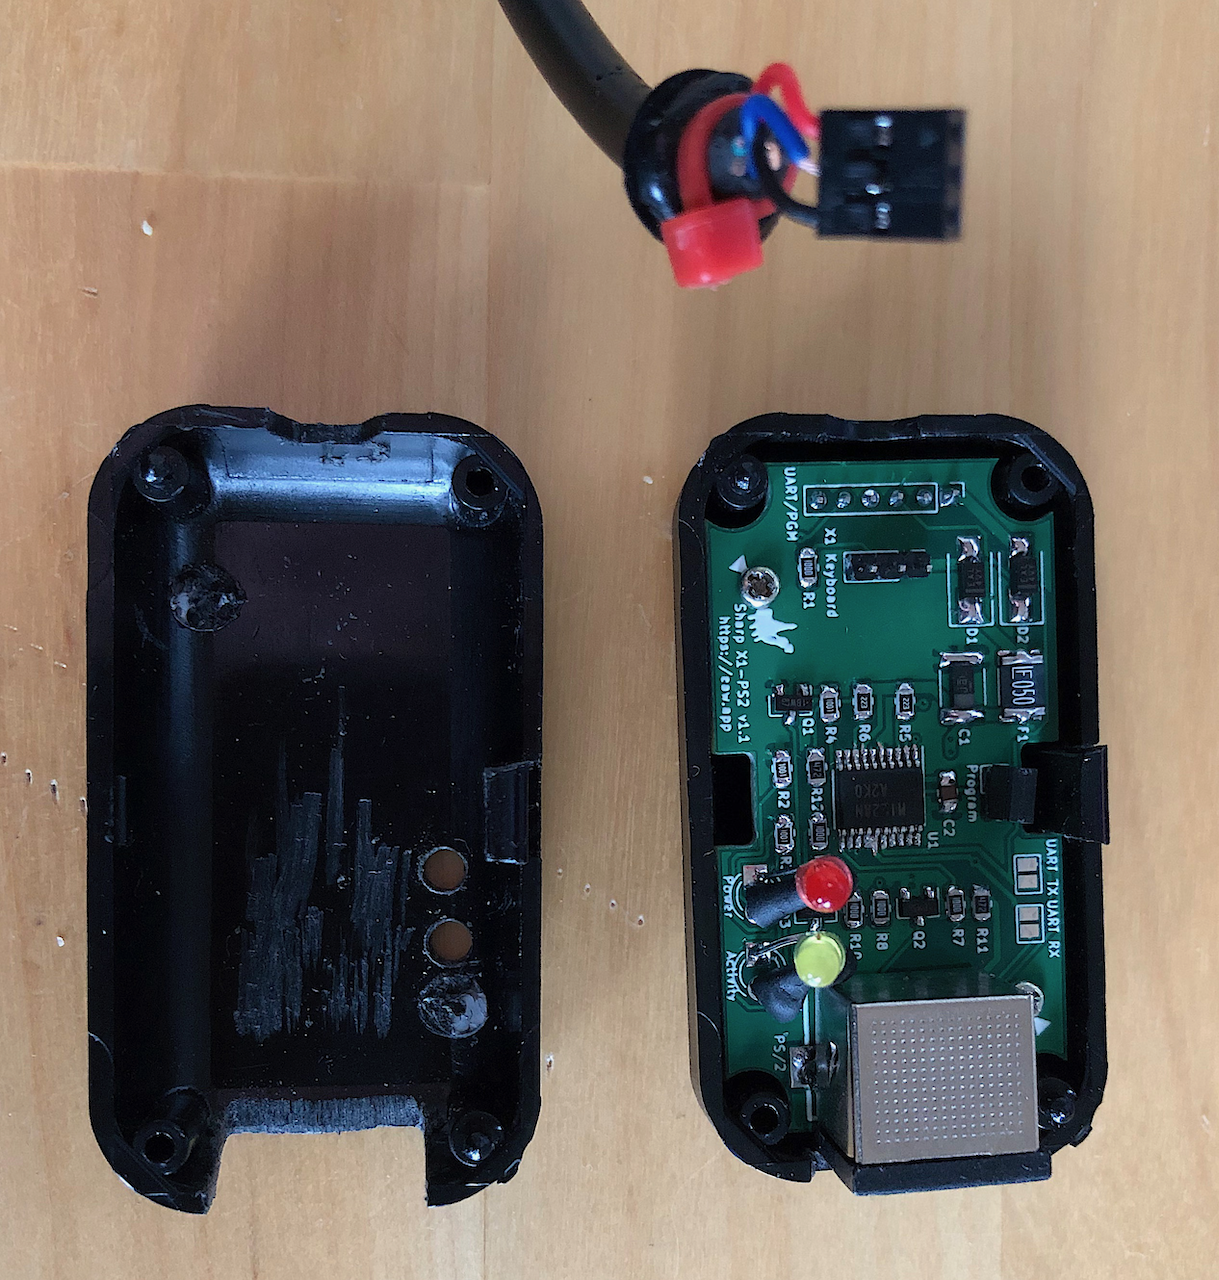
Assembled Interface
The pictures below highlight the completed, assembled and working interface. Firmware updates are in progress to allow the interface to send commands to the PS/2 Keyboard notably for RESET and LED events which the original interface firmware version lacked.
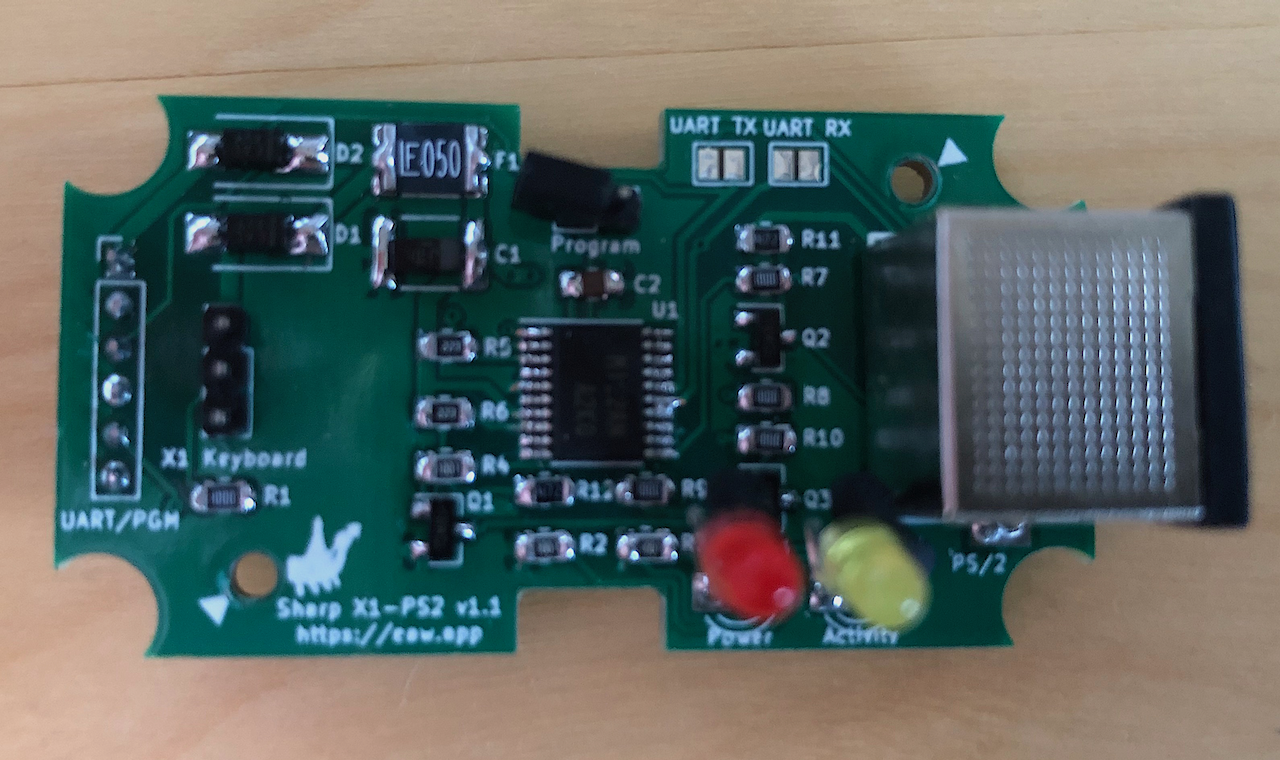
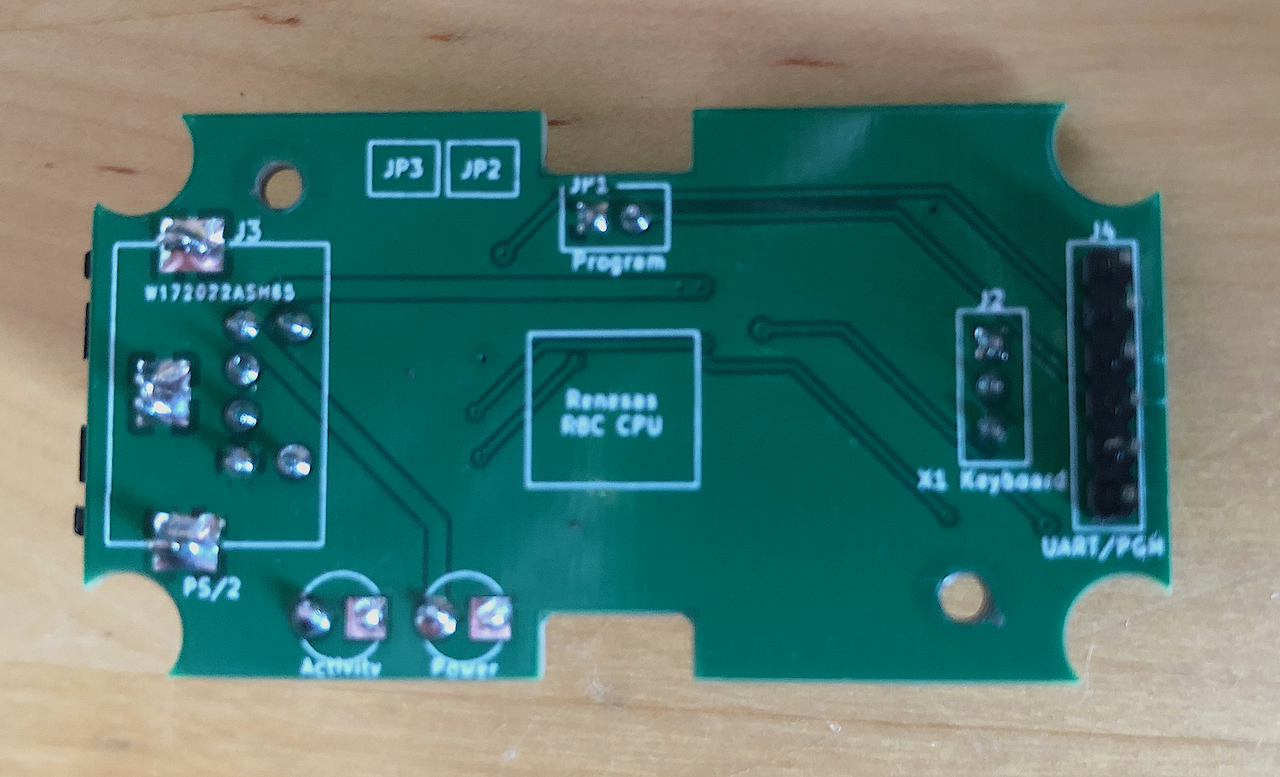
Top and bottom, SMD throught with TSSOP 0.65mm pitch on the R8C makes for tricky soldering especially when fine nibs only last about 2 hours as the copper vapourises and I had used the last of my new nibs assembling 3 mz25key pcb’s!
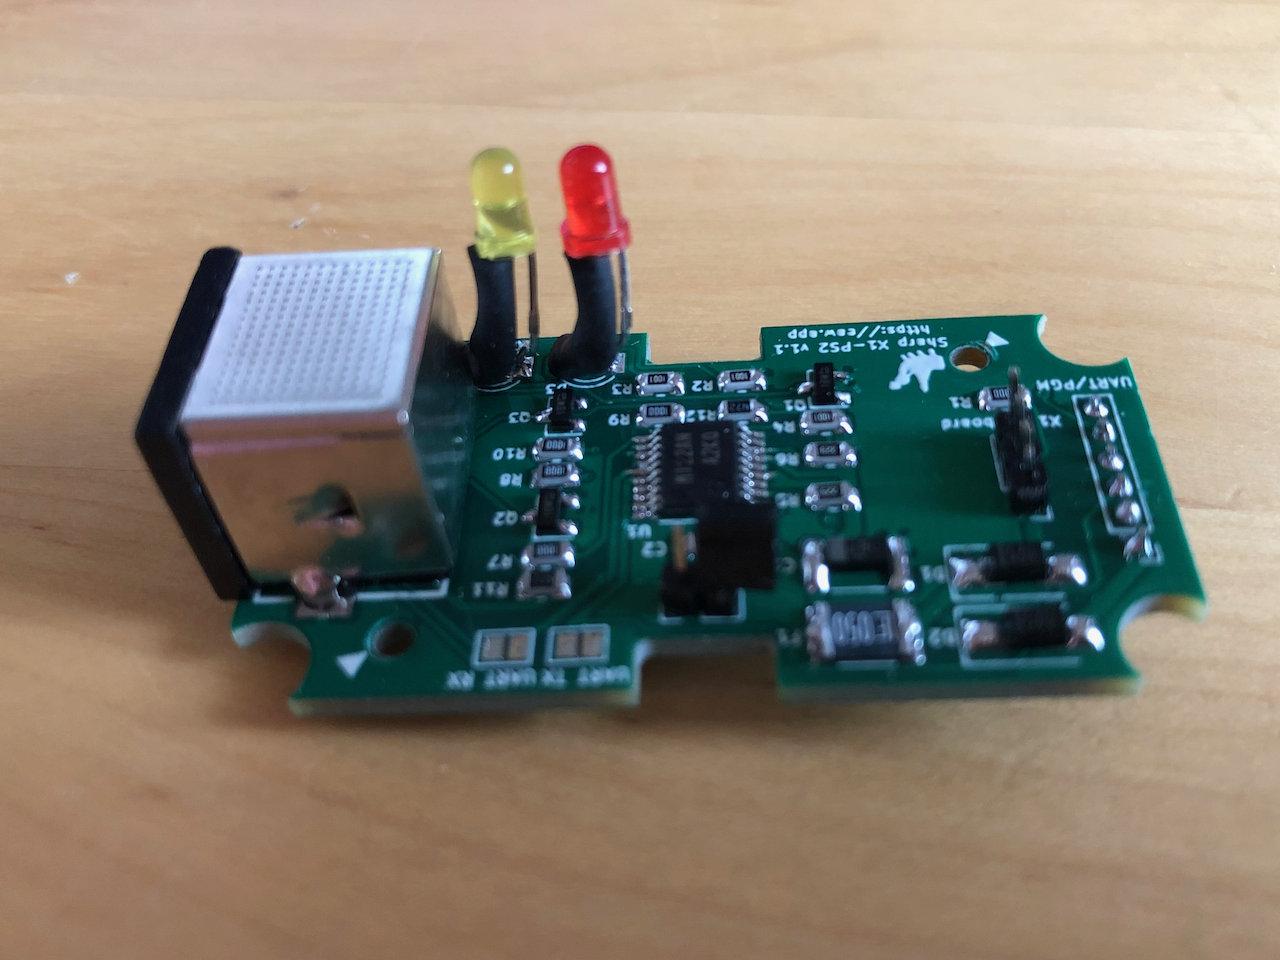
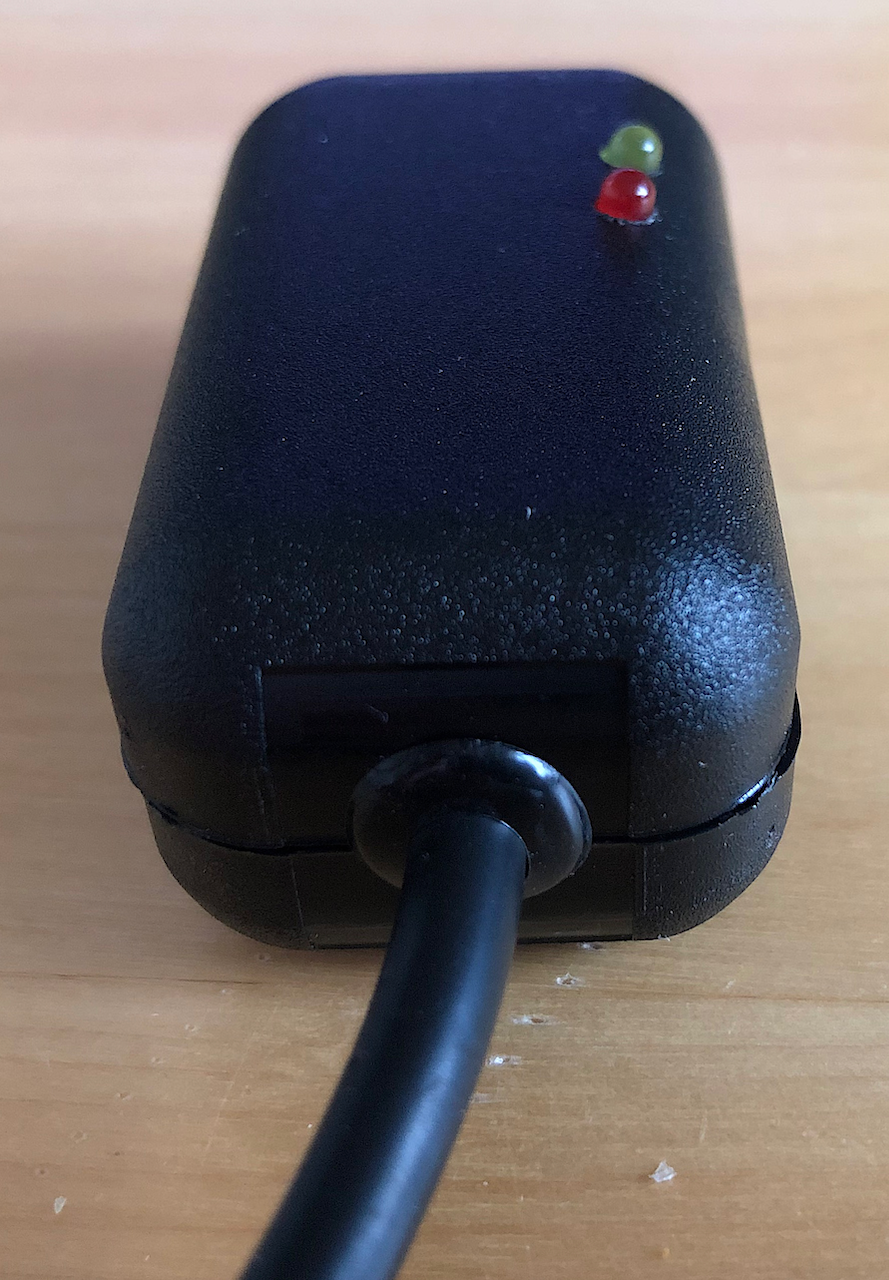
Side on view, heat shrinked Anode on the LED’s (not yet shrunk) to protect against shorts!
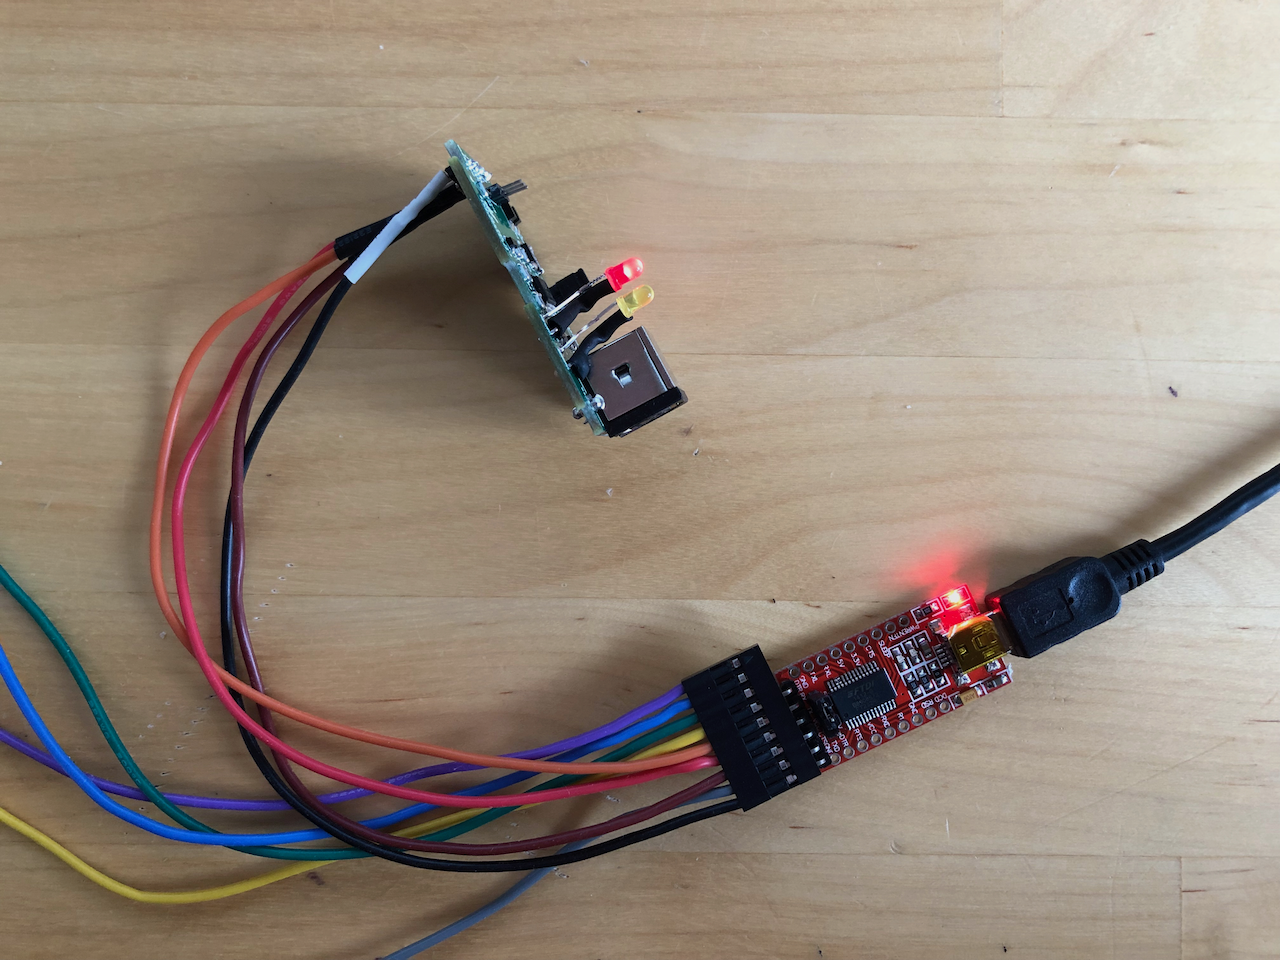
Programming is simply 4 wires, VCC, GND, TXD and RXD. The programming header allows for remote control of PGM and RESET which could be done via RTS/DTR but the Renesas flashing tool doesnt support it (to my knowledge).
Assembly, I need tools to cut out the ABS of the KM24, hacksaw and files dont make for such a professional job. I’ve used a dremel too but this also doesnt leave such professional looking results.
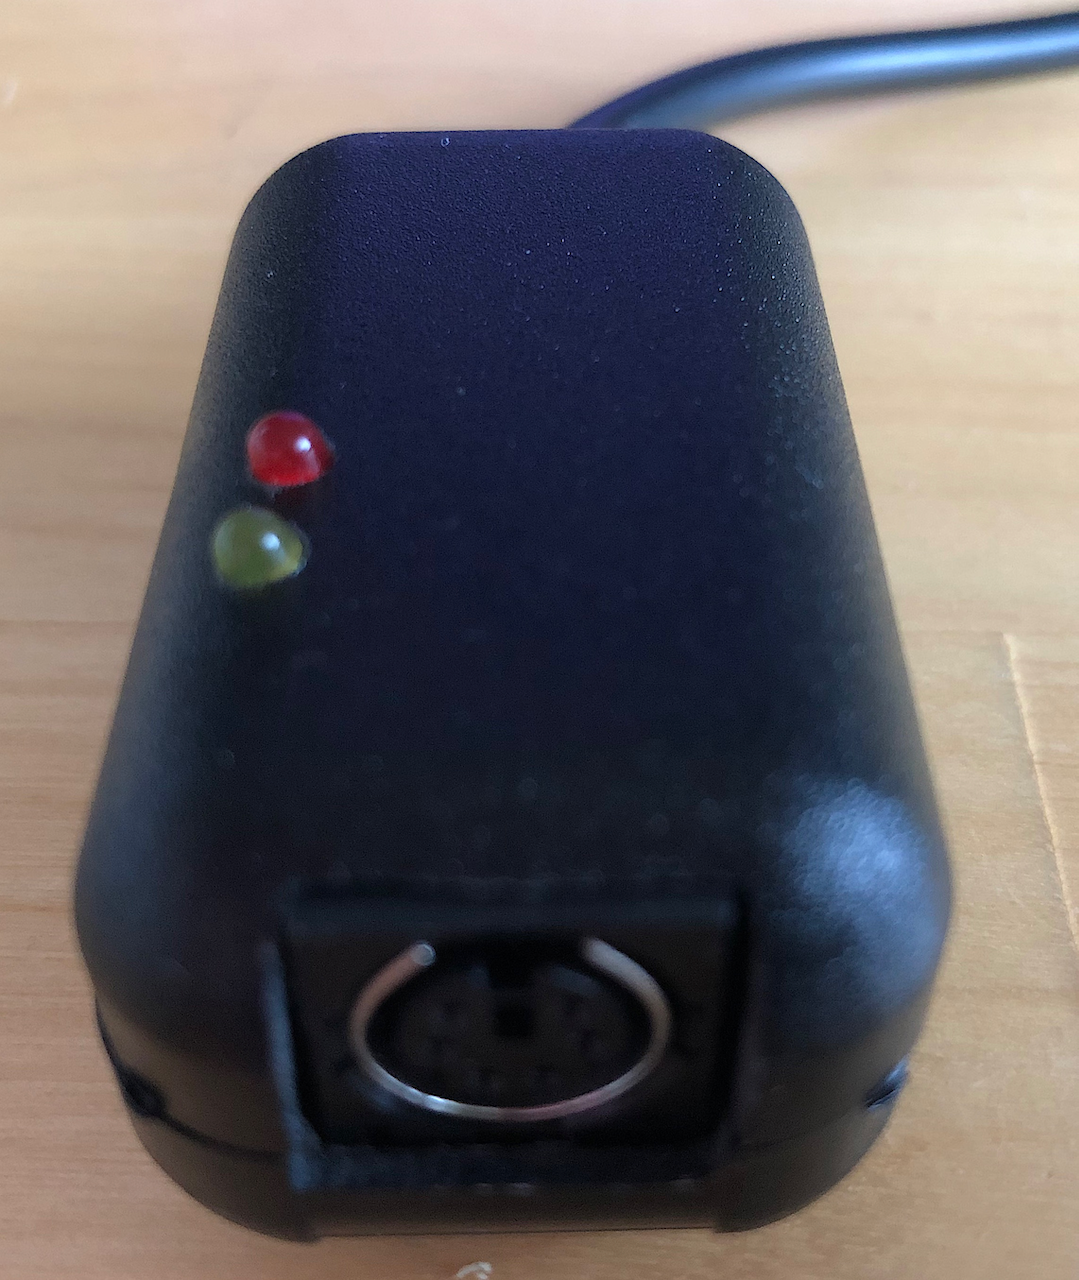
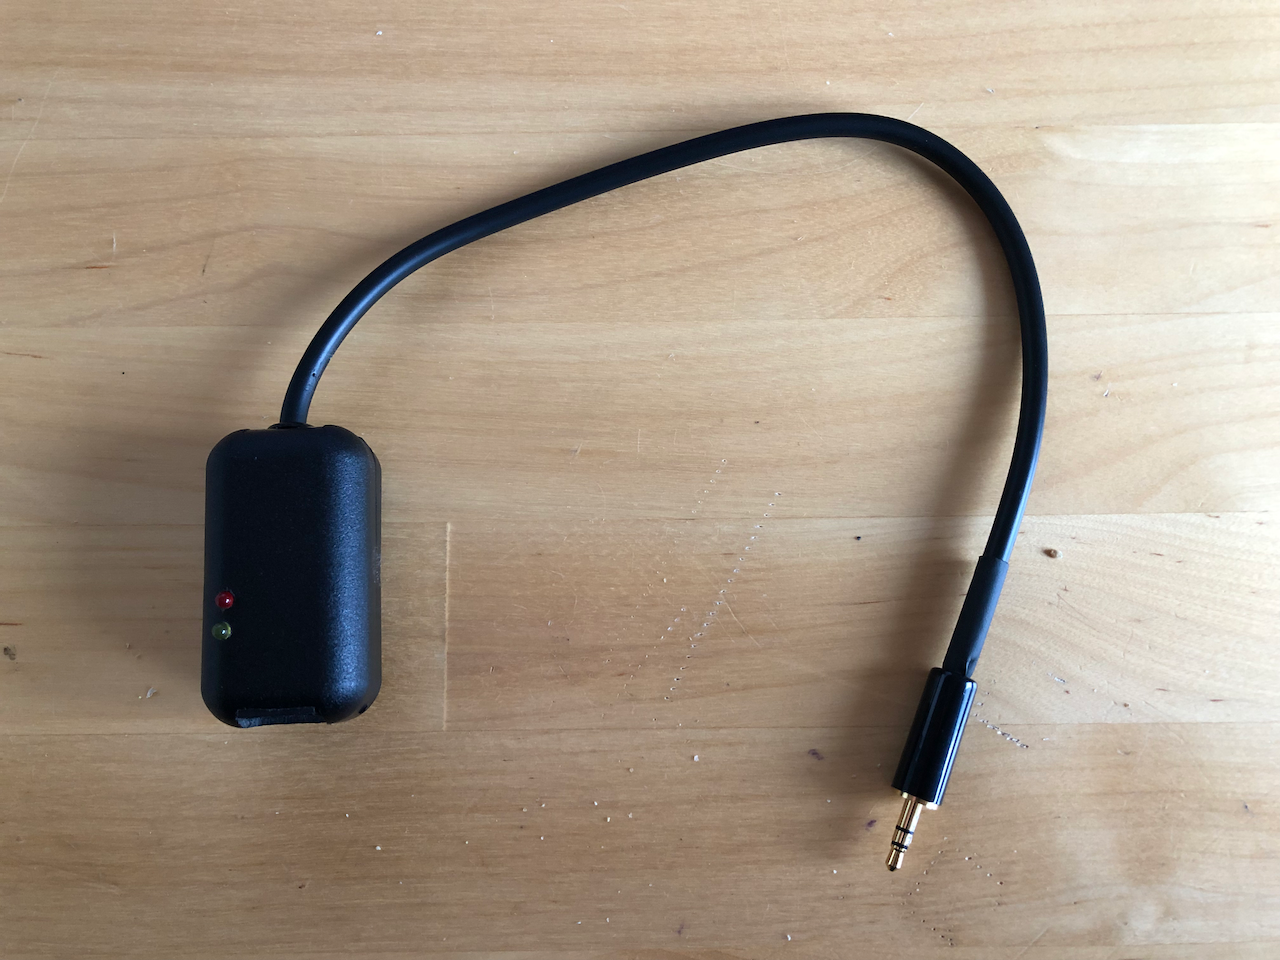
Final interface, attached to a 3 pin ‘jack’ plug which goes into the X1 and the PS/2 keyboard (or USB->PS/2 adapter) plugs into the K24 socket.
Firmware
The firmware is written in C, originally by Sato Kyouchi which I took, translated and am in the process of updating for bi-directional PS/2 control. As the firmware currently stands, it is fully functional, works extremely well, just doesnt have LED control or keyboard disconnect/re-connect RESET control.
In order to compile the C source you must use the Renesas development tools which are Windows 7/8/10 based. You will need to create a login on the Renesas website in order to download the tools and documents. There is no fee for using the tools with the R8C.
Download the Compiler and IDE and install, you will have two main packages installed under the Start Menu group Renesas, namely: ‘High-performance Embedded Workshop’ and ‘Flash Development Toolkit 4.09’
Editting and Compilation
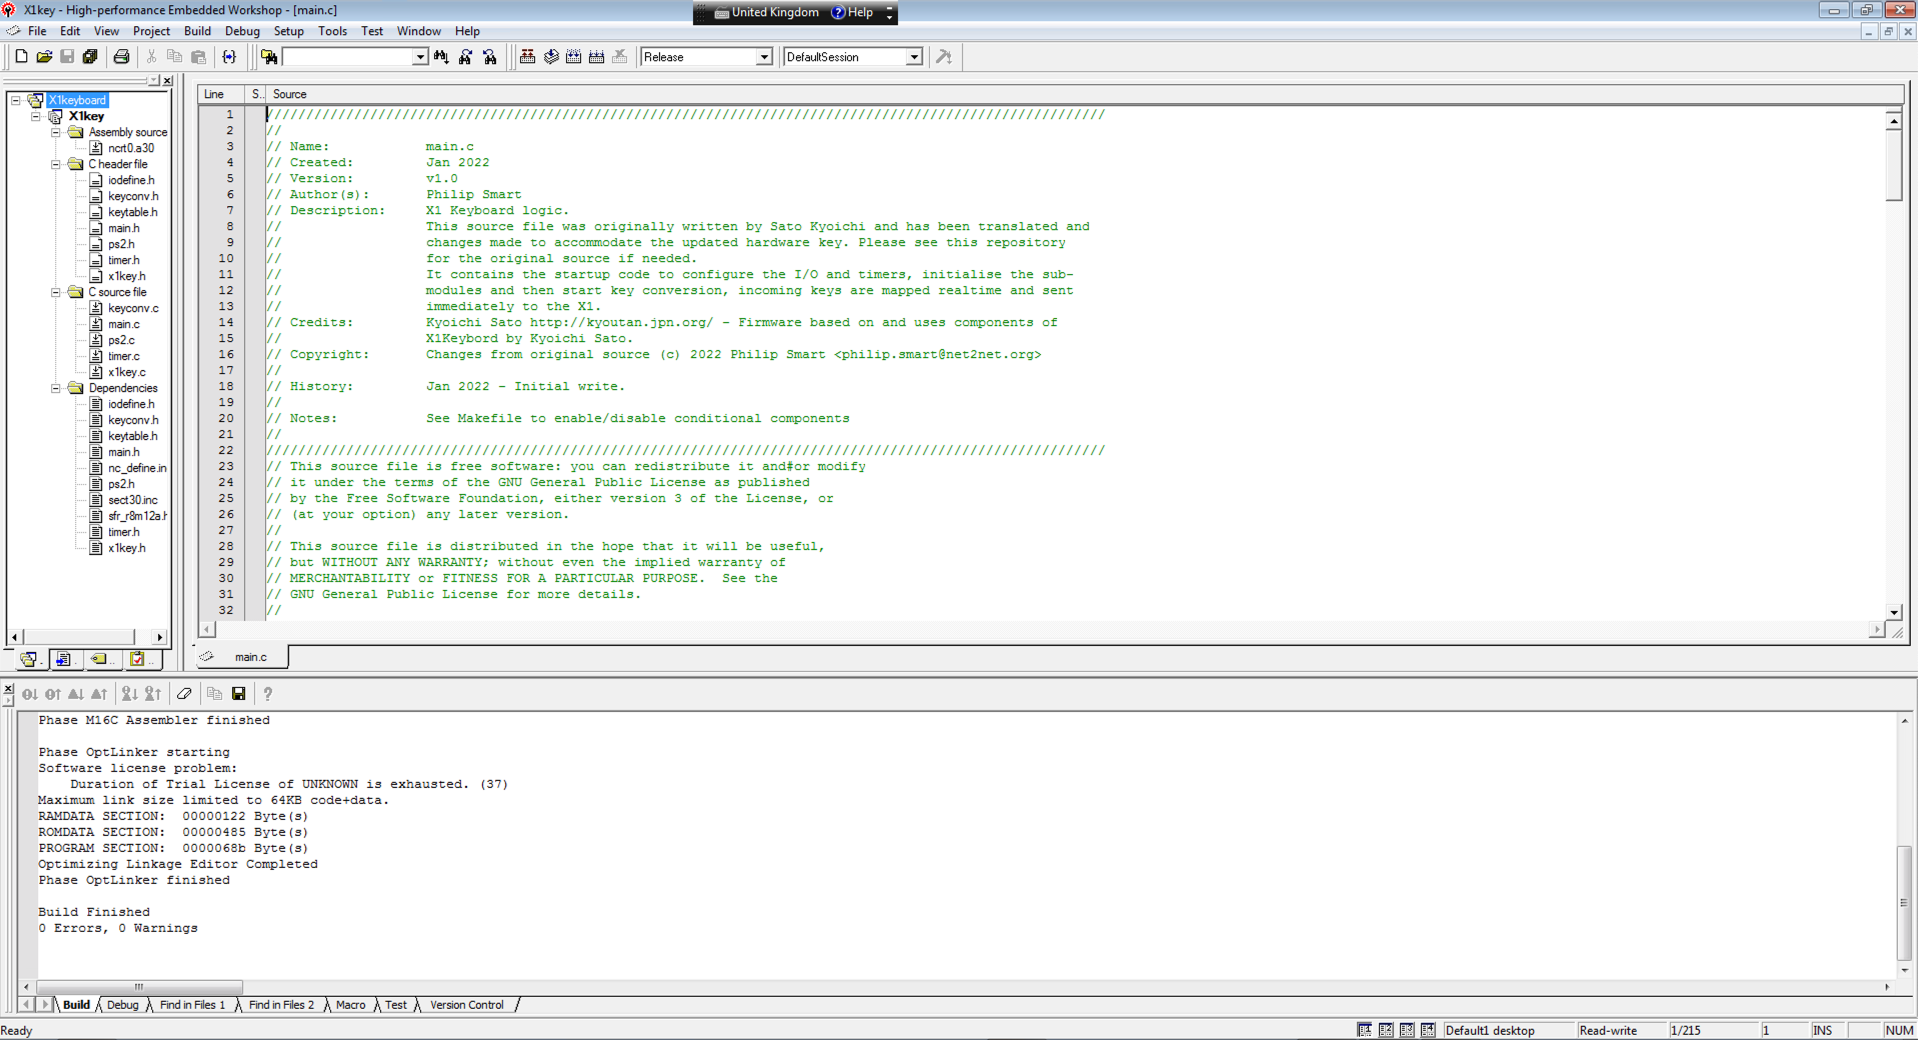
To launch the integrated development environment, go to Start Menu->Programs->Renesas->High-performance Embedded Workshop - Launch the ‘High-performance Embedded Workshop’ application. The look and feel is very similar to Netbeans, Eclipse or Visual Studio and wont take you long to be able to use it. I personally develop on Linux and use SCP to sync the sources to my Windows machine as I find it easier.
Use git clone to pull the software repository onto your computer.
git clone https://github.com/pdsmart/x1key.git
I developed with the source located in D:\Renesas\x1key and the paths will be setup relative to this path. Opening a new Workspace in a different location will change the paths so install the ‘x1key project’ wherever you feel fit and on first Workspace open the paths should be adjusted.
To compile, go to Build -> Build All, ie. as per the image below.
Programming
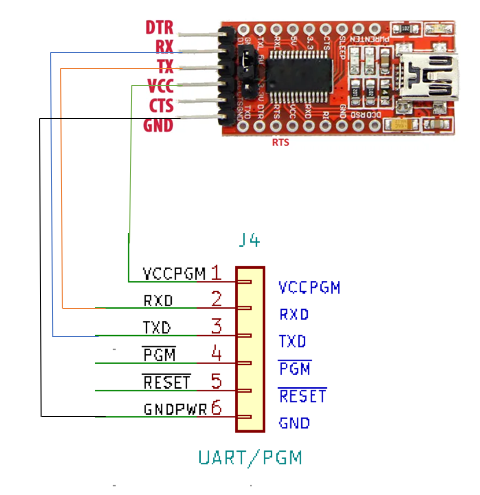
Obtain and connect a USB to UART TTL Adapter which can be commonly found on Ebay or Amazon. If the adapter has a voltage jumper, ensure it is set to 5V. Connect wires from the adapters pins to the ‘x1key’ interface as per the diagram below.
To launch the Flash Development Toolkit, go to Start Menu->Program->Renesas->Flash Development Toolkit 4.09 and launch the Flash Development Toolkit 4.09 application. This application has a lot of options but we will just use the simplest method.
Go to >File->Open Workspace, navigate to the directory where you installed the ‘x1key project’ repository, go into the ‘flash’ directory and select ‘X1KEY.AWS’. This will setup the required environment for programming.
Once the workspace has been opened, select the binary file generated by the IDE compiler (this is a one time action, it will automatically refresh on each compile), via File->Open Data File and navigate to the directory where you installed the ‘x1key project’ repository, go into the Release folder and select ‘X1key.mot’. The binary file will be loaded and the contents shown in Hex in the large ‘USer Flash’ window.
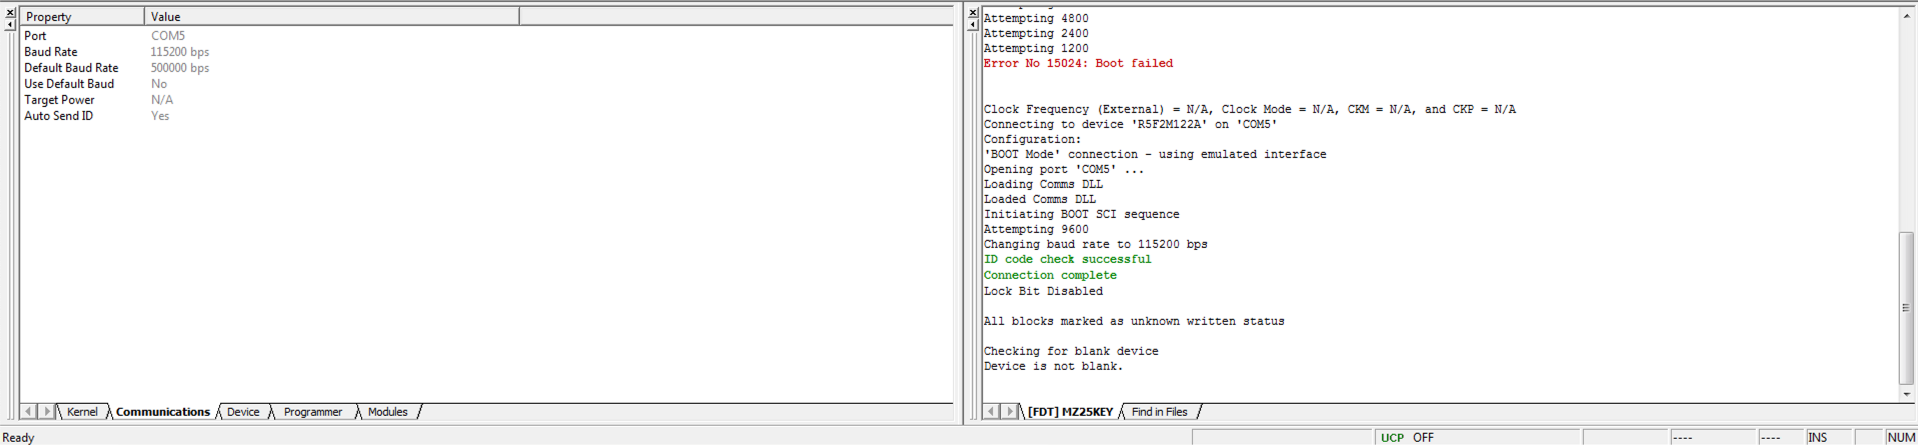
Go to Device->Configure Flash Project and a new tab will open up on the bottom of the application, select Communications. Double click on Port and set the communications Port to the value enumerated on your machine after plugging in a USB to UART adapter. Ensure the ‘Select Interface’ is set to ‘Direct Connection’ and click Next. Set the ‘Recommended Speeds’ to 115200 and click Finish.
On the ‘x1key’, place the ‘Programming Jumper’ across both pins (should normally only be on 1 pin when not programming), unplug the USB adapter, wait a second then plug it back in, this basically forces a reset of the ‘x1key’ which you could do via shorting pin 5 on the ‘x1key’ programming header to ground, it is just easier to unplug the USB cable!
Go to Device->Connect to Device and the Flash application will attempt to communicate with the ‘x1key’ interface. If it fails, try again, it tends to work on the 2nd or 3rd attempt! If it doesnt work, double check the connections and the voltage. The image below shows the communications settings and the connection attempt and the response.
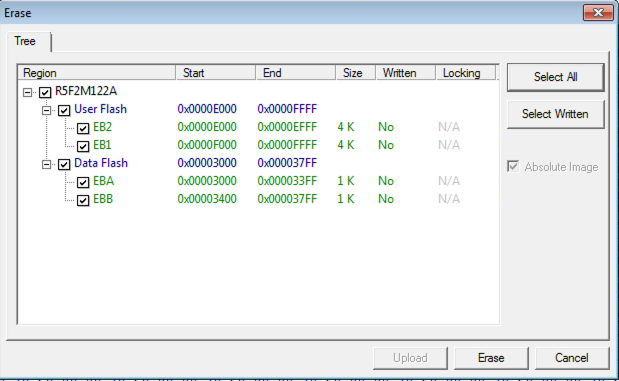
Once connected, perform a block erase of the device, it doesnt do it automatically. Open Device->Erase FLASH Blocks and click on ‘Select All’ and then the ‘Erase’ button, as per the image below.
Now program the device, click on Device->Download Active File and programming will commence, with the output below.
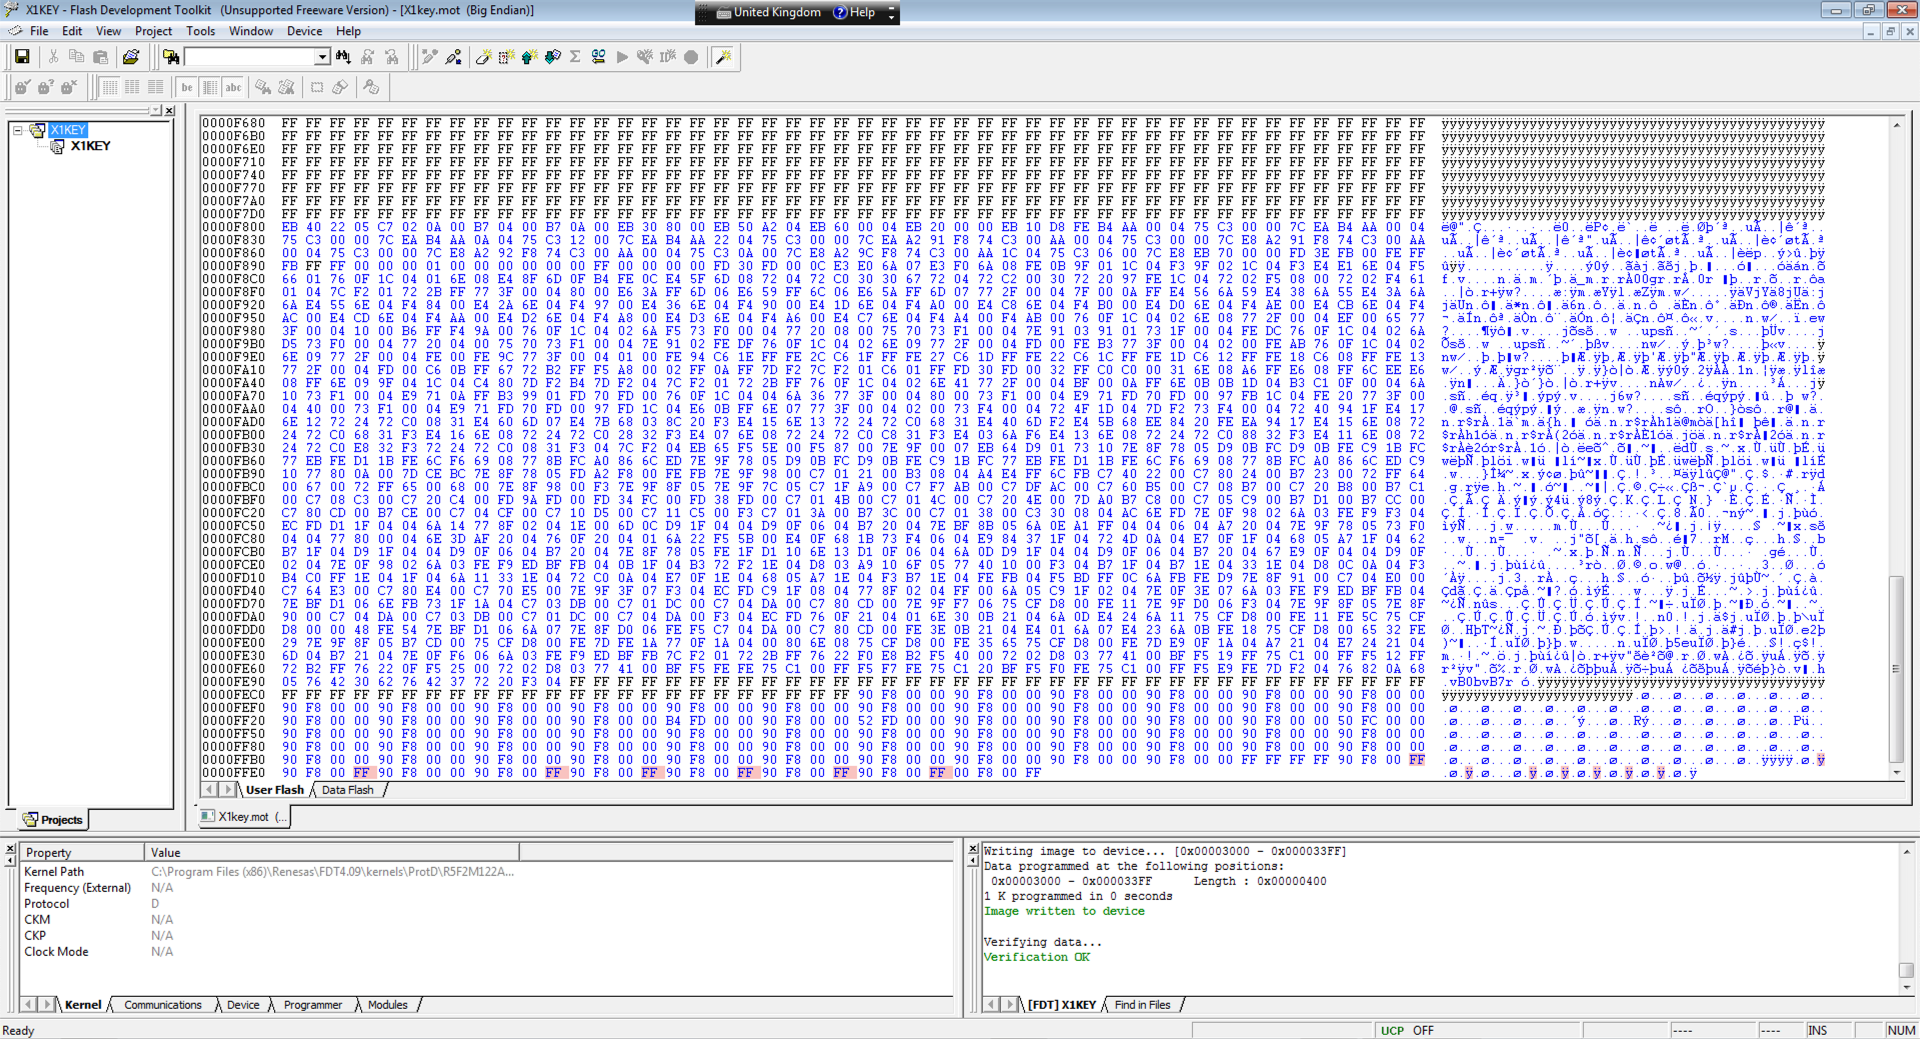
After successful flash, remove the ‘Programming Jumper’, unplug the USB adapter and plug back in and now the ‘x1key’ will run the new download program.
The development cycle is just Edit -> Compile -> Flash, repeat.
Pricing
The table below shows the parts and the cost. You may be able to buy some parts cheaper or miss out things like the 3pin/6pin 2.00mm header and socket or find cheaper suppliers. The list below is made from RS components, Ebay and Aliexpress.
If your not into making one youself, I am considering making some up to to sell on ebay, albeit it would add an extra 16% for their fees and at least 1 hour of my time, so probably around GBP40.00. Direct sell without Ebay would be 16% less and via paypal, contact me if this is of interest to you.
| Part | References | Quantity | Value | Price Each | Price Net | VAT | Price Total |
|---|---|---|---|---|---|---|---|
| 1 | C1 | 1 | 100uF | £0.44 | £0.44 | £0.44 | |
| 2 | C2 | 1 | 100nF | £0.06 | £0.06 | £0.06 | |
| 3 | R1, R7, R8, R9, R10 | 5 | 100R | £0.02 | £0.10 | £0.10 | |
| 4 | R2, R3, R4 | 3 | 1K | £0.02 | £0.06 | £0.06 | |
| 5 | R5, R6 | 2 | 22K | £0.02 | £0.04 | £0.04 | |
| 6 | R11, R12 | 2 | 4K7 | £0.02 | £0.04 | £0.04 | |
| 7 | D1, D2 | 2 | 1N4001 | £0.26 | £0.53 | £0.53 | |
| 8 | D3 | 1 | Power | £0.20 | £0.20 | £0.20 | |
| 9 | D4 | 1 | Activity | £0.20 | £0.20 | £0.20 | |
| 10 | U1 | 1 | R8C M12A | 3.04 | £3.04 | 0.608 | £3.65 |
| 11 | F1 | 1 | 500mA | £0.99 | £0.99 | £0.99 | |
| 12 | Q1, Q2, Q3 | 3 | BC846 | 0.084 | £0.25 | 0.0168 | £0.27 |
| 13 | H1, H2 | 2 | Support | ||||
| 14 | LG1, LG2 | 2 | Argo Logo | ||||
| 15 | JP1 | 1 | Program | £0.06 | £0.06 | £0.06 | |
| 16 | JP2 | 1 | UART TX | ||||
| 17 | JP3 | 1 | UART RX | ||||
| 18 | J2 | 1 | X1 Keyboard | £0.09 | £0.09 | £0.09 | |
| 19 | J3 | 1 | PS/2 Keyboard | £1.33 | £1.33 | £1.33 | |
| 20 | J4 | 1 | UART/PGM | £0.17 | £0.17 | £0.17 | |
| 21 | 3 pin 2.0mm DuPont Housing | 1 | 3pin DuPont | £0.62 | £4.96 | £4.96 | |
| 22 | PCB | 1 | PCB | £2.60 | £2.60 | £2.60 | |
| 23 | Case KM24 | 1 | KM24 | £2.35 | £2.35 | £2.35 | |
| 24 | 3 Pin Jack + Wire | 1 | Jack/Wire | £2.44 | £2.44 | 0.488 | £2.93 |
| Total | £21.07 |
This interface is a work in progress, the hardware and original firmware with LED activity works fine, work will be done shortly to allow the inteface to send commands to the PS/2 keyboard so that control of the LED’s can be made and will reflect the ‘LOCK’ status. Also sending keyboard resets to cater for PS/2 keyboard disconnect/re-connect.
Credits
The original circuit and software was designed by Sato Kyouchi.
Licenses
   Created July 16, 2014

    Kyoichi Sato http://kyoutan.jpn.org/

    There is no guarantee.
    I don't own the actual X1 keyboard, so I'm not sure if it works correctly.
    I did the operation test with X1 turbo III, and it seems that it works generally well.

    The part created by Kyoichi Sato has no restrictions on its use. You can use it freely regardless of whether it is commercial or non-commercial.
    It means that you can copy, modify, distribute, or sell it without permission.
    No need to contact.
The Gnu Public License v3
The source files are distributed in the hope that it will be useful, but WITHOUT ANY WARRANTY; without even the implied warranty of MERCHANTABILITY or FITNESS FOR A PARTICULAR PURPOSE. See the GNU General Public License for more details.
You should have received a copy of the GNU General Public License along with this program. If not, see http://www.gnu.org/licenses/.