 Kuma 40/80 Column Video Upgrade
Overview
Since the launch of the MZ-80A many third parties thought to change this modus operandi as the MZ-80A is the basis of a great business machine and 80 column output was necessary to run business applications, specifically, those for CP/M.
On my website, here, you can find an add on card design to enable 40/80 column switching and also external colour output, it makes no damage to the MZ-80A mainboard apart from socketing an IC but it uses quite a lot of components and the availability and cost can be off putting.
I've seen a few hacks to achieve 80 columns having renovated several MZ-80A's, one being a home brew board floating above the mainboard and another was a myriad of wires! John Edwards of the SUC (Sharp Users Club) some years back advised me of a Kuma Computers modification which I didnt really consider at the time due to the amount of changes needed on an MZ-80A mainboard and my desire not to modify classic machines.
I'm now in possession of a Kuma Computers 40/80 column modified MZ-80A and can conclude that it works well. This modification is something other MZ-80A owners might want to make (with sufficient skill) hence preparing these pages.
This modification sees the rewiring of the gate arrays to the MZ-80B circuit and repurposing of the INTEN signal from the 8255 PC2 port as the 40/80 switch and an updated BIOS to provide 80column support and switching. INTEN was typically used to mask internal interrupt sources from the Z80 if external sources (in the MZ-80AEU) where present, in reality, it is not really needed.
Along with the Kuma modified MZ-80A, I received the ever so elusive MicroTech CP/M and Sharp F-DOS, both work with an unmodified 40 column MZ-80A but with the 80 column modification, they are much more useable.
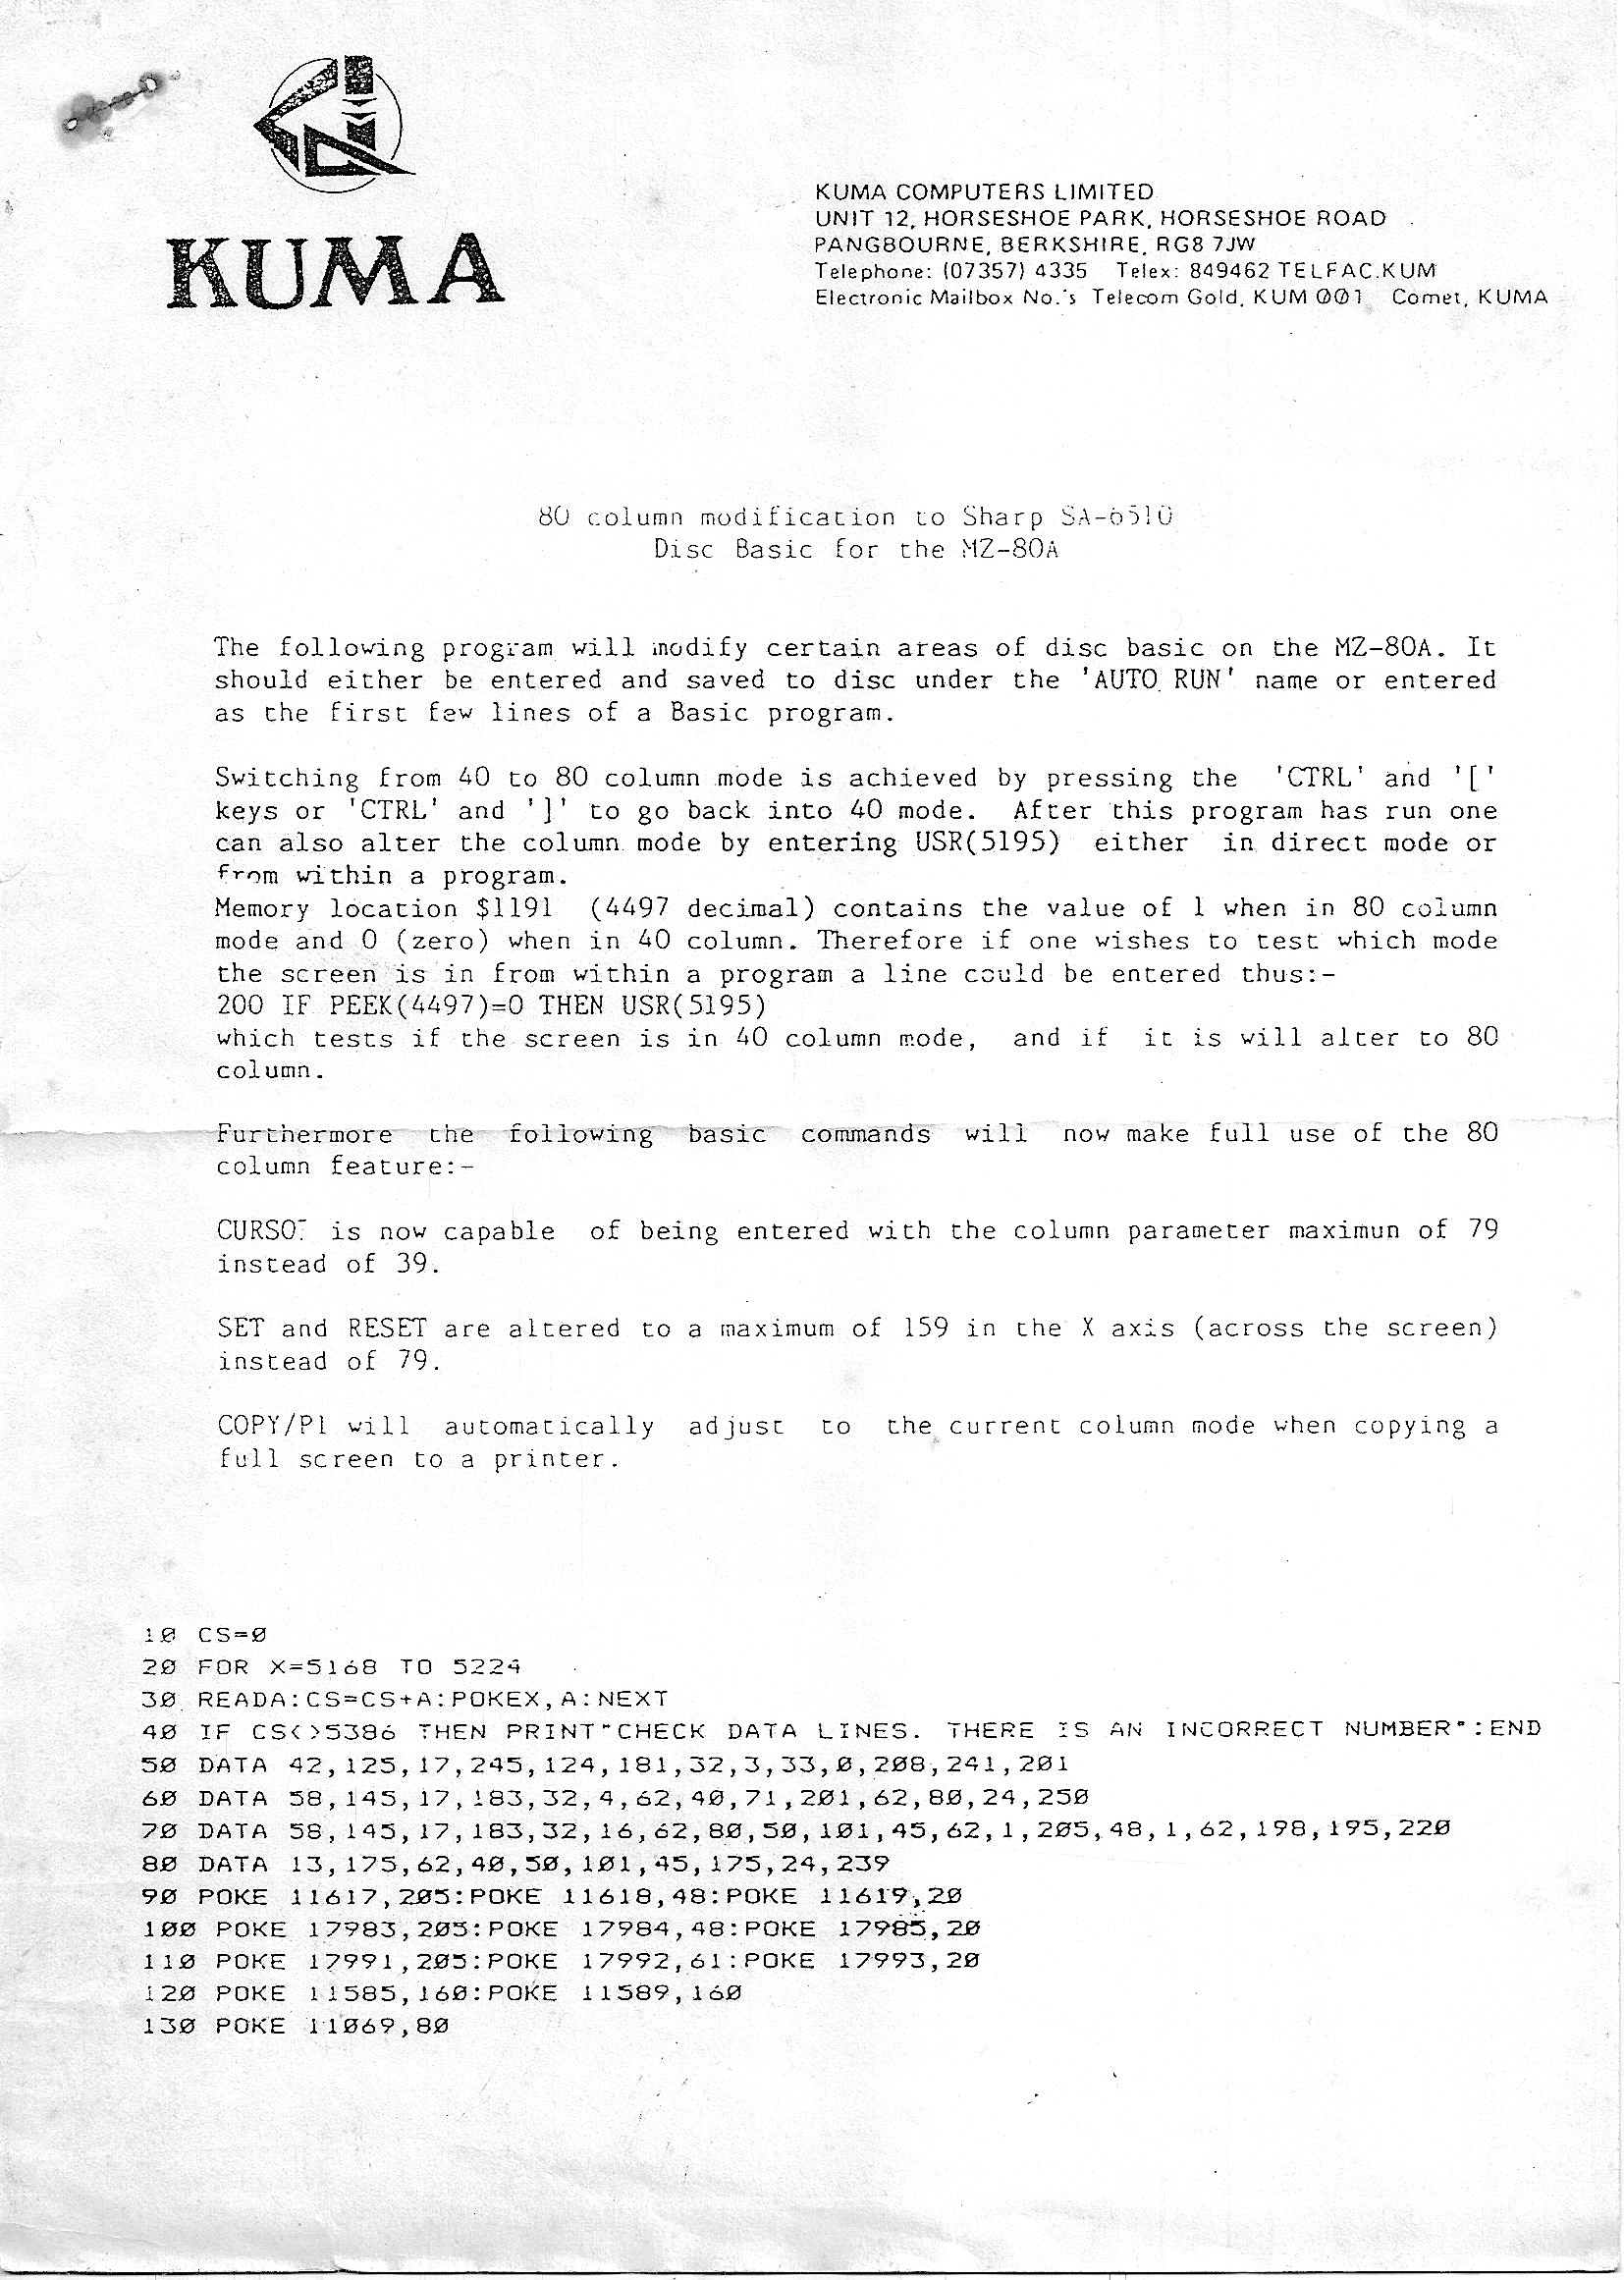
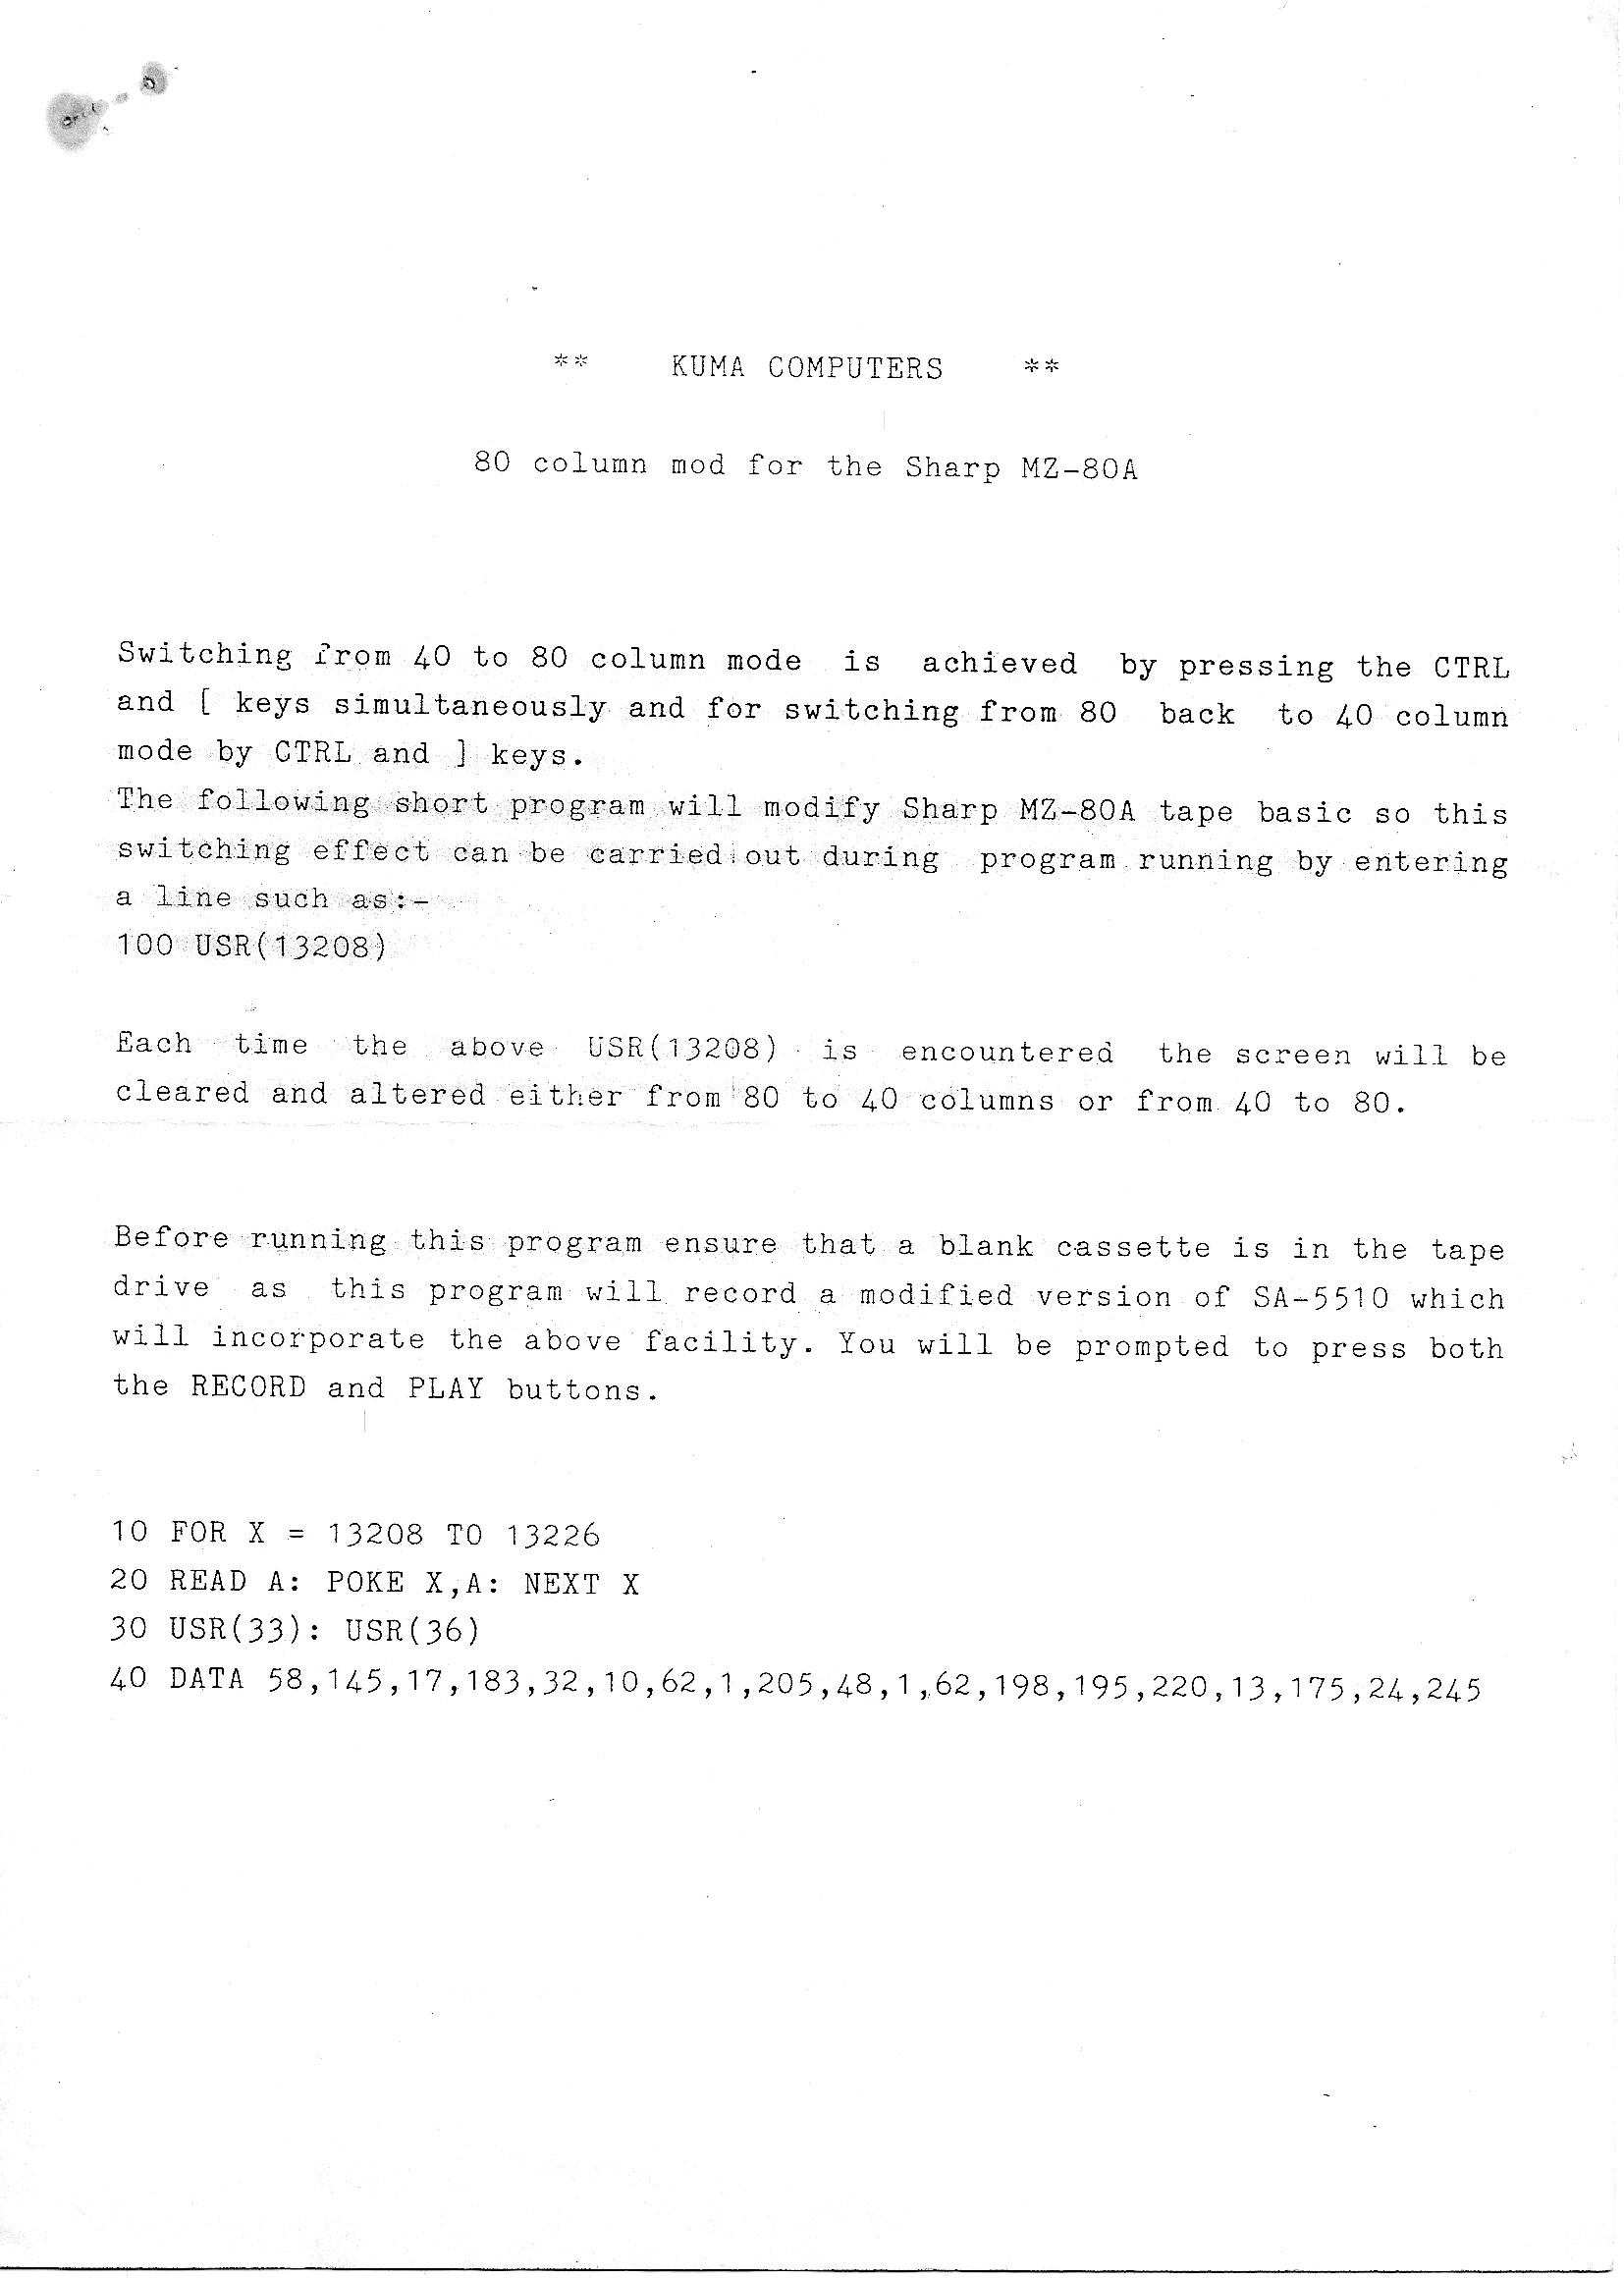
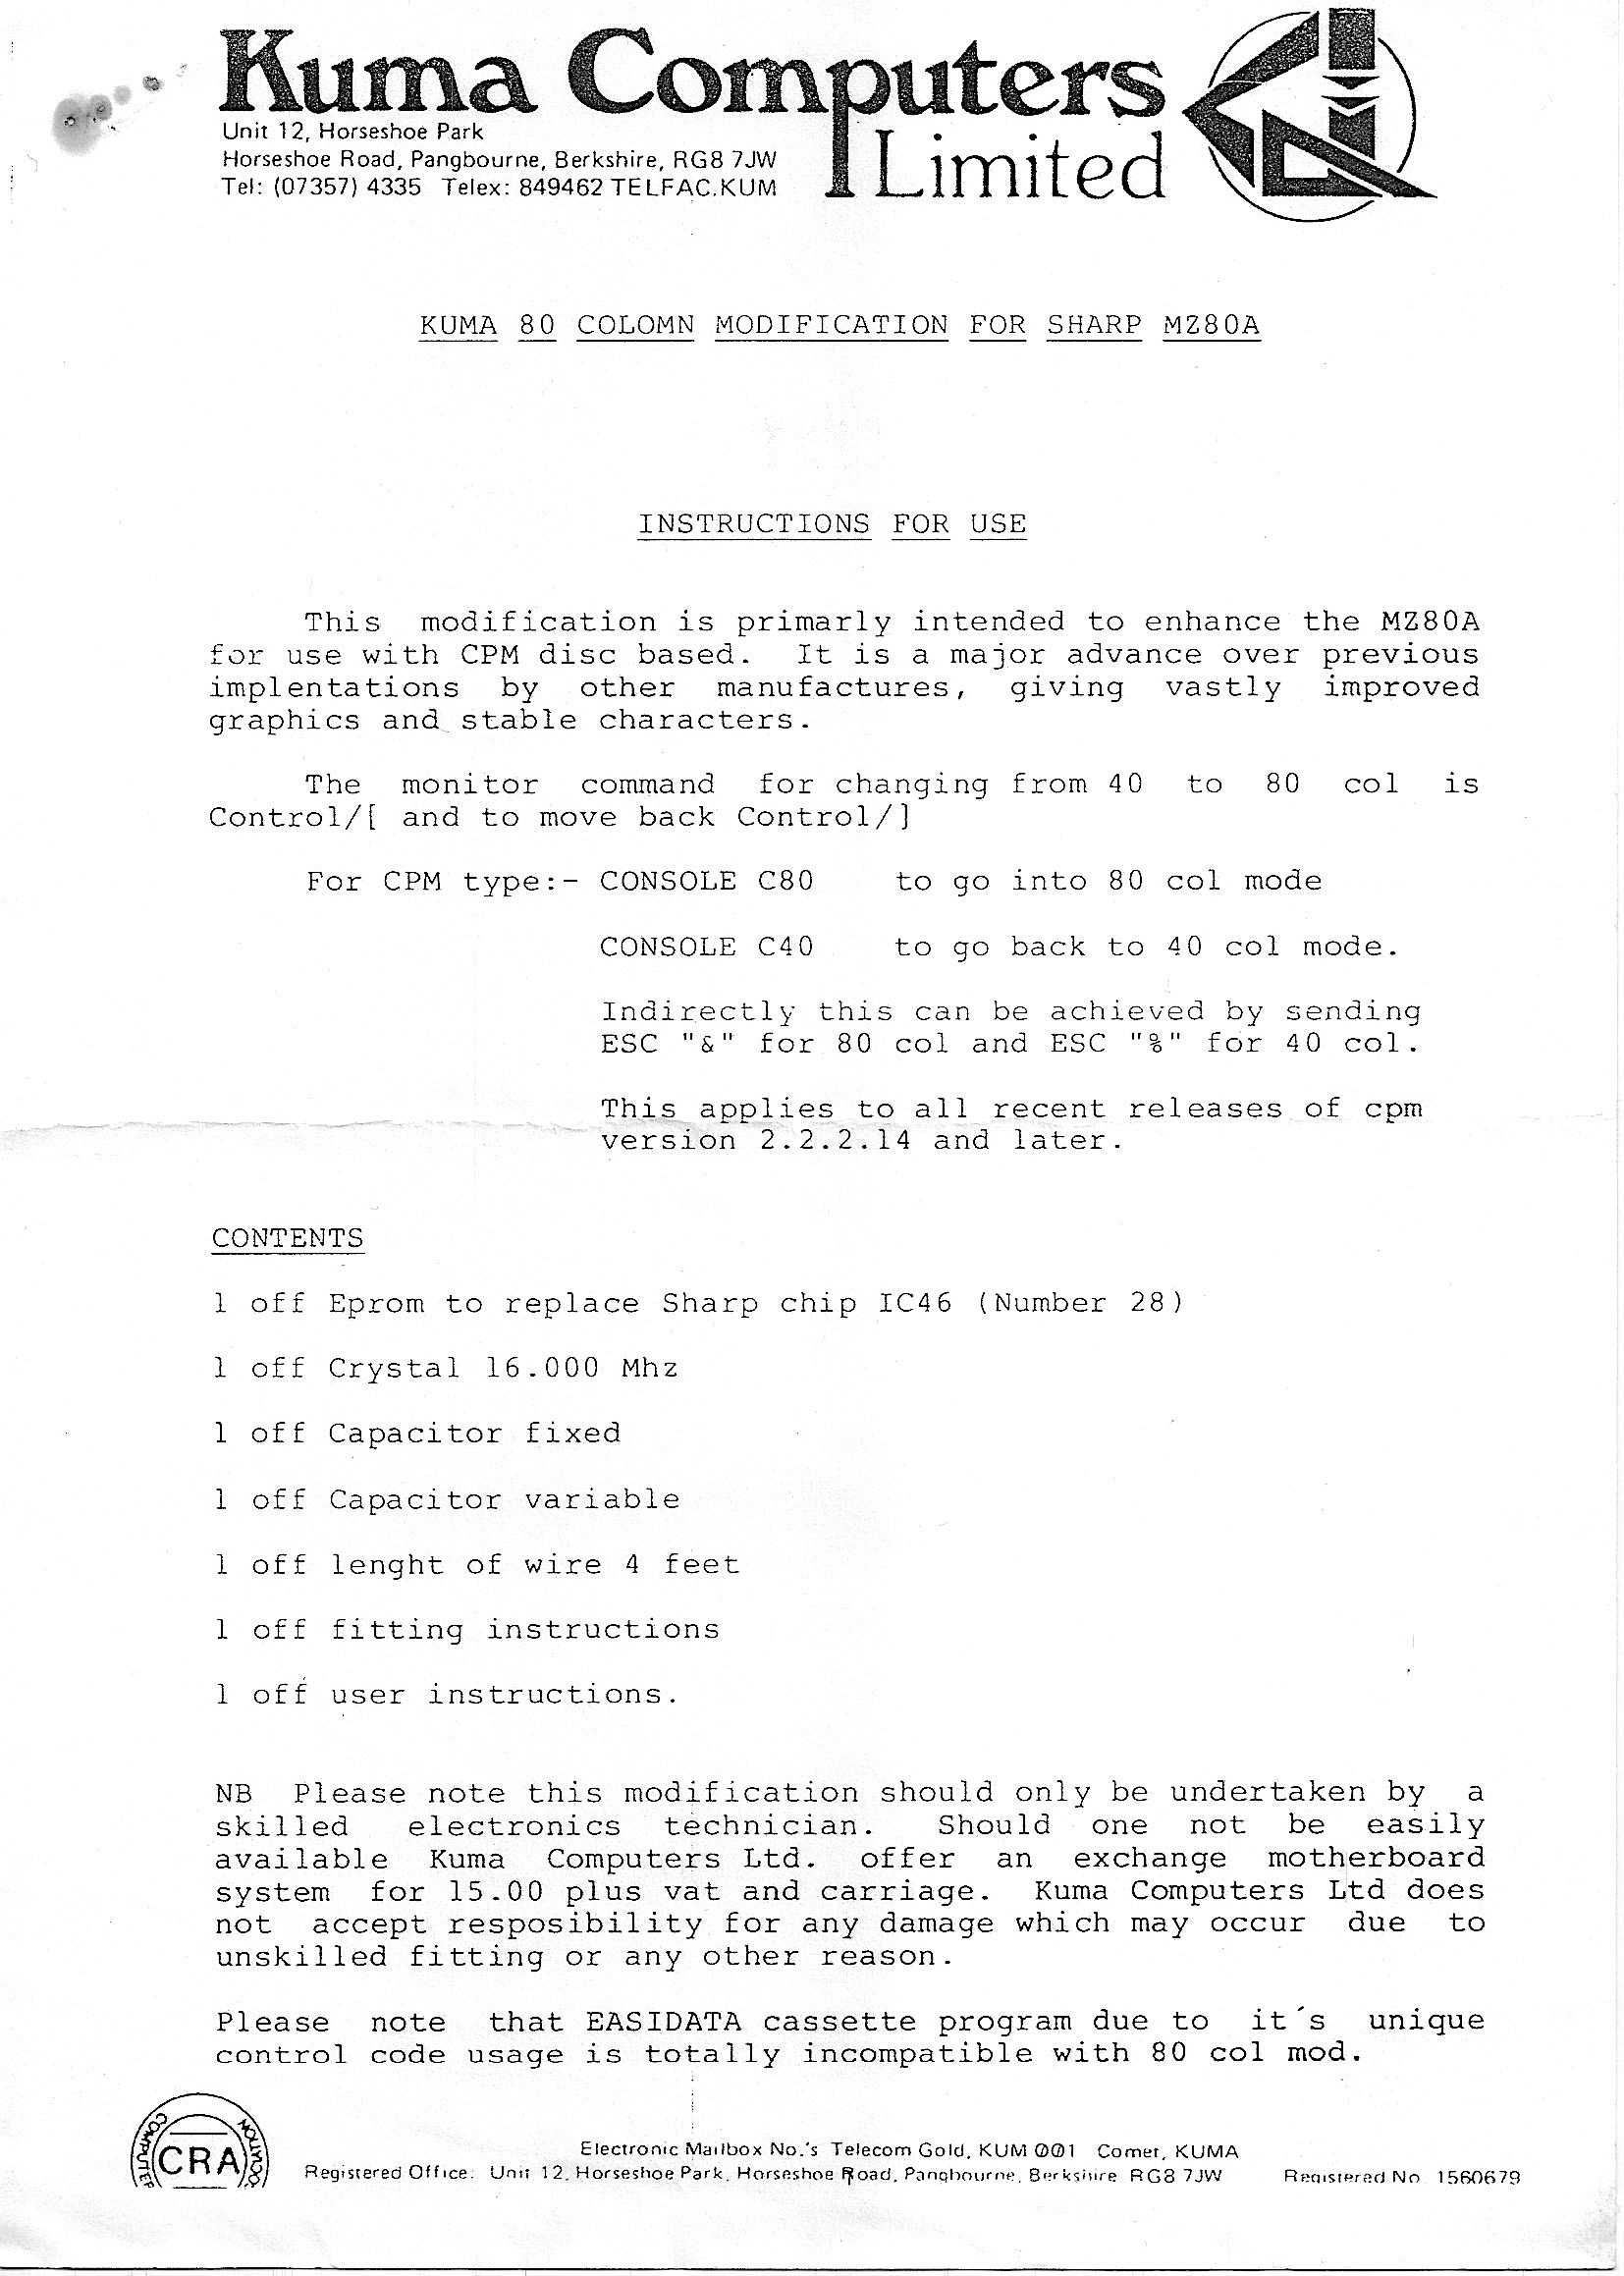
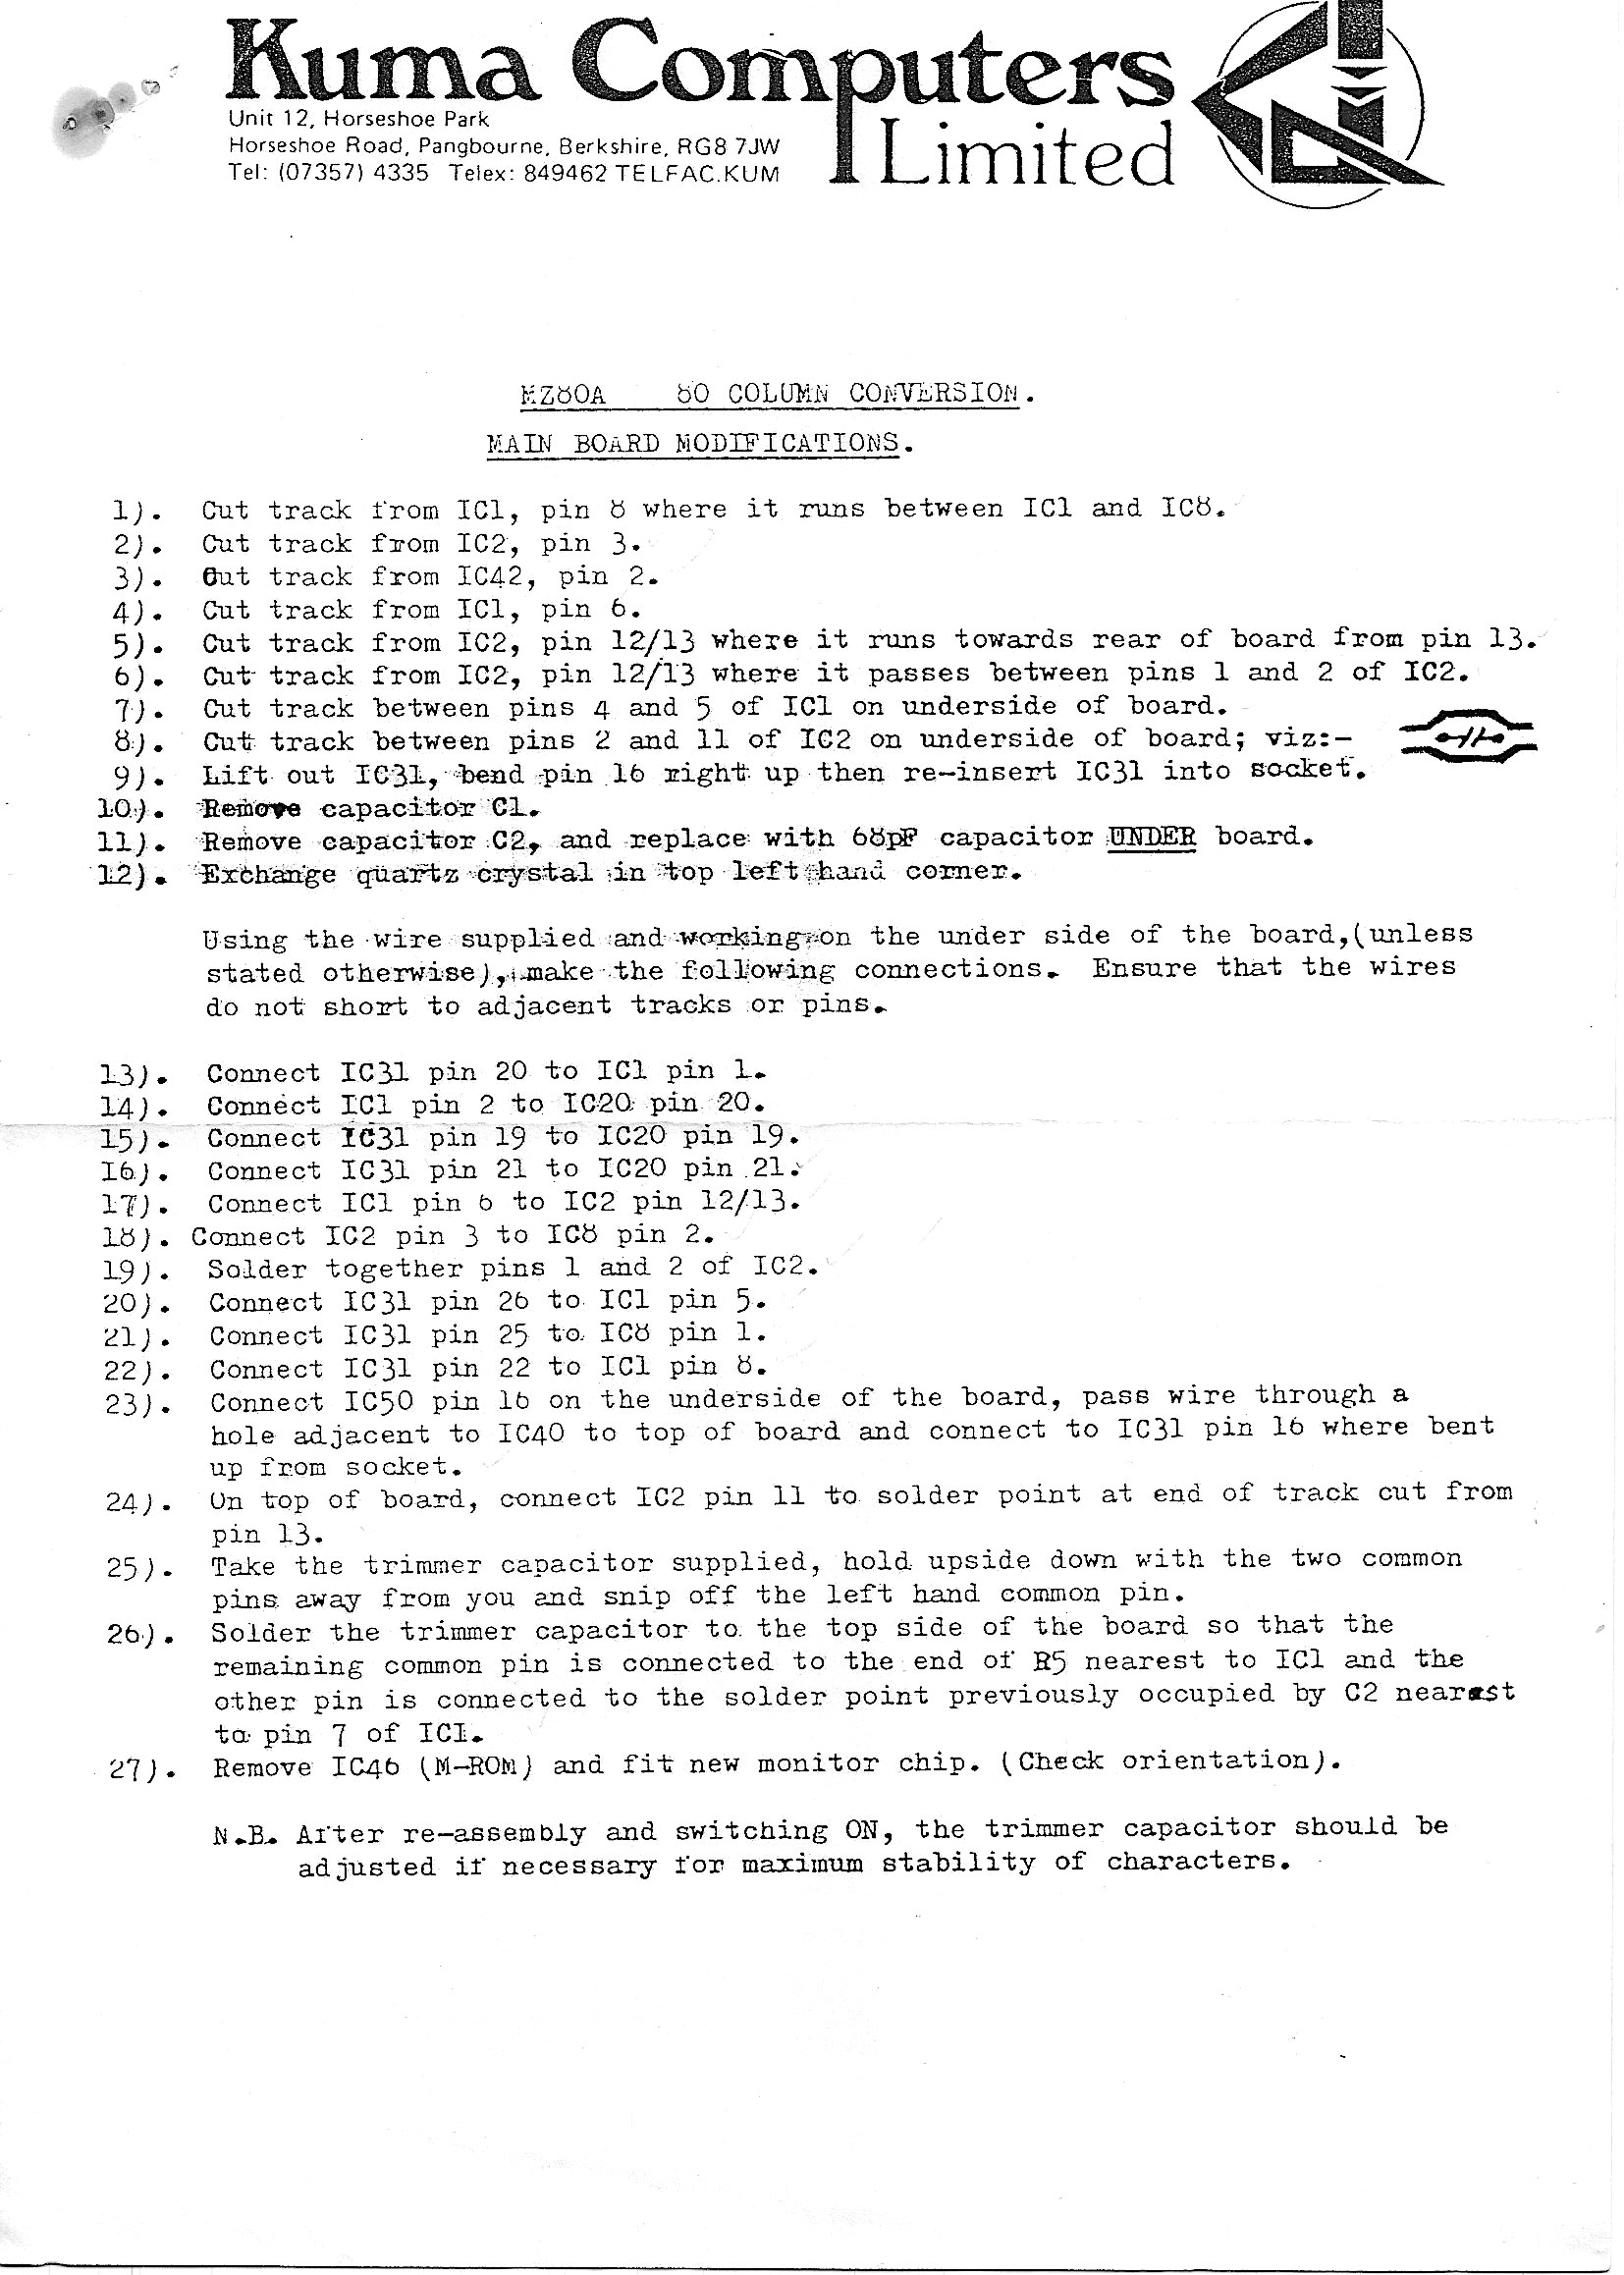
Kuma Manual
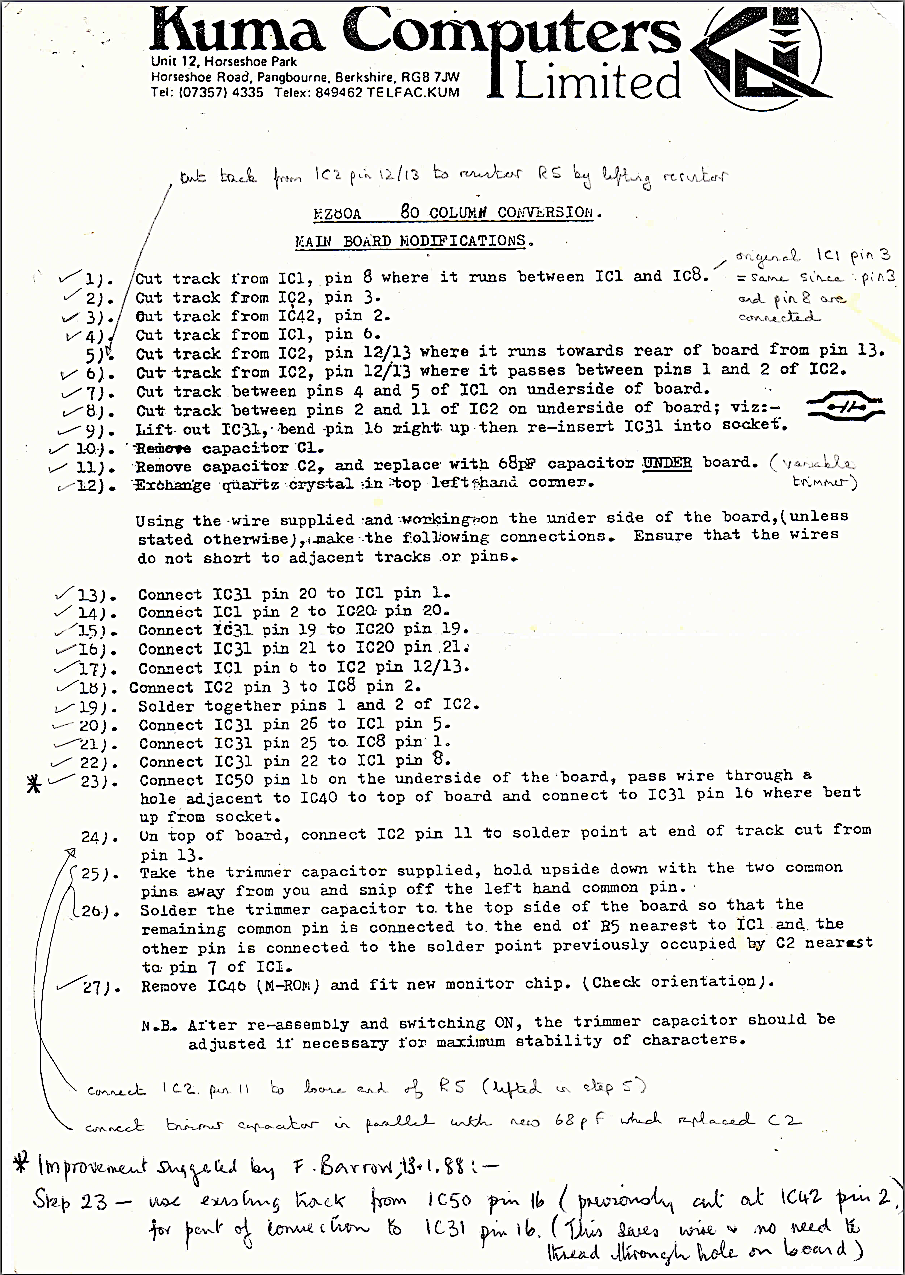
The following 4 pages are scans from the original Kuma document describing how you make the update. It requires only 3 components and wire:
- a 68pf capacitor
- a 100pf trim capacitor (any value in this range as it finely adjusts the character rendering quality)
- a 16MHz crystal
An additional page, sent to me by John Edwards, contains additional notes to be used when making the update:
Installation Photos
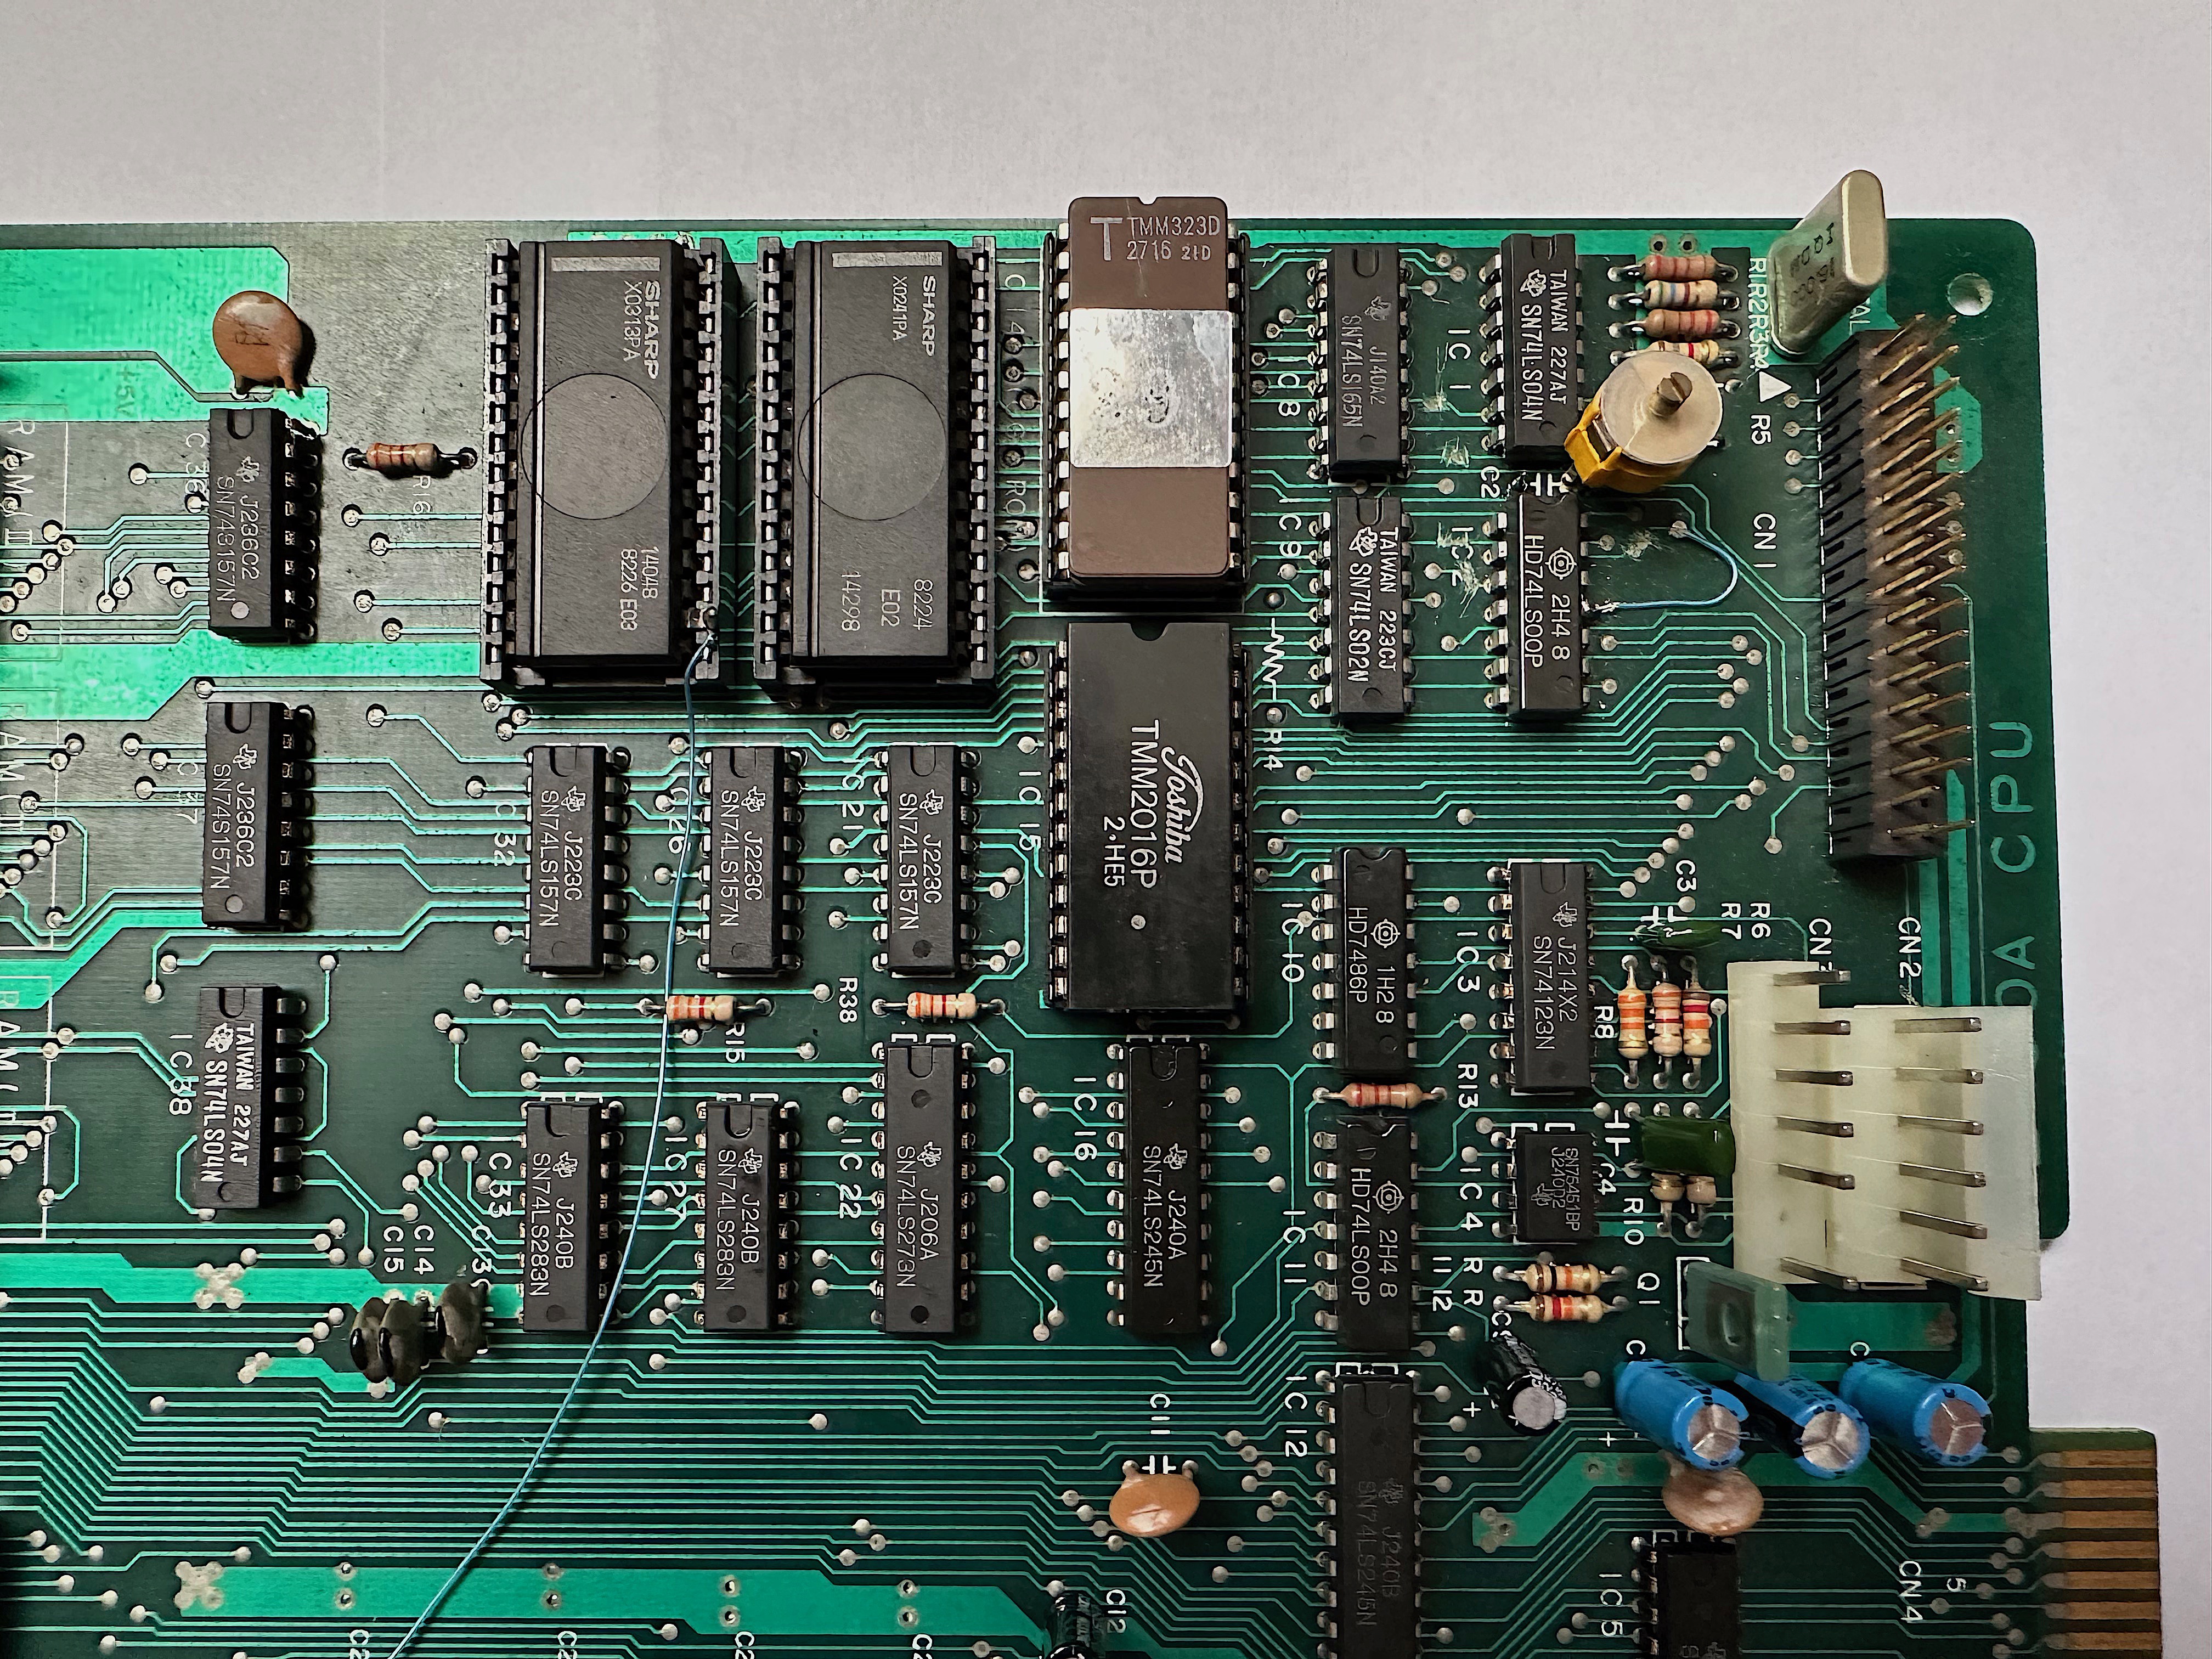
In addition to the Kuma 80 Manual above, I have taken the following pictures of my motherboard which will help you to make the changes.
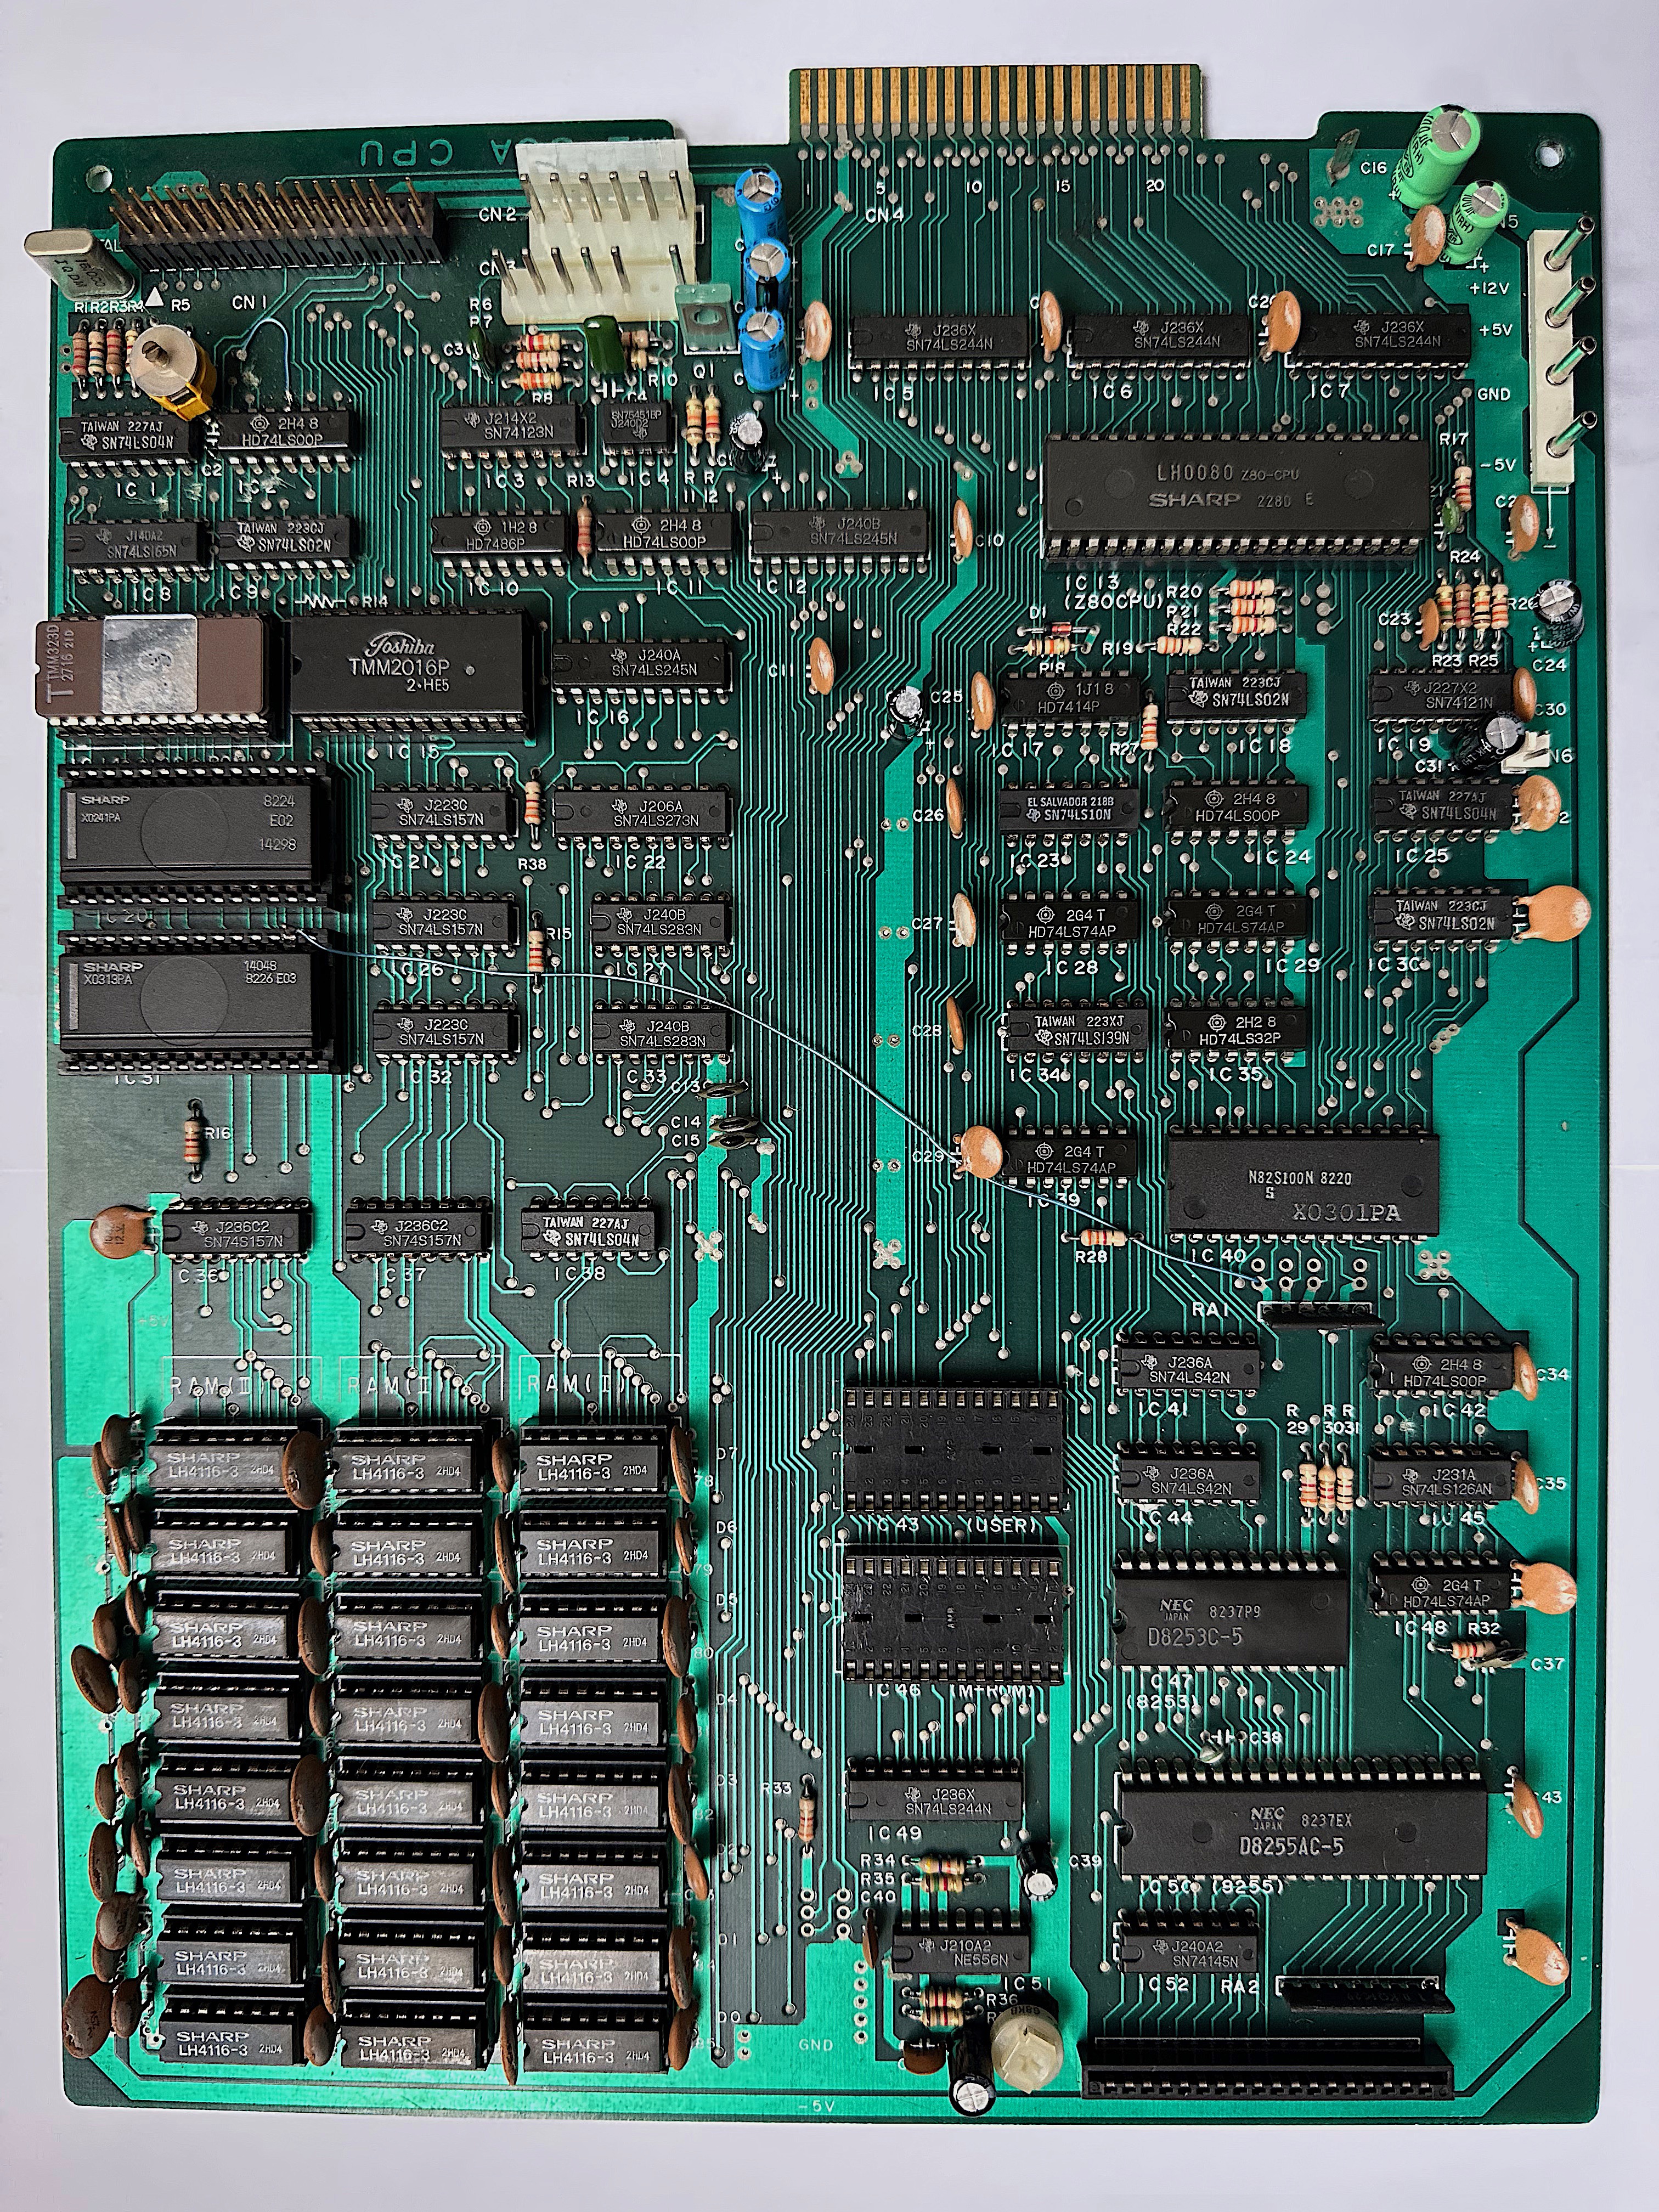
^ - Mainboard topside - note the wire running from the 14048 IC (NB: Just noticed this, normally that would be a 14299 gate array, so this motherboard is an early model) through the hole near IC40 - This connection is connecting the CH80 input on the gate array (which is connected to ground on the notherboard) to IC50 (8255) PC2 port. It allows the software to change from 40 to 80 columns.
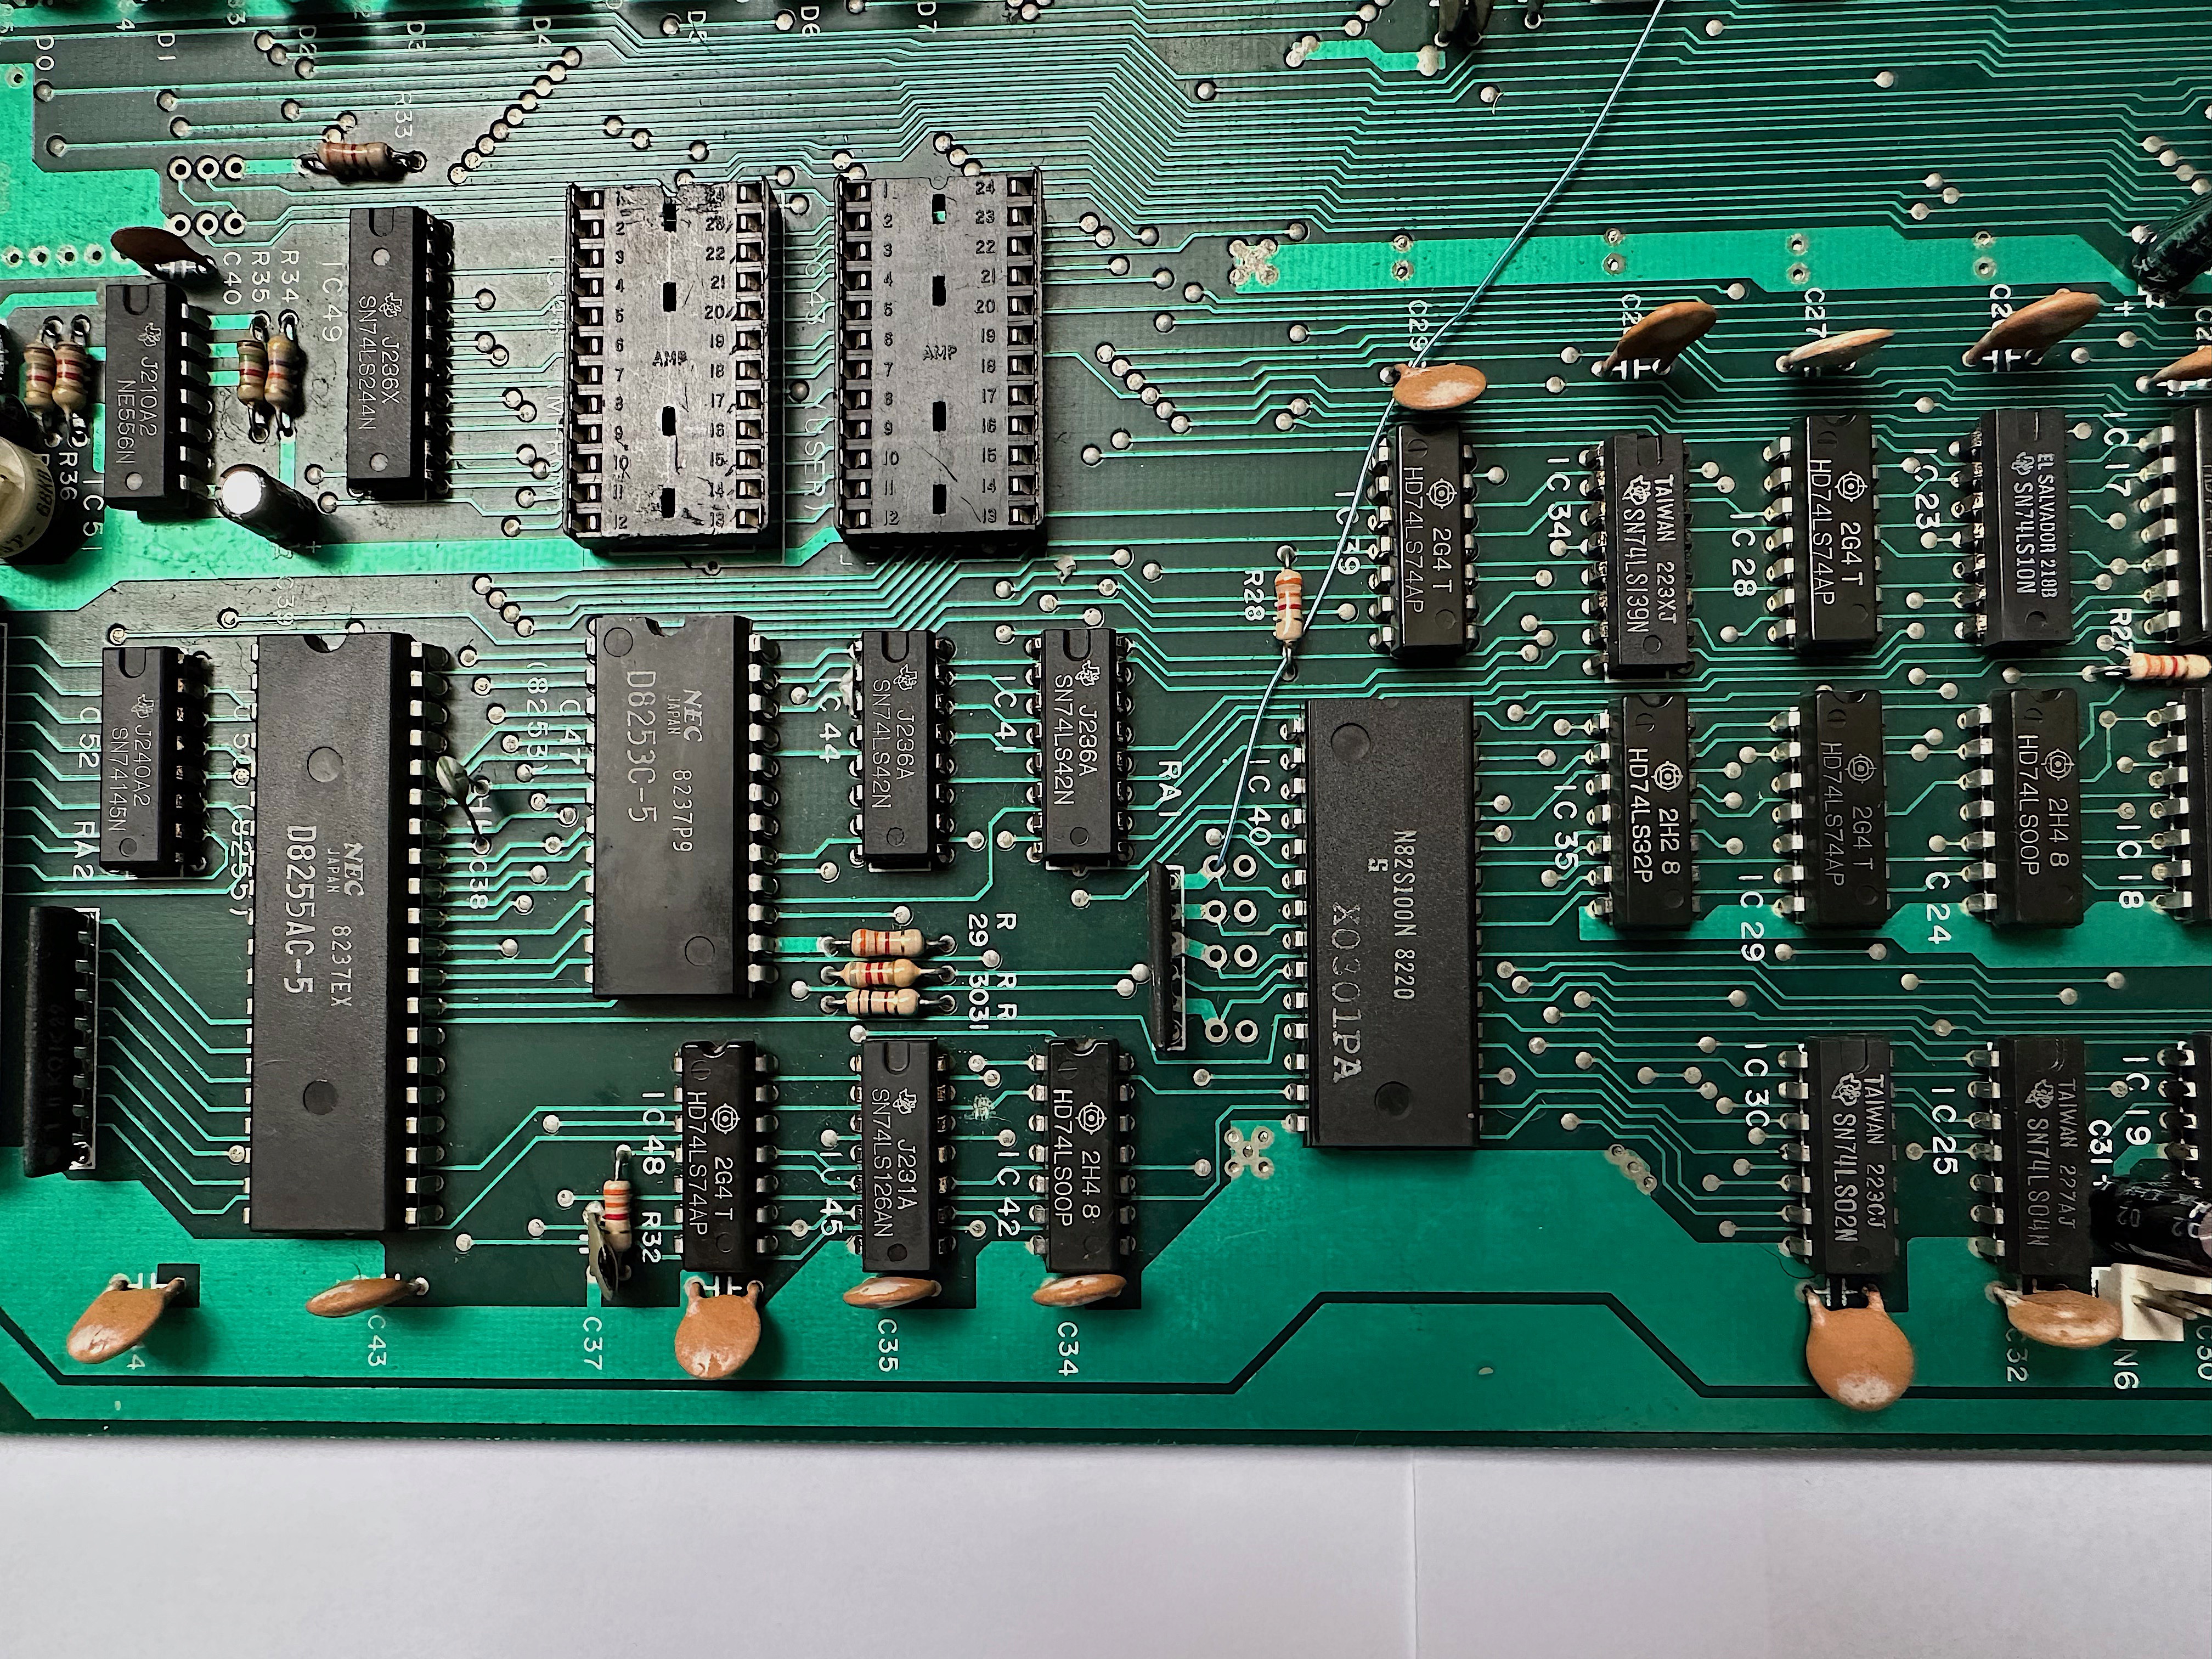
^ - Close up of the above connection.
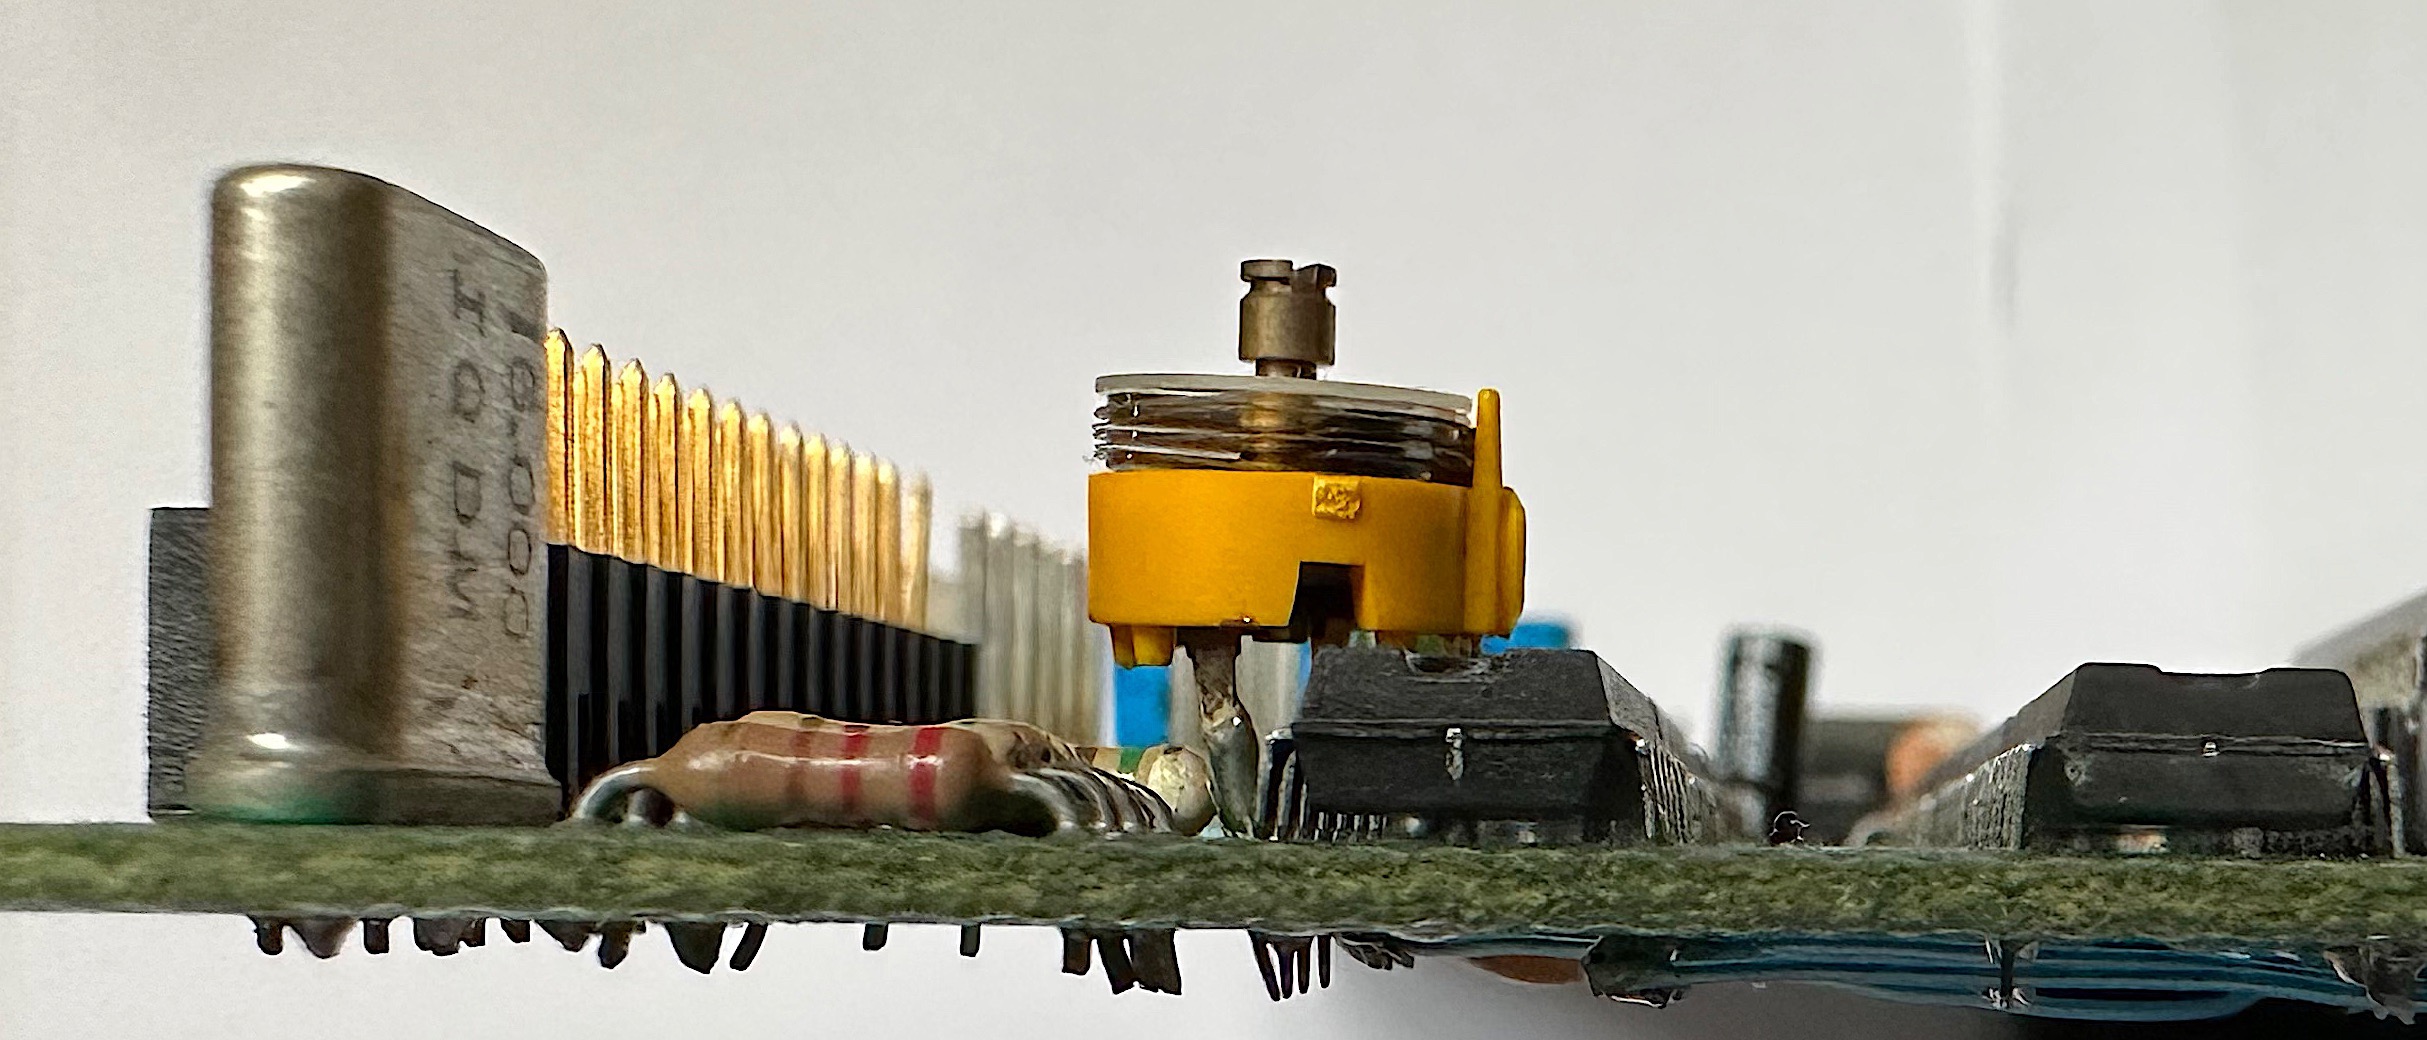
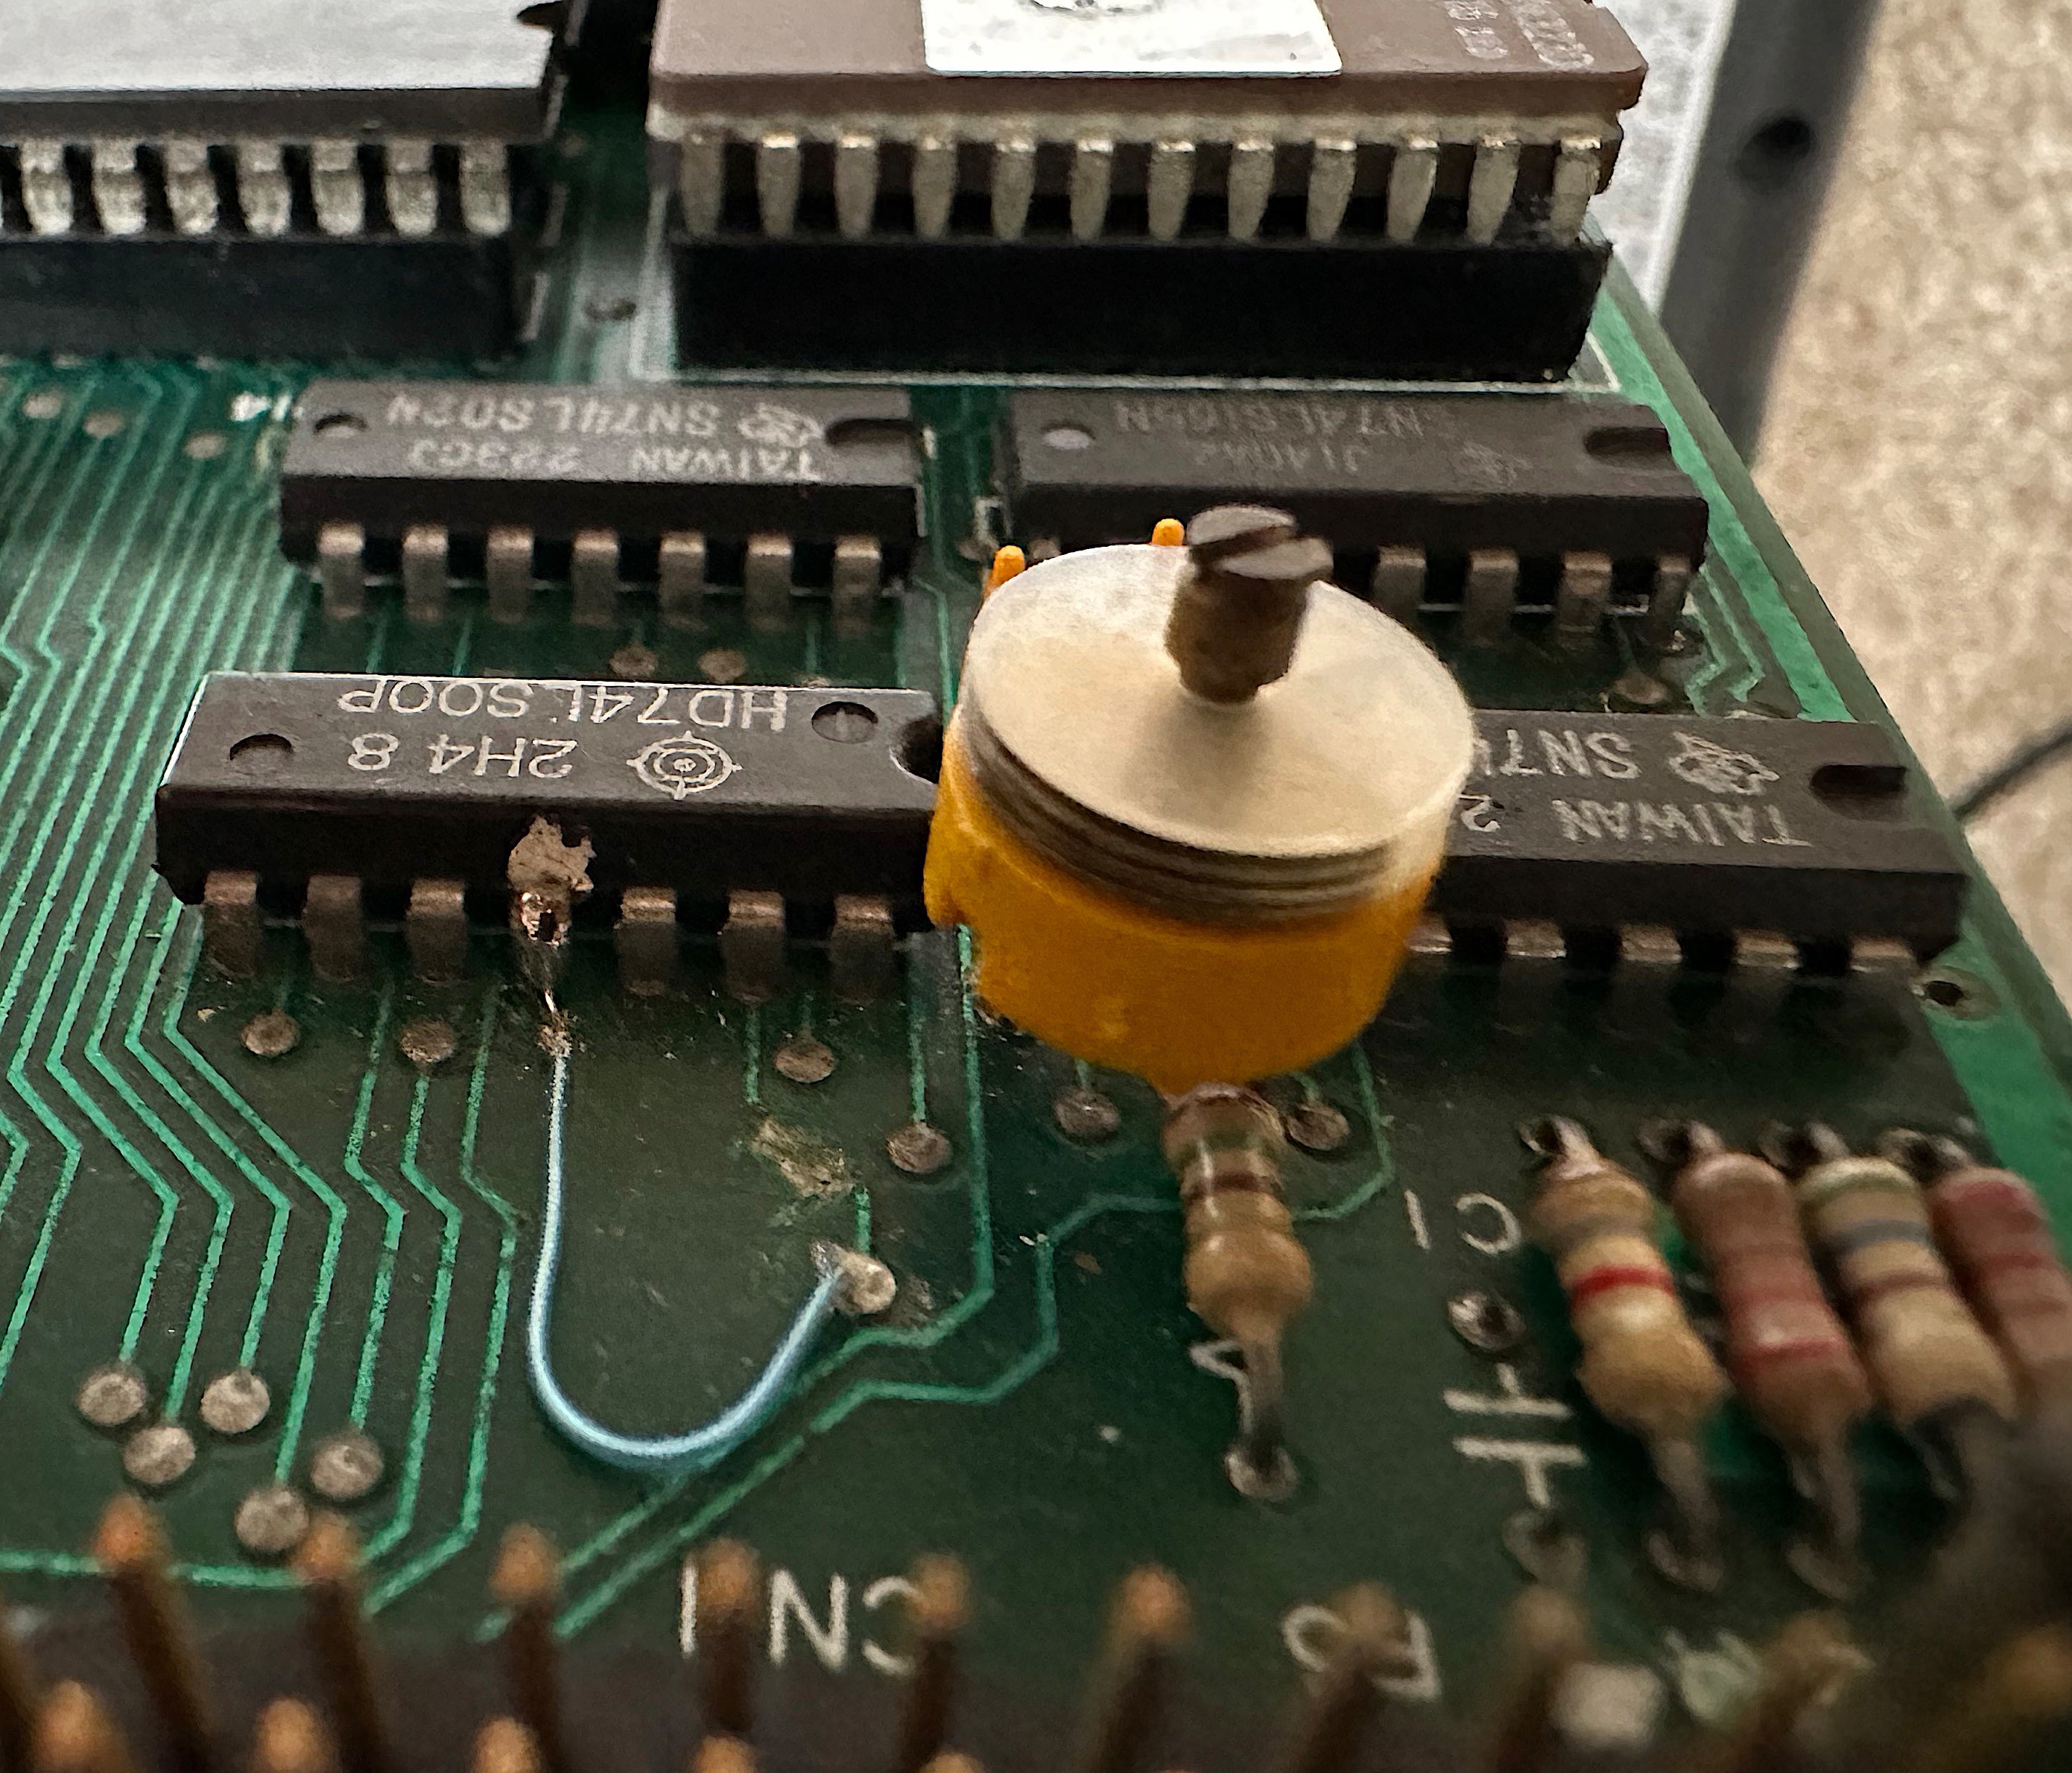
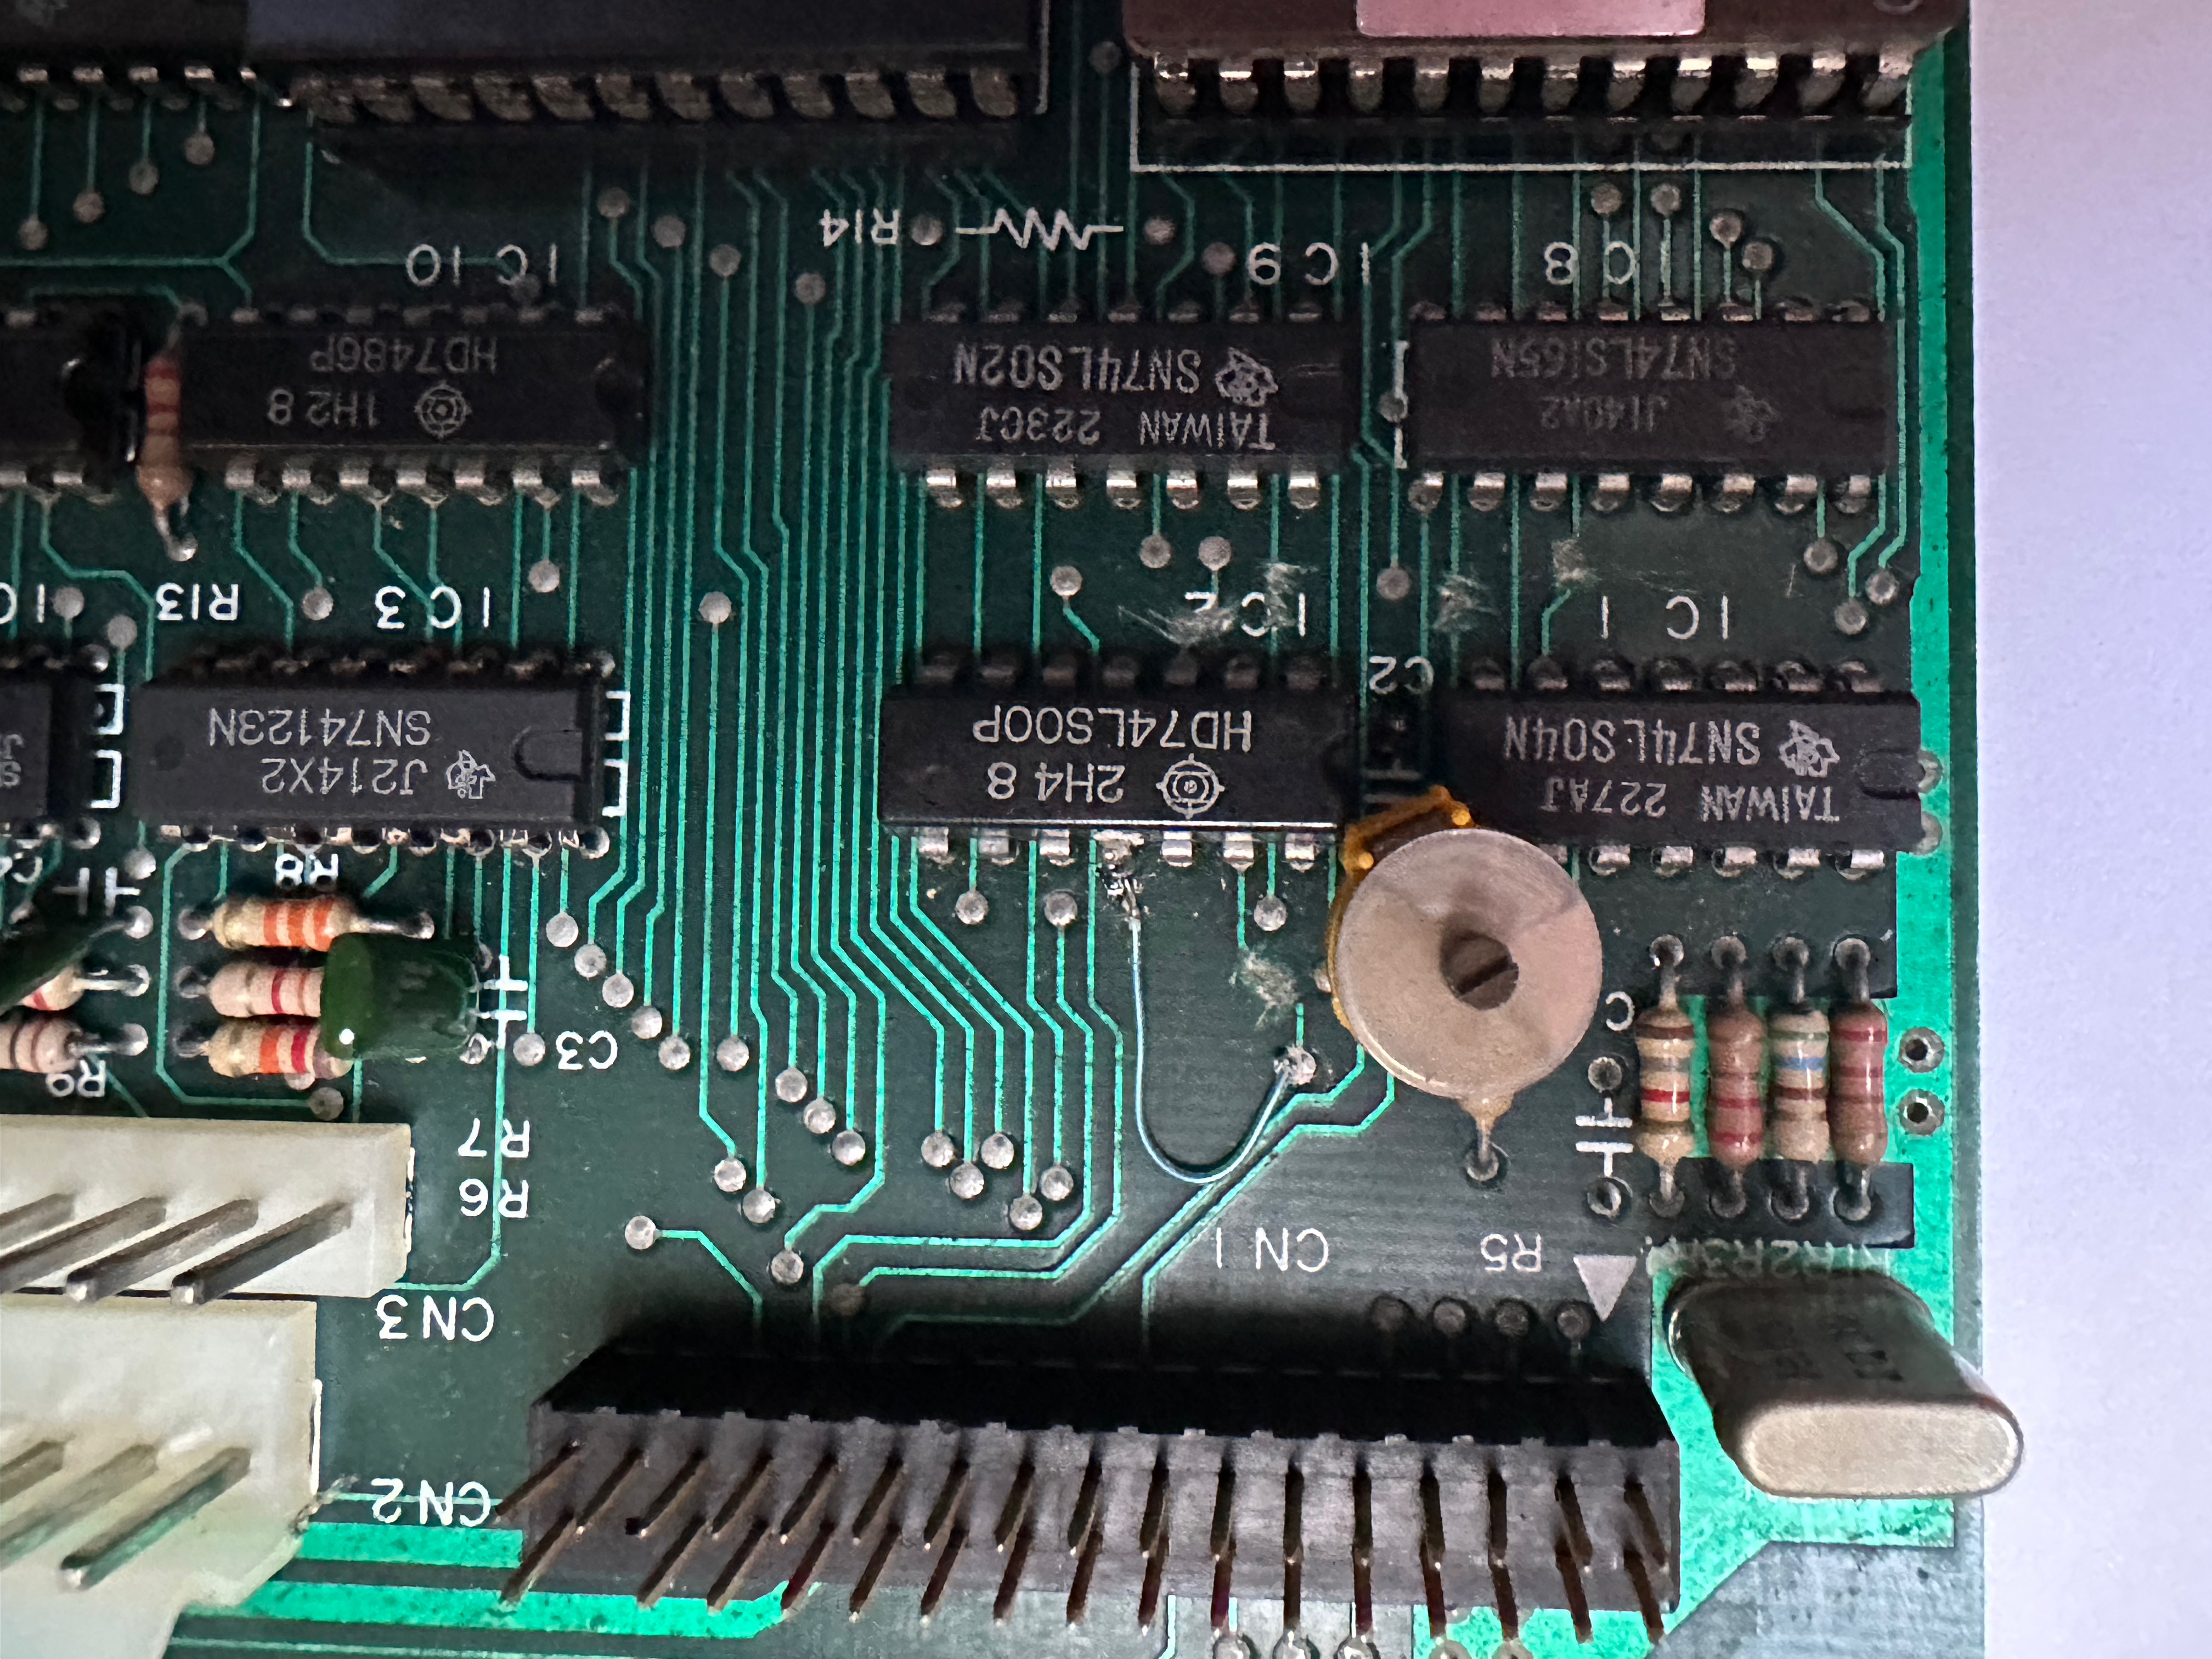
^ - Trim capacitor is mounted into the hole of C2 with a 68pf capacitor mounted on the underside. Note the lands been cut and wire linked. Note the crystal has been changed from an 8MHz part to a 16MHz part.
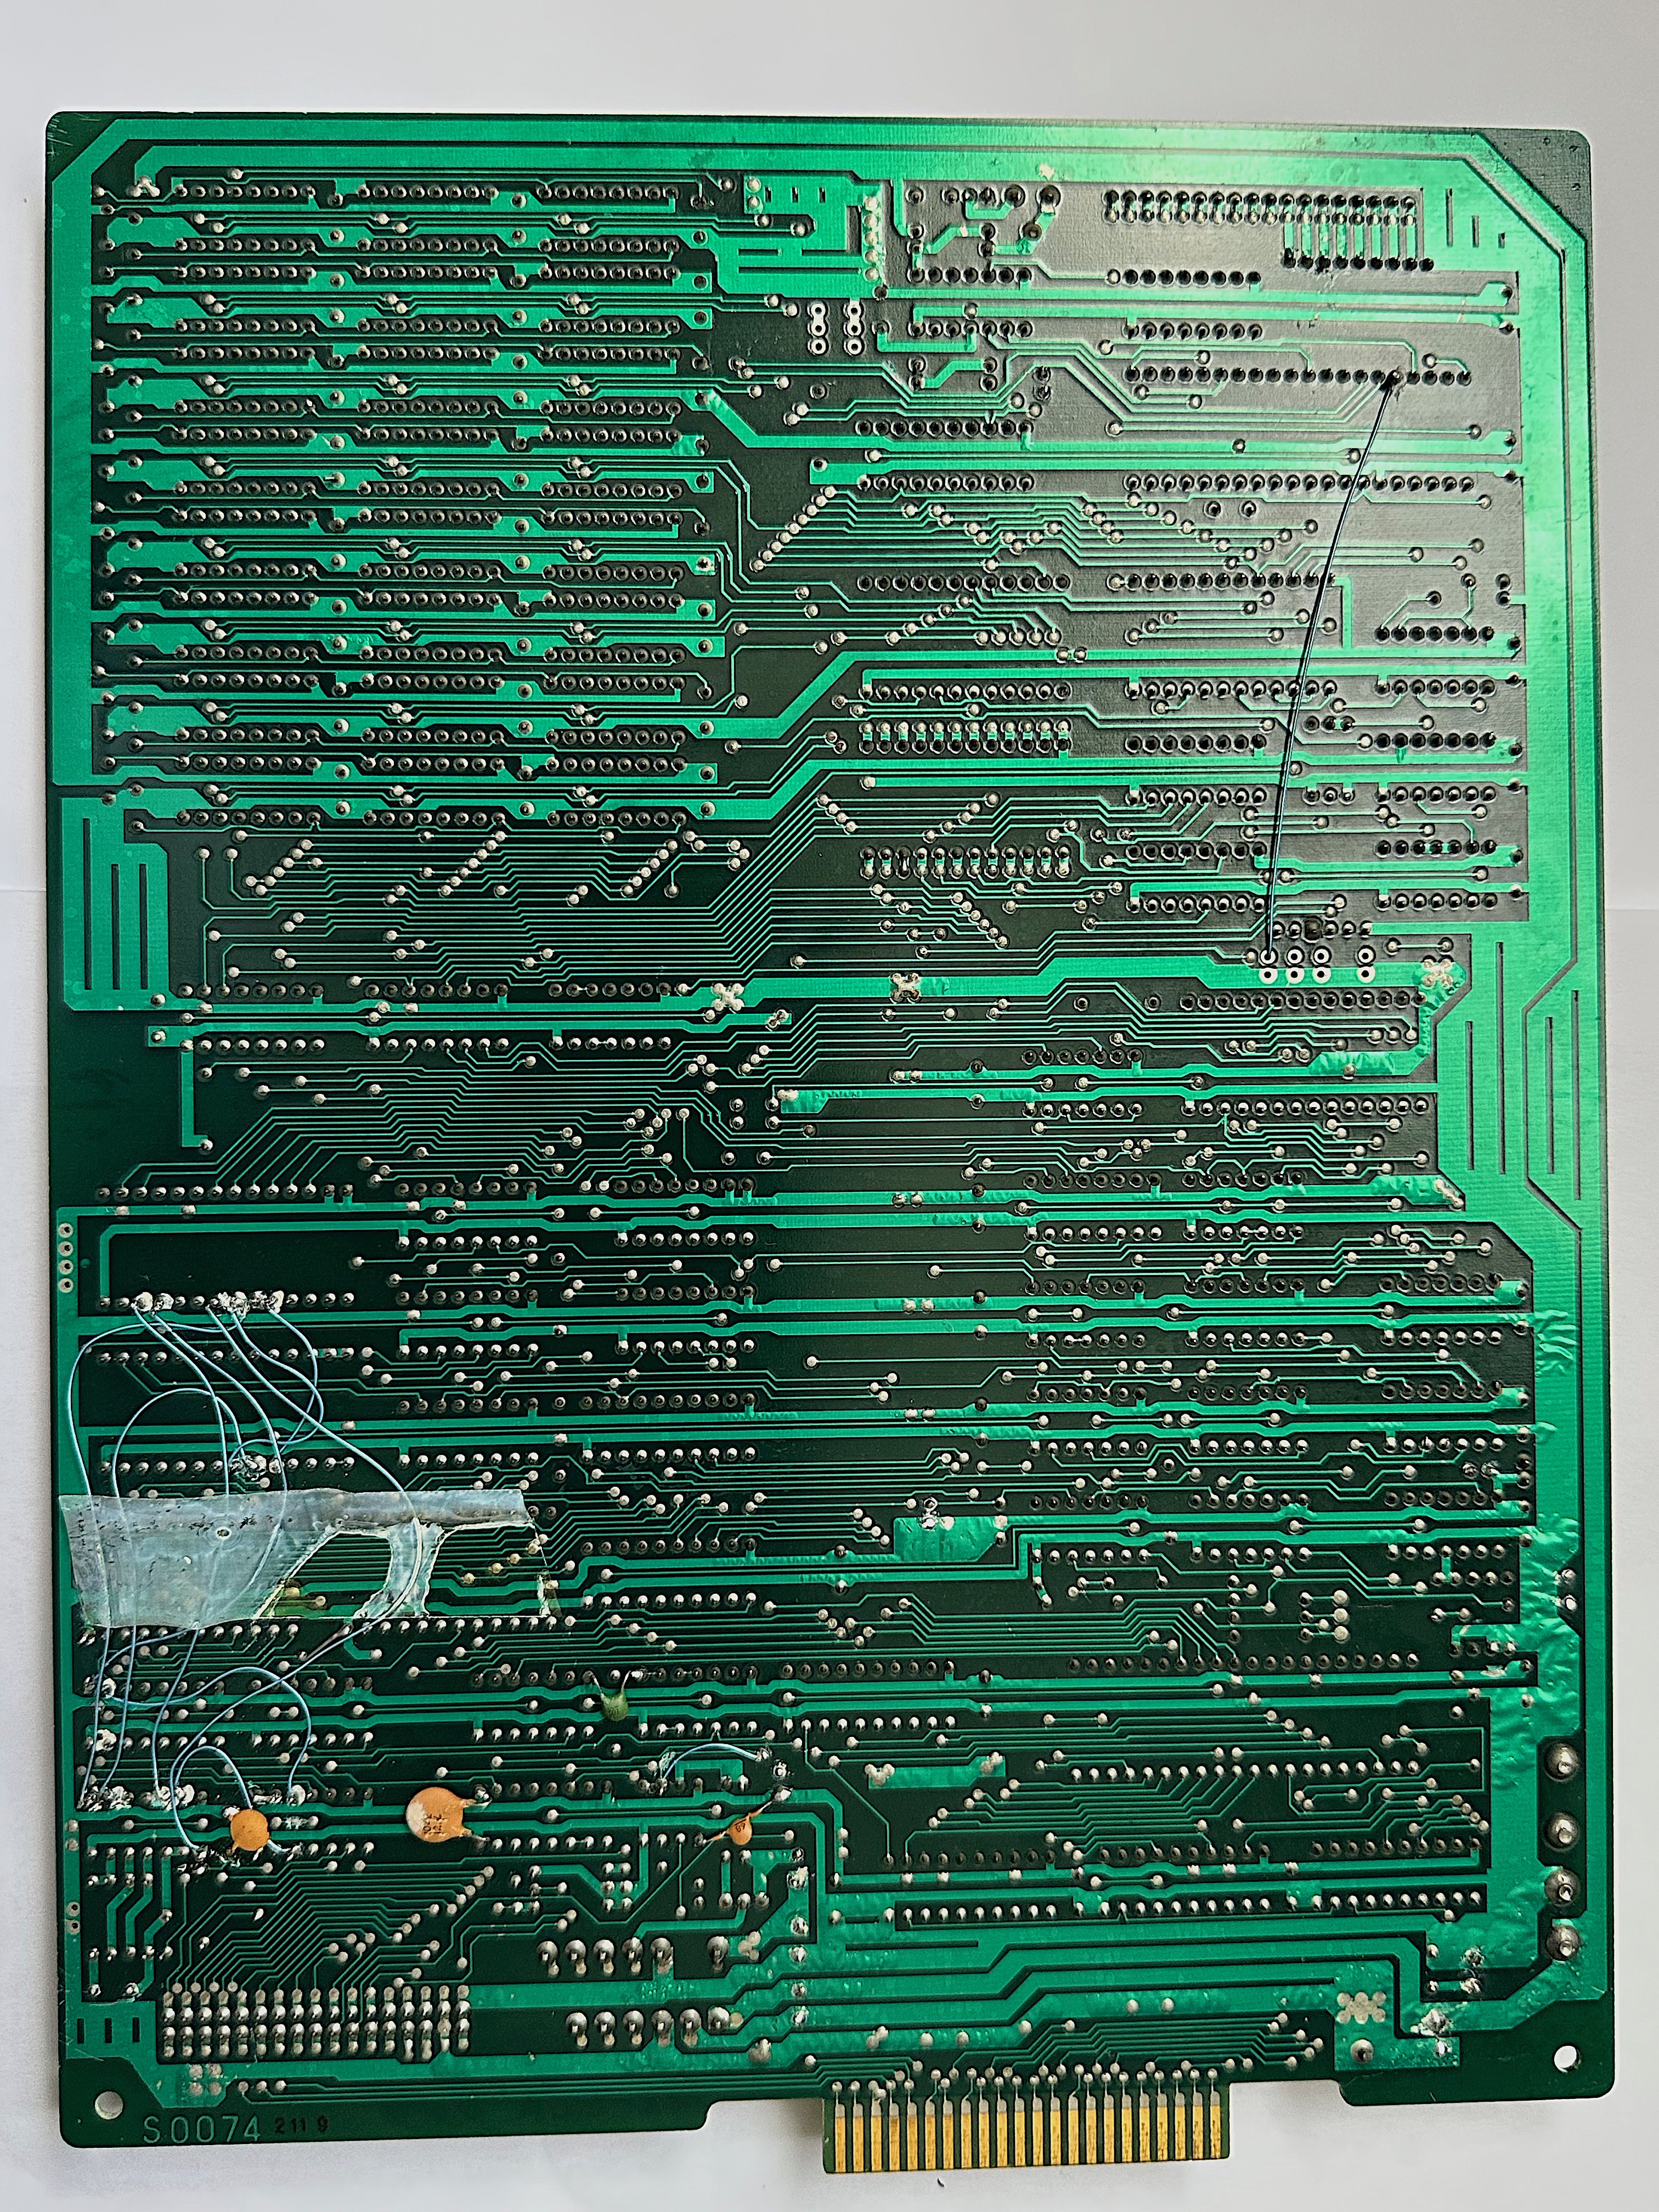
^ - Underside of the mainboard. Note the wire connecting to IC30 (8255) PC2 and the plethora of wires which reroute the 14048/14299 gate array. Also note the 6pf capacitor.
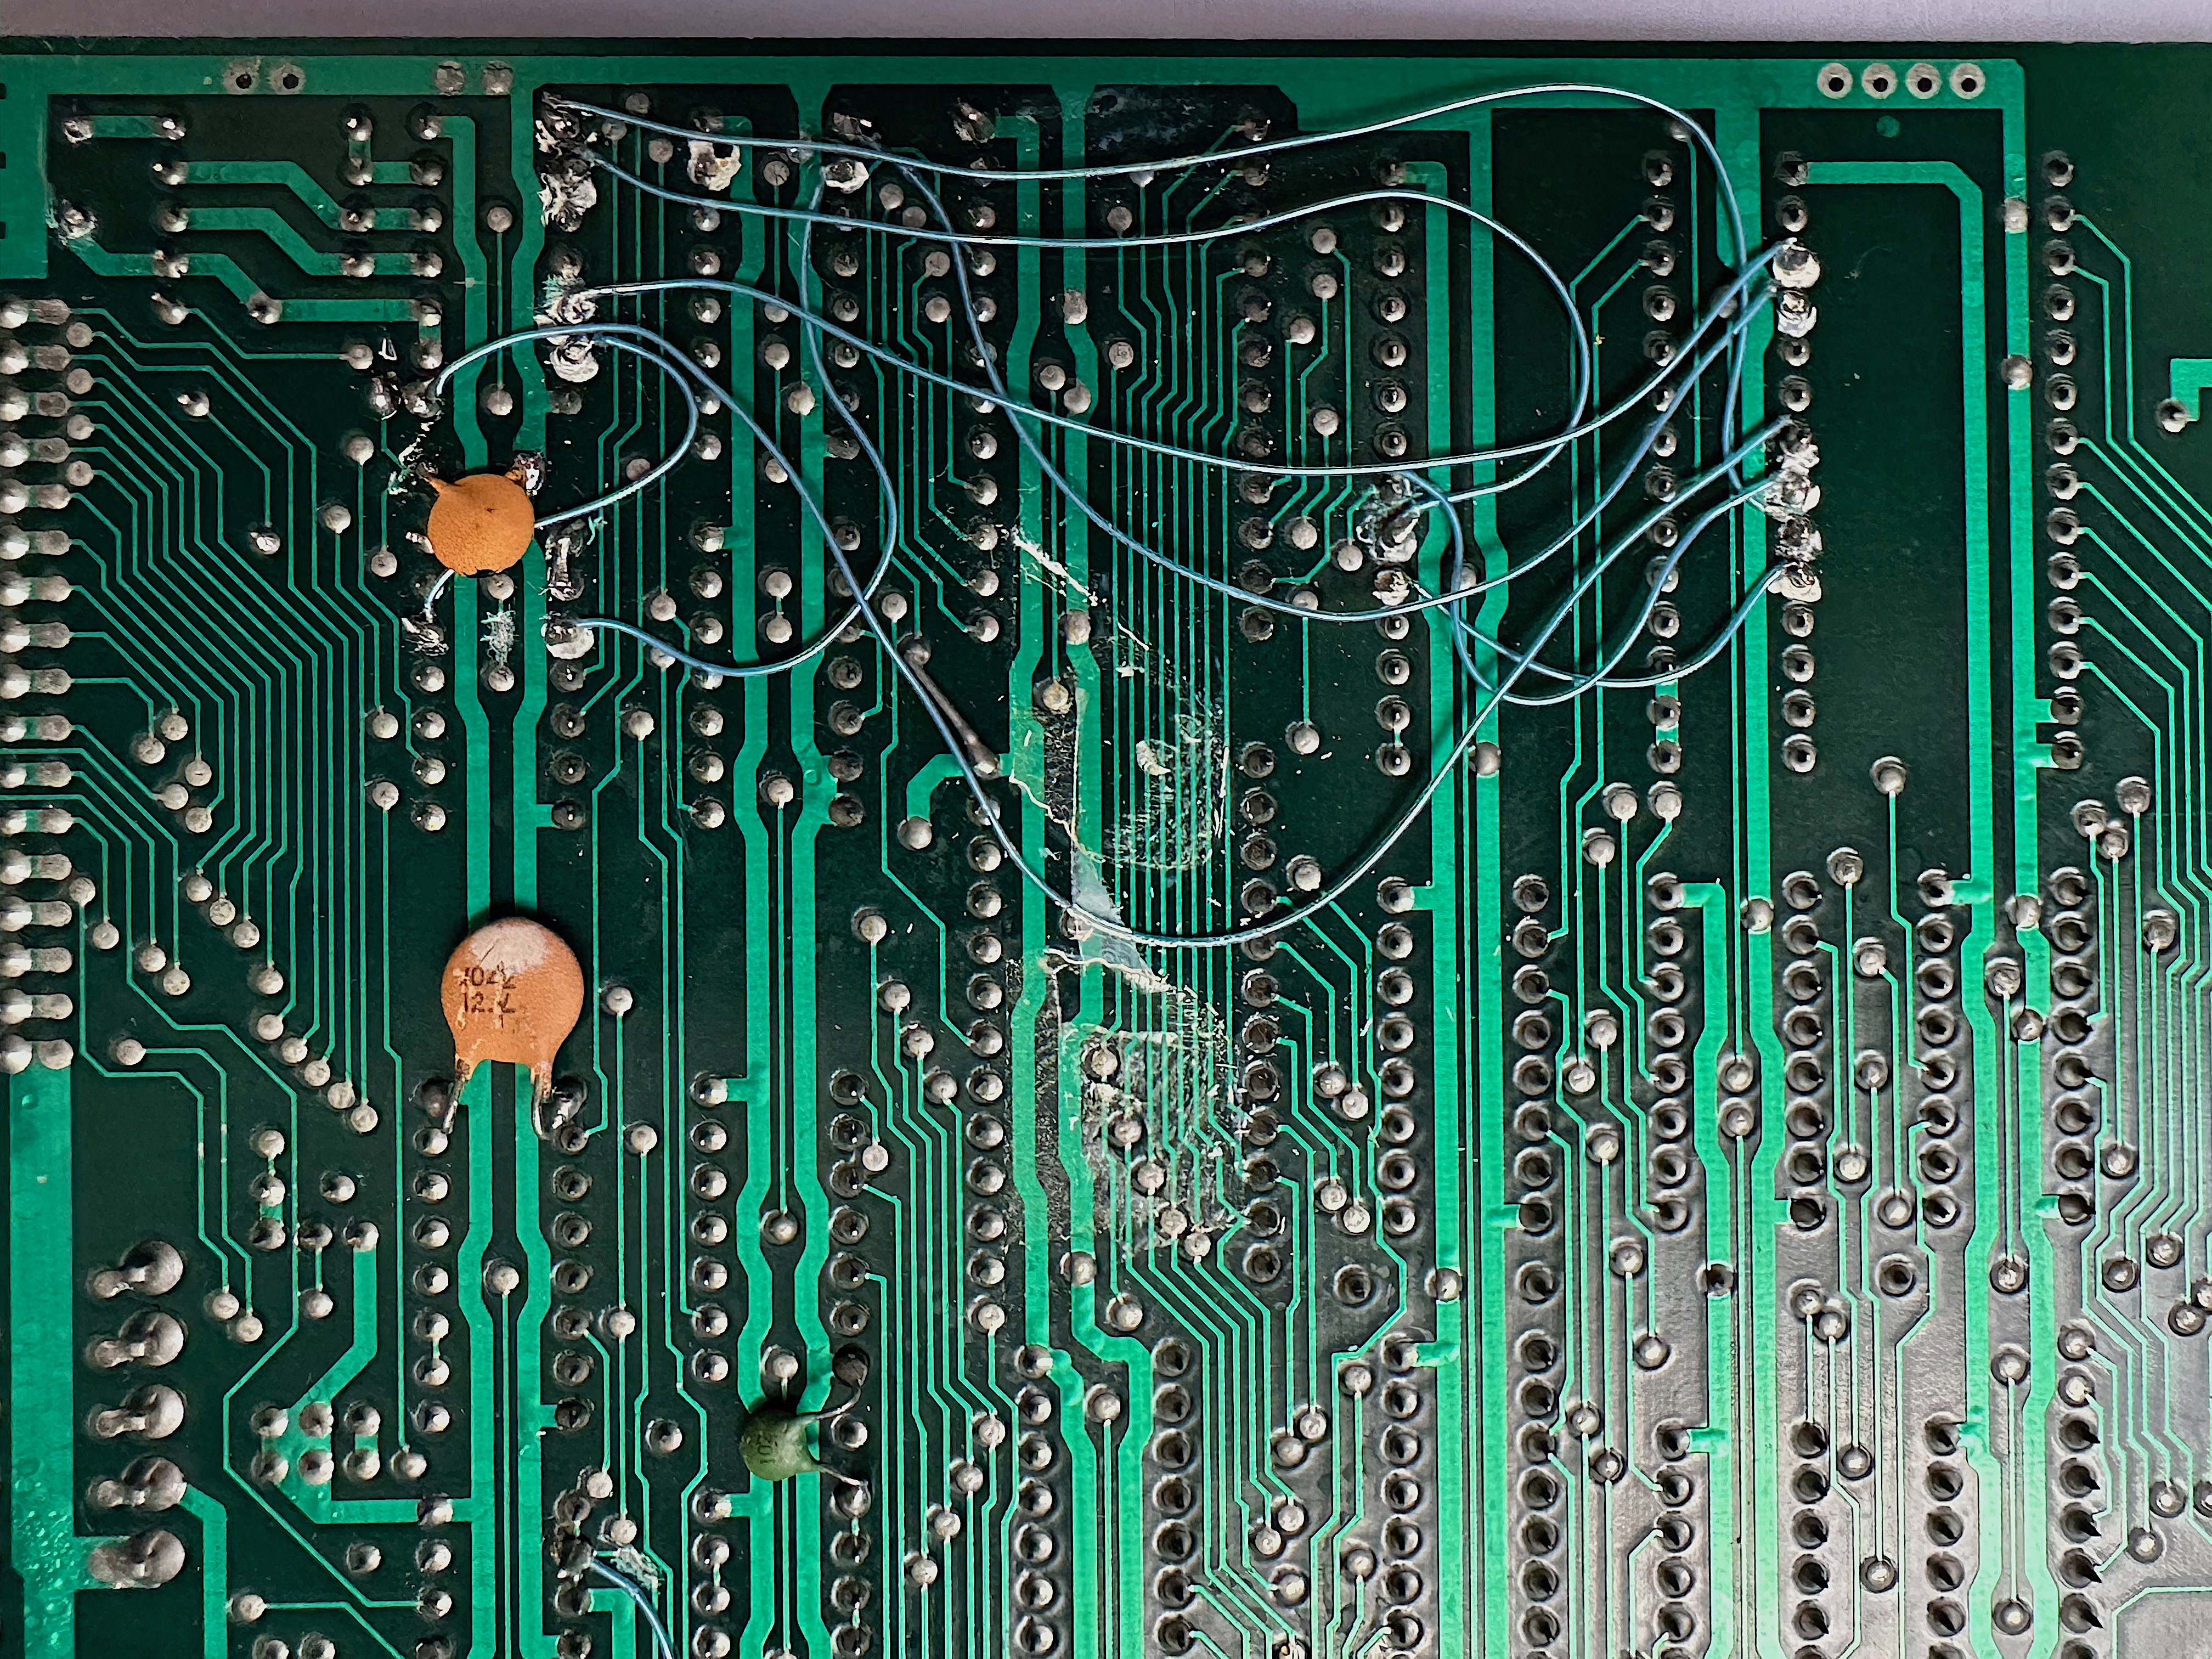
^ - Close up of the underside wiring.
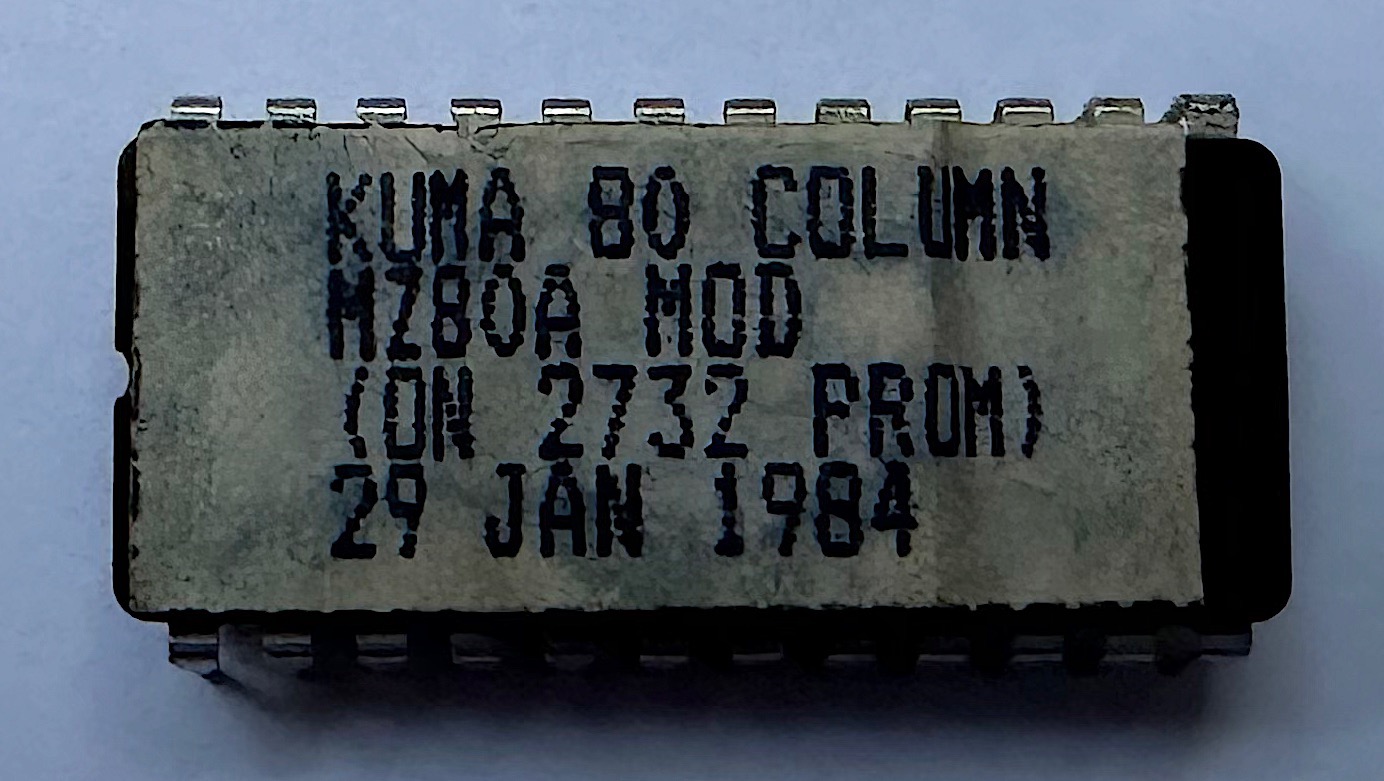
^ - The replacement 2732 EPROM with the original SA-1510 monitor modified by Kuma to handle 40/80 columns.
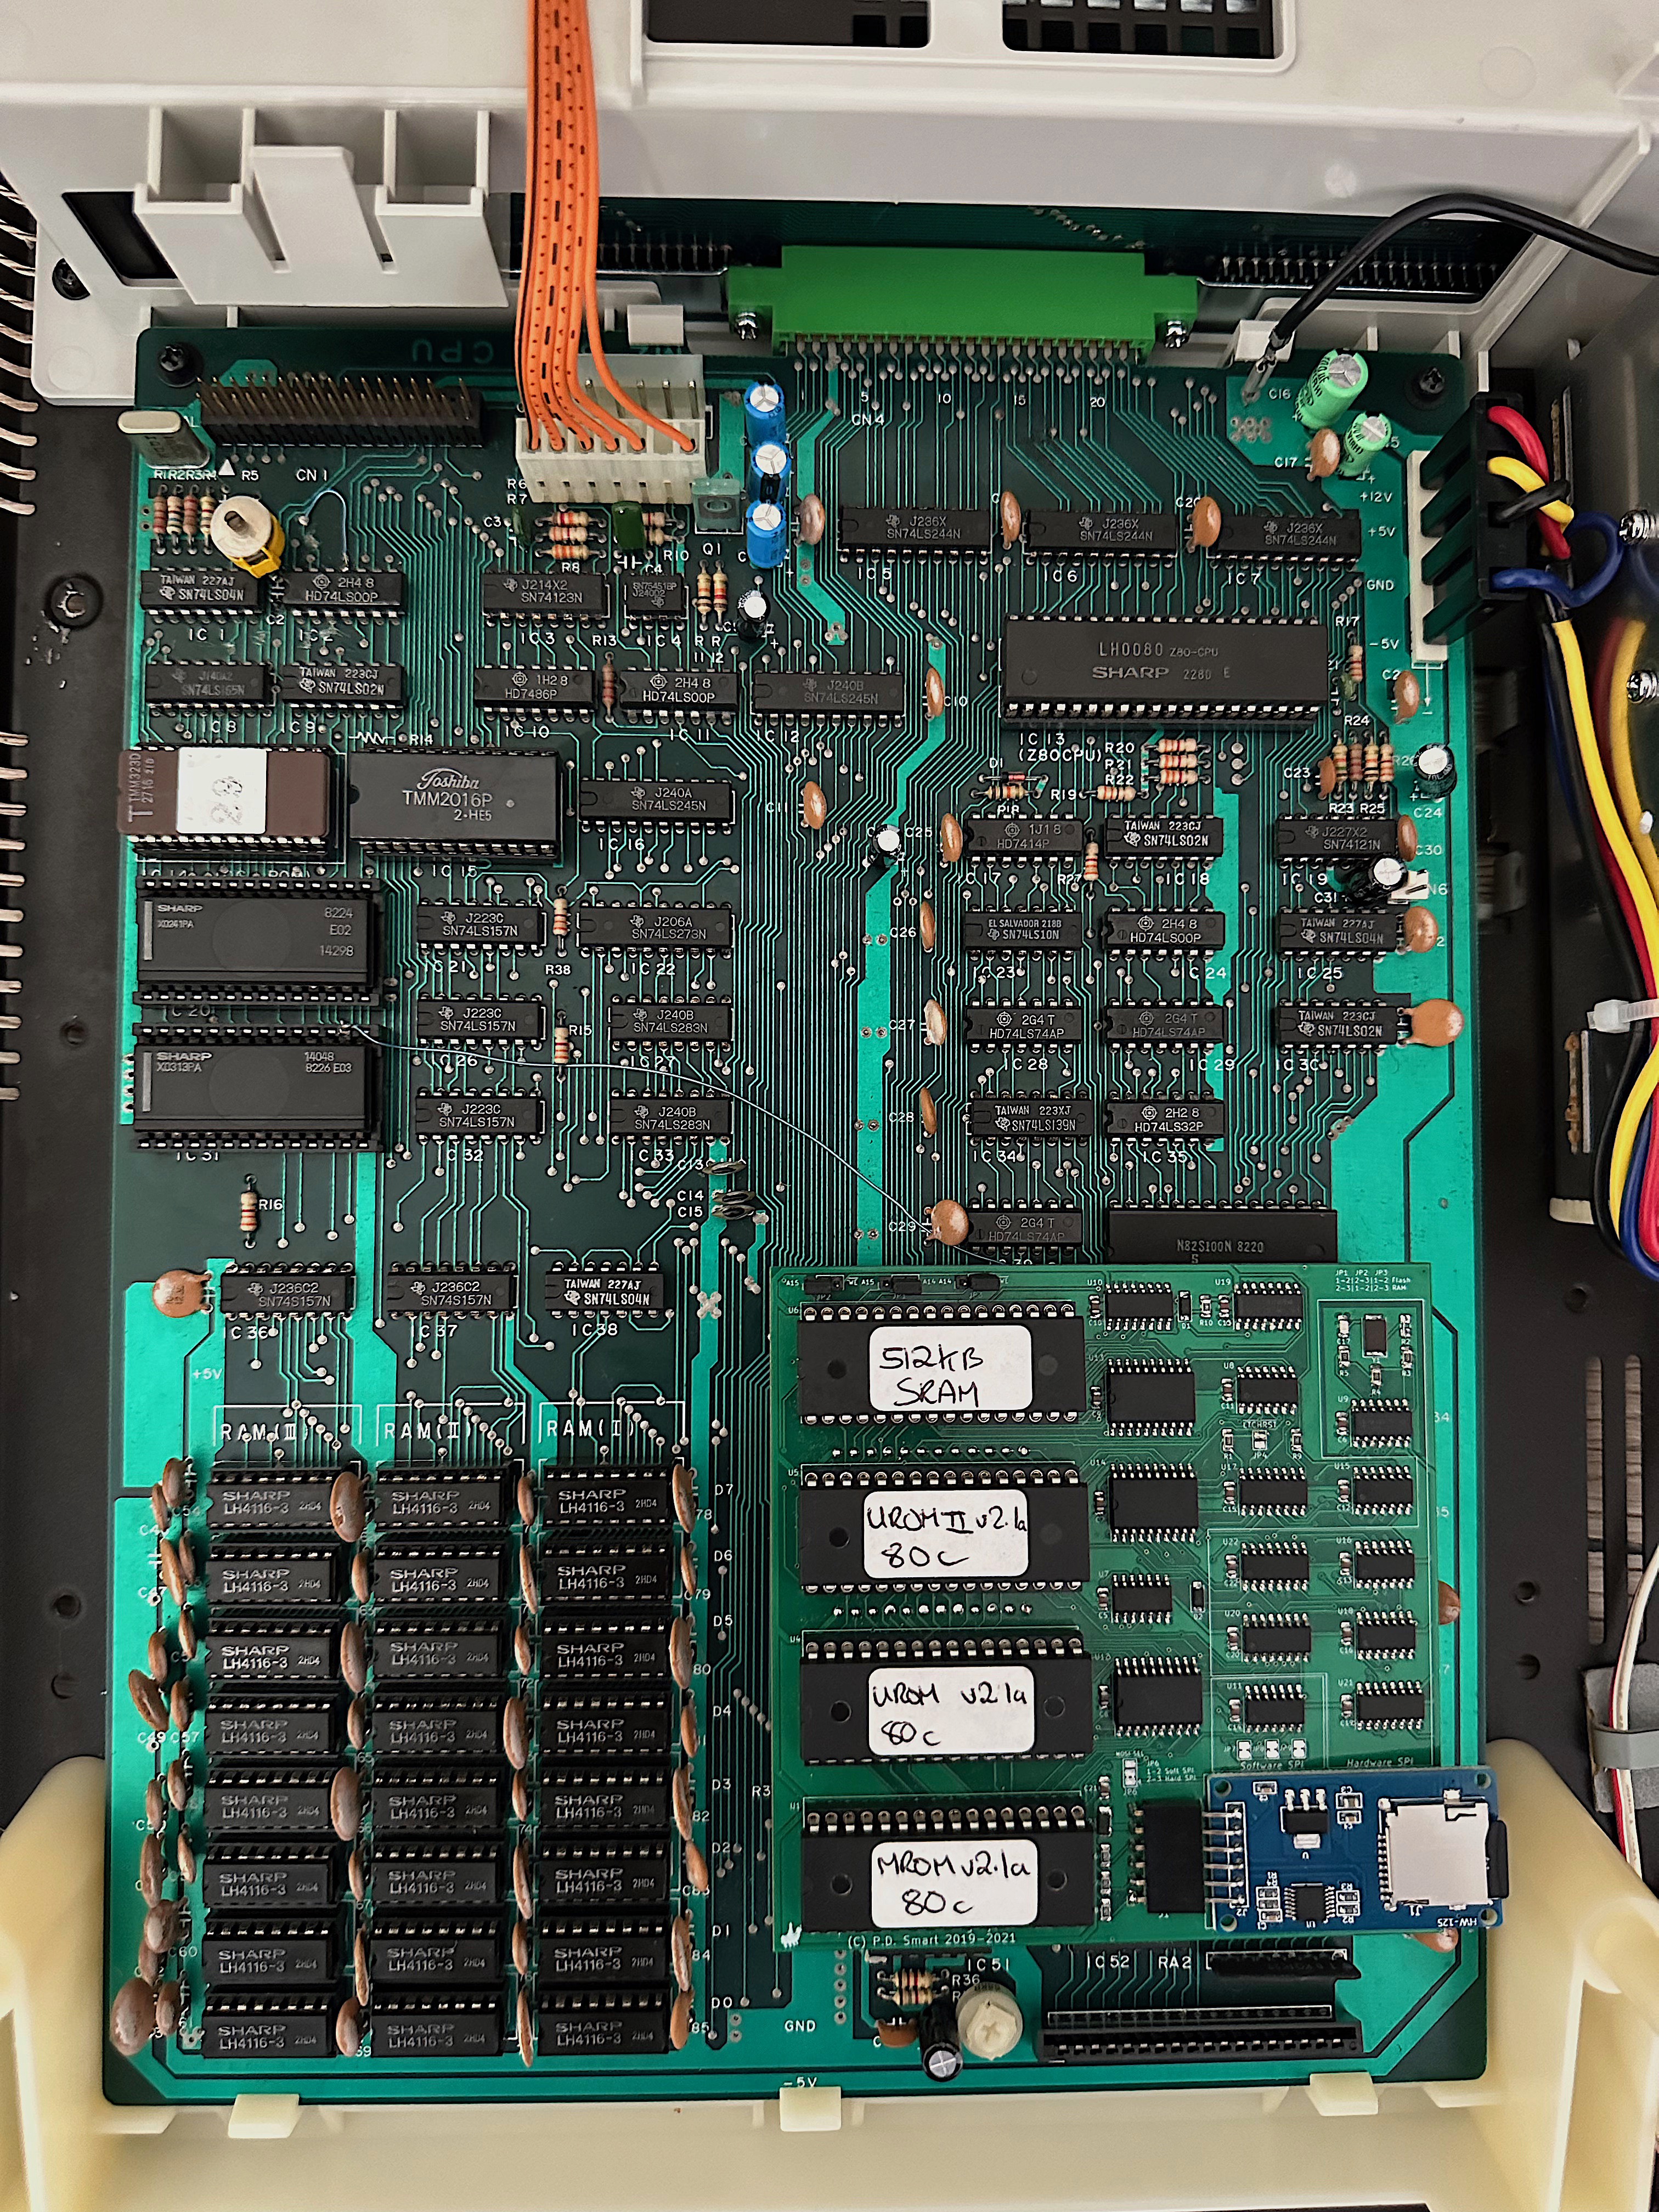
^ - Kuma 40/80 modification can be used with my Rom Disk card. I will look at placing MicroTech CP/M into the spare Flash ROM so those without disk interfaces can fully use it.
Firmware
As part of my Rom Filing System developments, I reverse engineered the Kuma Monitor changes and built them into the SA-1510 assembler source.
Files
| File | Description |
|---|---|
| SA-1510.asm | SA-1510 Monitor assembler source code. The source is constructed using conditional compilation to generate firmware binary targetted to a specific requirement, ie. Kuma 80. |
| monitor_kuma_sa1510.asm | Conditional assembly file, which includes SA-1510.asm, configured to generate a Kuma 80 ROM image. |
| Kuma80.bin | Original Kuma80 Binary Image, flash into a 2732 and install in the MROM socket on the MZ-80A mainboard. |
| Glass-0.5.1.jar | Java Archive containing the Glass Z80 assembler. |
Building Firmware
To build the Kuma 80 Monitor (should you make changes), ensure Java is installed on your machine, download the above files and issue the command:
java -jar ../tools/glass-0.5.1.jar monitor_kuma_sa1510.asm KUMA80.BIN monitor_kuma_sa1510.sym